Do you have a question about the Makita UM600DZX and is the answer not in the manual?
This document provides the instruction manual for the Makita UM600D Cordless Grass Shear and UH201D Cordless Hedge Trimmer. It covers safety warnings, technical specifications, operational procedures, and maintenance guidelines for both models.
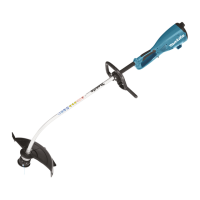
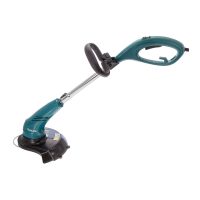
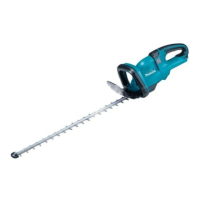
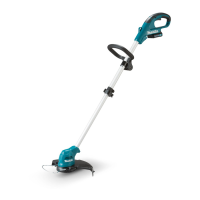
The Makita UM600D is primarily a cordless grass shear, designed for cutting lawn edges or sprouts. It can also be converted into a cordless hedge trimmer by installing optional shear blades for hedge trimming. The Makita UH201D is primarily a cordless hedge trimmer, intended for trimming hedges. It can also be converted into a cordless grass shear by installing optional shear blades for grass shear. Both tools are battery-operated, offering cordless convenience.
The tools feature a tool/battery protection system that automatically cuts off power to the motor to extend tool and battery life. This system activates under overload conditions (when the tool draws abnormally high current) and overheat conditions (when the tool or battery overheats). In case of overload, the tool stops, and the user needs to turn it off and restart after addressing the cause. In case of overheat, the tool stops and the lamp blinks, requiring the tool and battery to cool down before restarting. Additionally, there is an overdischarge protection that stops the tool when battery capacity is low.
The tools are equipped with a lock-off button to prevent unintended starting. The lock-off button can be pressed from either the right or left side. An indicator lamp on the battery cartridge allows users to check the remaining battery capacity. The indicator lamps light up for a few seconds when the check button is pressed. The tool also has an indicator lamp that blinks or lights up red when the remaining battery capacity is low or empty, or when the tool is overloaded.
For the grass shear function, a grass receiver can be installed to gather discarded leaves and make clean-up easier. The shearing height can be adjusted to three levels (15 mm, 20 mm, and 25 mm) by changing the fixed position of the grass receiver. Without the grass receiver, the shearing height is approximately 10 mm.
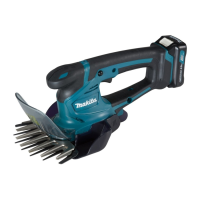
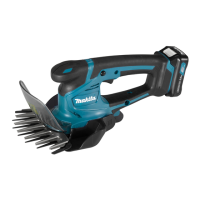
UM600D with shear blade for grass shear installed:
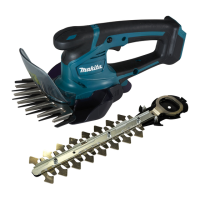
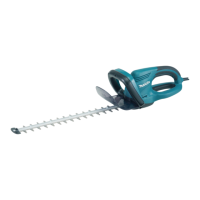
UH201D with shear blade for hedge trimmer installed:
Battery Installation/Removal: To install the battery cartridge, align the tongue on the cartridge with the groove in the housing and slide it in until it locks with a click. Ensure the red indicator on the button is not visible, indicating it's fully locked. To remove, slide the button on the front of the cartridge and pull the battery out.
Starting the Tool: To start, depress the lock-off button and pull the switch trigger. Release the switch trigger to stop.
Shearing (Grass Shear): After adjusting the shearing height, hold the tool so its bottom rests on the ground and gently move it forward. When trimming around curbs, fences, or trees, move the tool along them, being careful to avoid contact with the blades. For sprouts or small tree foliage, trim little by little. Avoid using the tool in ways that cause the motor to stop or rotate extremely slowly. Do not attempt to cut thick branches or allow blades to contact the ground. Do not trim wet grass or foliage of small trees. For long lawns, cut in steps, allowing a day or two between cuts for an even result.
Trimming (Hedge Trimmer): Hold the tool with one hand, pull the switch trigger while pressing the lock-off button, and move it forward. For basic operation, tilt the blades toward the trimming direction and move calmly and slowly at a speed rate of 3 to 4 seconds per meter. To cut a hedge top evenly, tie a string at the desired height and trim along it. Avoid overreaching, especially from a ladder, and do not work on wobbly surfaces. Do not attempt to cut branches thicker than 10 mm in diameter; use branch cutters for these. Do not cut down dead trees or similar hard objects. Do not trim grass or weeds with the shear blades, as they may become tangled. For round shapes, trim from the root to the top. To cut a hedge side evenly, cut from bottom to top.
Chip Receiver (Optional Accessory): The chip receiver gathers discarded leaves and makes clean-up easier. It can be installed on either side of the tool by pressing it against the shear blades until the hooks fit into the holes. To remove, press the levers on both sides to release the hooks.
Cleaning the Tool: Clean the tool by wiping off dust with a dry cloth or one dipped in soapy water and wrung out. Do not use gasoline, benzine, thinner, alcohol, or similar substances, as they may cause discoloration, deformation, or cracks.
Blade Maintenance: Before operation or once per hour during operation, apply low-viscosity oil (machine oil or spray-type lubricating oil) to the blades. After operation, remove dust from both sides of the blades with a wired brush, wipe with a cloth, and then apply low-viscosity oil. Do not wash blades in water, as this may cause rust or damage. Dirt and corrosion increase blade friction and shorten operating time.
Shear Blade Replacement (Grass Shear):
Shear Blade Replacement (Hedge Trimmer):
Storage: Hang the tool from a nail or screw using the hook hole in the bottom. Attach the blade cover to the shear blades to prevent exposure. Store the tool out of reach of children, in a dry room, away from moisture or rain.
Battery Life Maintenance: Charge the battery cartridge before it is completely discharged. Stop operation and charge when tool power decreases. Do not overcharge. Charge at room temperature (10 °C - 40 °C / 50 °F - 104 °F). Allow a hot battery cartridge to cool before charging.