10 ENGLISH
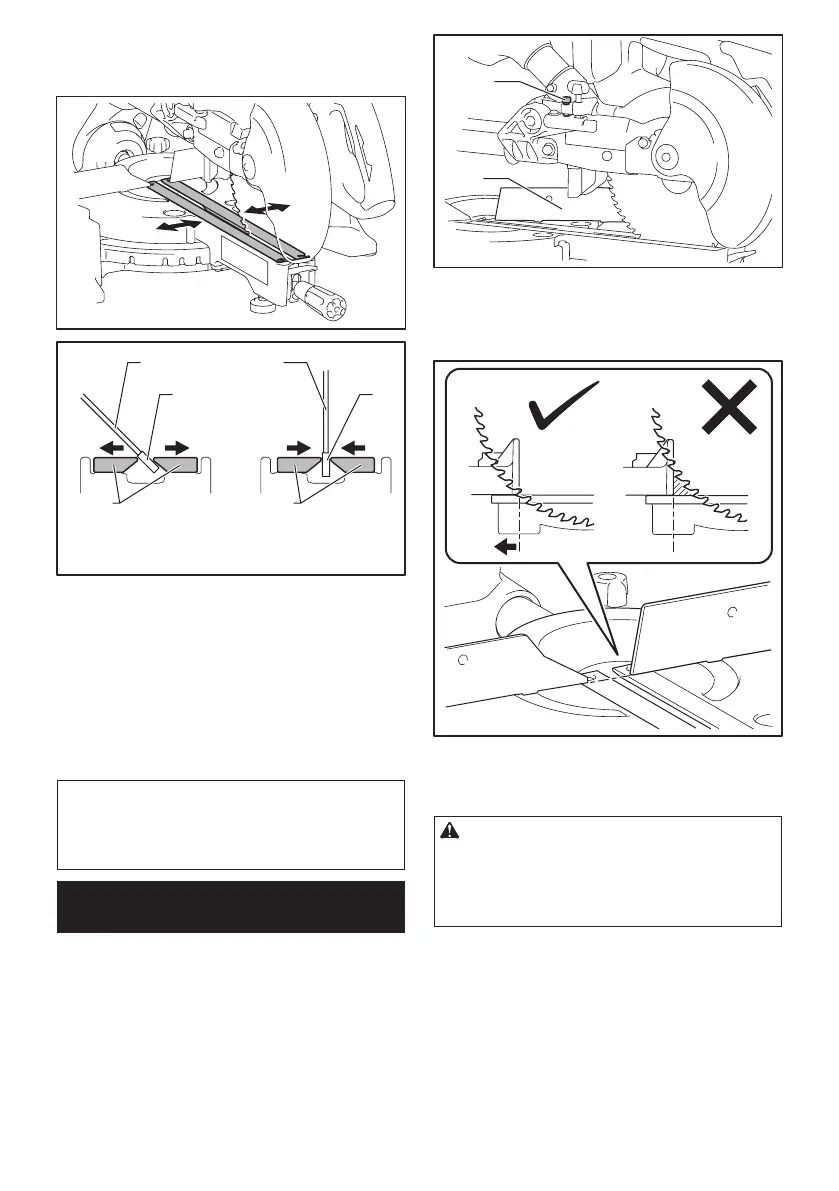
5. Pull the carriage toward you fully.
6. Adjustthekerfboardssothatthekerfboardsjust
contact the sides of the blade teeth.
1 1
3
3
2 2
1. Saw blade 2. Blade teeth 3. Kerf board
4. Left bevel cut 5. Straight cut
7. Tightenthefrontscrews(donottightenrmly).
8. Push the carriage toward the guide fence fully and
adjustthekerfboardssothatthekerfboardsjustcon-
tact the sides of blade teeth.
9. Tightentherearscrews(donottightenrmly).
10. Afteradjustingthekerfboards,releasethestop-
per pin and raise the handle. Then tighten all the screws
securely.
NOTICE: After setting the bevel angle ensure
that the kerf boards are adjusted properly. Correct
adjustmentofthekerfboardshelpstoprovideproper
support of the workpiece and minimizing workpiece
tear out.
Maintaining maximum cutting
capacity
Thistoolisfactoryadjustedtoprovidethemaximum
cutting capacity for a 190 mm (7-1/2") saw blade.
When installing a new blade, always check the lower
limitpositionoftheblade,andifnecessary,adjustitas
follows:
1. Remove the battery cartridge. Then, push the car-
riage toward the guide fence fully and lower the handle
completely.
1
2
1.Adjustingbolt 2.Guidefence
2. Usethehexwrenchtoturntheadjustingboltuntil
the saw blade comes slightly below the cross section of
the guide fence and the top surface of the turn base.
3. Rotate the blade by hand while holding the handle
all the way down to be sure that the blade does not
contactanypartofthelowerbase.Re-adjustslightly,if
necessary.
WARNING: After installing a new blade and
with the battery cartridge removed, always be
sure that the blade does not contact any part of
the lower base when the handle is lowered com-
pletely. If a blade makes contact with the base it may
causekickbackandresultinseriouspersonalinjury.
 Loading...