R
8
10
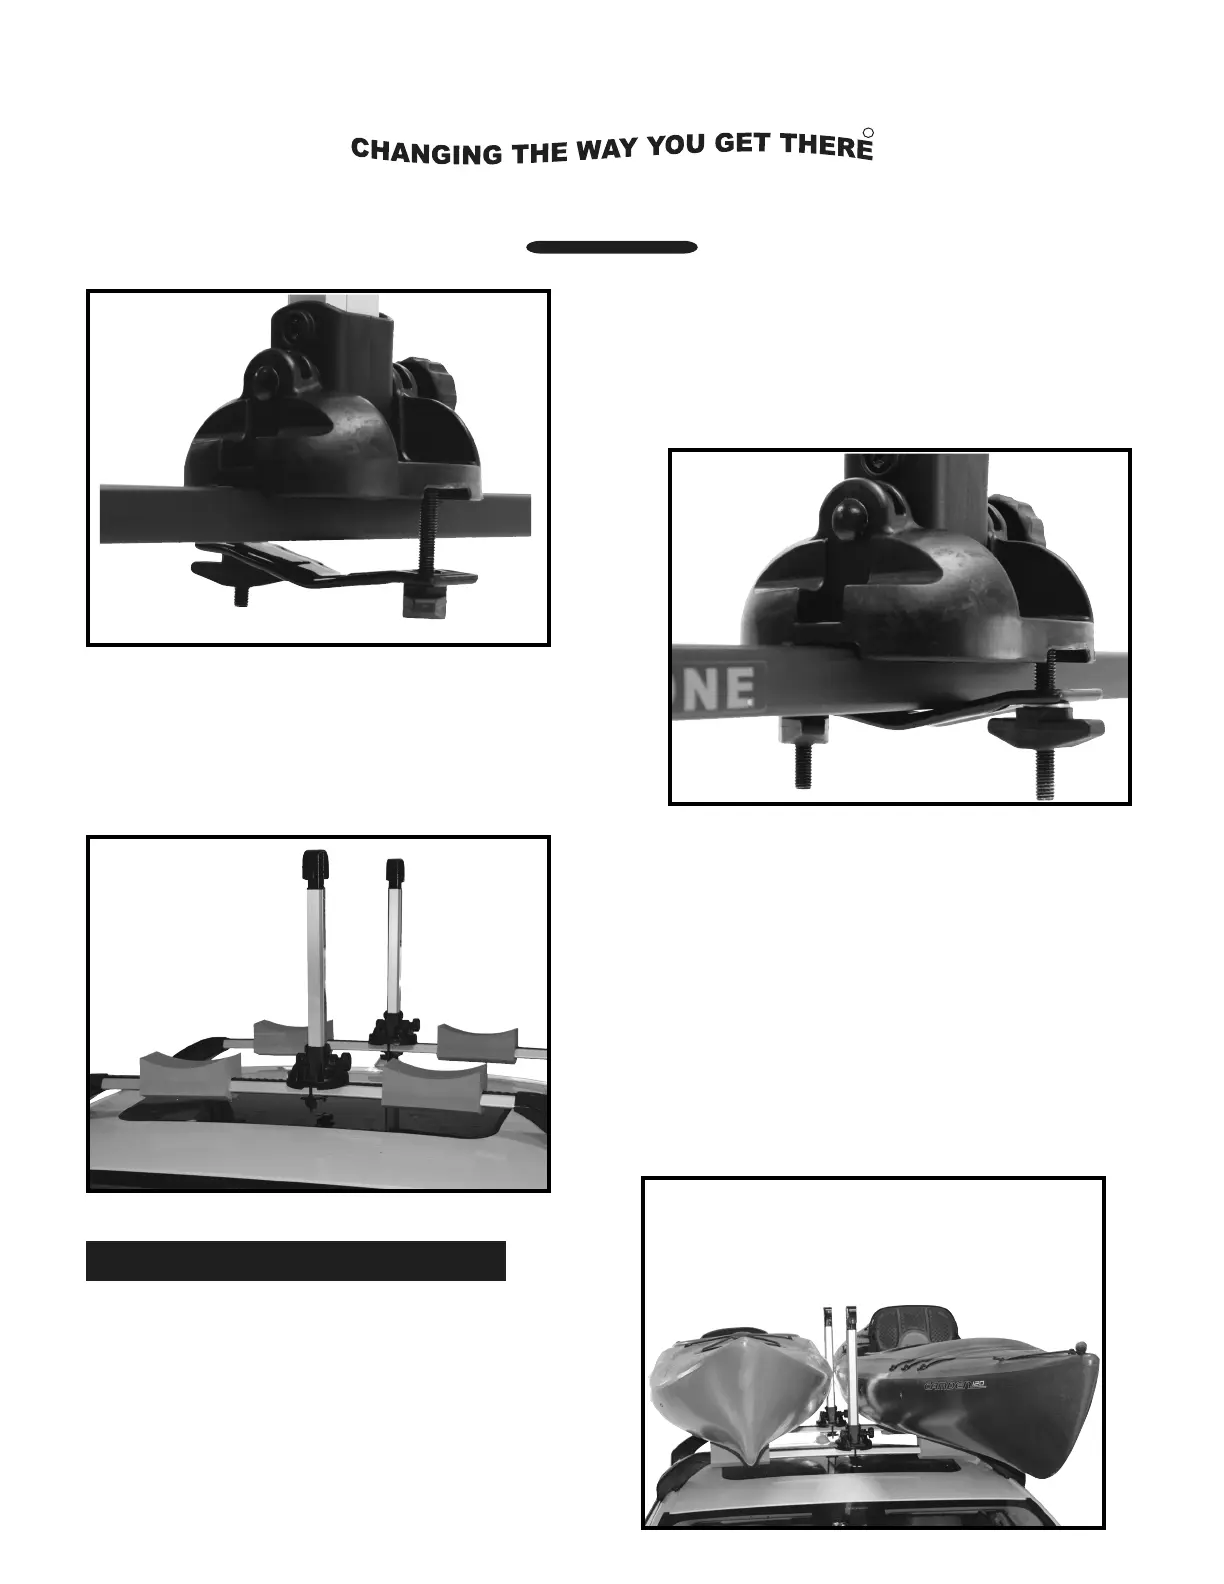
. Apply a t-knob to the bolt and slightly
tighten until the carrier is secure on
the cross bar. Repeat for the second
carrier and rear cross bar. See image 9.
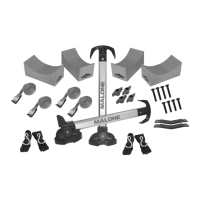
. Insert a mounting bolt into the rear side
hex hole and down through the Jawz
mounting adapter. See image 8.
Step 3: Loading the Kayaks
. Route the free end of a 12’ load strap
through one strap slot in the top of the
carrier. Pull the free end back until
there is an even loop. Repeat for the
second carrier. See image 11.
11
9
Installation & Loading Instructions - MPG115MD Stax Pro2
TM
. Raise the carriers to the up-position and
confirm alignment. Tighten the t-knobs
until both carriers are securely fixed to the
cross bars. Place foam blocks onto the cross
bars and next to the carriers. See image 10.
Note: When transporting one kayak; the
carriers should be positioned so that the
distance from the carriers to the cross bar
towers is exactly the width of the kayak.
8
9
Place the kayak(s) bottom down on the
crossbars and foam pads. See image 11.
10
11
 Loading...