R
D ownLoaderD ownLoader
TM
J-STYLE FOLDING KAYAK CARRIER
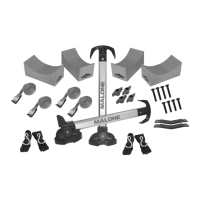
12’ Safety LinesJawz Universal Adapters Mounting BoltsKayak Carriers Load Straps T-Knobs
60mm
70mm
Installation & Loading Instructions - Please Read Before Beginning
Veuillez lire les instructions avant d’entreprendre l’installation et le chargement
1
3
2
. Insert Mounting Bolt through one hole of a Jawz adapter.
Insert washer and loosely apply a T-knob. See image 2.
. Faites passer le boulon de fixation dans l’un des trous
d’un adaptateur Jawz puis vissez légèrement un bouton
en ‘‘T’’ à la base du boulon. (Figure 2)
. Prior to installation, insert a bolt into the mounting holes in
the bottom of the carriers. Push upward to open the two
mounting hole covers located in the Base pads.
. Insert a Mounting Bolt into one mounting hole from the top
side. Rotate and close the mounting hole cover.
See image 1.
. Insérez un boulon de fixation dans l’un des trous hexagonaux
situés sur le côté supérieur du support.
(Figure 1)
. Place the carrier onto the front cross bar with the boarding
ramp facing out. Swing the Jawz under the cross bar as
shown. See image 3.
. Placez le support sur la barre transversale avant, la rampe
de chargement vers l’extérieur. Faites passer l’adaptateur
Jawz sous la barre transversale, tel qu’indiqué. (Figure 3)
1
Mounting Bolt Washers
Base Pad
Covers
IMPORTANT WARNING: All vehicular transports are potentially hazardous. Any person(s) using Malone products are personally responsible for
following the given directions for use and/or installation and accepts full responsibility for any and all damages or injury of any kind including death,
which may result from their use and/or installation.
It is critical that all Malone racks and accessories be properly and securely attached to your vehicle. Improper attachment could result in a serious
accident, and could cause serious bodily injury or death to you or to others. You are responsible for securing the racks and accessories to your car,
checking the attachment’s prior to use, and periodically inspecting the products for adjustment, wear, and damage.
You must read and understand all of the instructions and cautions supplied with your Malone products(s) prior to installation or use. If you do not
understand all of the instructions and cautions, or, if you have no mechanical experience and are not thoroughly familiar with the installation
procedures, you should have the product installed by a professional installer.
MISE EN GARDE IMPORTANTE: Tout transport d’un chargement sur le toit d’un véhicule est potentiellement dangereux. Une personne qui
utilise les produits Malone doit suivre sans faute les instructions d’installation et d’utilisation fournies et assume l’entière responsabilité pour tout
dommage ou toute blessure, y compris un décès, pouvant résulter d’une telle installation ou utilisation.
Il est essentiel de xer correctement et solidement les supports et les accessoires à votre véhicule. Une mauvaise installation ou attache pourrait
provoquer un accident, entraîner des blessures corporelles graves à vous et aux autres et même causer la mort. Vous avez la responsabilité de
xer solidement les supports et les accessoires à votre véhicule, de vérier l’installation avant l’utilisation et d’inspecter périodiquement le produit
pour déceler tout signe d’usure ou de dommage ou tout problème d’ajustement.
Vous devez lire et comprendre les instructions et les mises en garde fournies avec les produits Malone avant l’installation et l’utilisation. Si vous
ne comprenez pas les instructions et les mises en garde ou si vous ne possédez pas d’expérience en mécanique et ne connaissez pas à fond les
procédures à suivre d’installation, vous devriez faire monter et poser le produit par un installateur professionnel.
Installation & Loading Instructions - Please Read Before Beginning
12’ Tie-Downs
Jawz Adapters Mounting Bolts
40mm
50mm
Stax Pro2 Kayak Carrier
Red Load Straps
Cogs
1
2
3
. Insert a 100mm bolt into the square
hole located in the top of the base.
See image 2.
Step 1: Assembling the Stax Pro2
. Insert the bottom of the post into the
top of the base. Position so the cogs
on the post are in contact with the
cogs on the base. See image 1.
. With the holes in the base and post aligned,
push the bolt through the two assemblies
until the end of the bolt is exposed.
Note: Confirm that the head of the bolt is
fully seated into the base. See image 3.
TM
Foam Blocks
9’ Safety Strap
TWO KAYAK VERTICAL FOLD-DOWN CARRIER
O
XTA
R
2
TM
TM
MPG115