Do you have a question about the Malouf STRUCTURES E255 and is the answer not in the manual?
Before setting up, carefully remove packaging and read all instructions. Ensure all parts are present and undamaged.
Use a grounded 120V circuit, surge protector, and plug directly into the wall outlet. Unplug before servicing.
Dispose of packaging immediately. Keep children and pets away from the base and ensure adult supervision.
Consult a physician regarding potential pacemaker interference from the base's motion detection.
This product is for in-home use only and not tested to hospital standards. Do not use with oxygen or flammable gases.
Supports up to 750 lbs with weight distributed evenly. Do not sit on raised sections or enter/exit while raised.
Motors rated for 2 continuous minutes of use within an 18-minute period. Input: AC 100-240V, 50/60Hz, 1.5 Amp. Output: DC 29V-2A.
Device operates on 2.4 GHz, complies with Part 15 of FCC Rules, subject to interference conditions. No antenna modifications allowed.
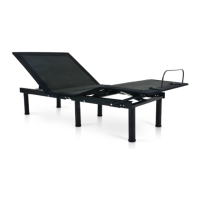
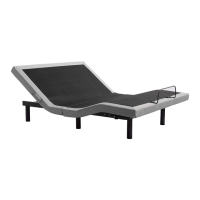
Familiarize yourself with the parts and component locations before assembly. Contact support if parts are missing.
Requires two people. Open box flat on the floor, bottom side up, to avoid damage. Remove all packaging and zip ties.
Hand tighten all six legs into the bed frame. Ensure end caps are attached and legs are consistently placed.
Connect the power cord jack securely to the receptacle on the bed motor.
With assistance, lift the metal frame and turn the base over. Move to the desired location, avoiding fabric or legs as pivot points.
Insert one end of the retainer bar into its slot until fully seated, then flex to insert the other end.
Plug into wall outlet and test functions. Familiarize yourself with remote functions prior to testing.
Operate all bed functions using the remote. Includes pre-programmed and manual adjustment buttons.
Remove the battery cover from the back of the remote and insert two AAA batteries.
Adjust and save Zero Gravity and Anti Snore positions by adjusting the bed and holding specific buttons.
The remote is pre-paired. If unpaired, follow these steps: check batteries, unplug/replug base, hold Head Up/Foot Up buttons.
Ensure the remote batteries are functioning correctly. Replace if necessary.
Unplug the power cord from the wall outlet, wait a few seconds, and then plug it back in.
Within 10 seconds of plugging in, press and hold Head Up and Foot Up buttons until the control box LED flashes.
Ensure bases are powered, paired to their remotes, then pair Remote A to Base B for simultaneous operation.
On Remote B, press Head Down/Foot Down. Then on Remote A, press Head Up/Foot Up to sync both remotes to both bases.
To ensure proper setup, use the remote to test all functions for 3 seconds. Always return to flat position between presets.
Check wired connections for obstructions. Ensure remote is synced and batteries are good.
Verify remote batteries and ensure the remote is synced with the control box.
Check power cord, try a different outlet, or reset electronics by unplugging for 1 hour.
Covers defects in materials and workmanship under specified conditions and exceptions.
Coverage lasts up to 10 years from the date of purchase, with tiered coverage.
Details Malouf's commitment for replacement parts and labor costs during different warranty periods (Year 1, Years 2-5, Years 6-10).
Email warranty@maloufsleep.com to submit a claim. Keep your receipt for warranty processing.
This warranty grants specific legal rights that may vary from state to state.
| Brand | Malouf |
|---|---|
| Model | STRUCTURES E255 |
| Category | Indoor Furnishing |
| Language | English |