EasyManua.ls Logo

Marantz PMD661 User Manual

Marantz PMD661
4 pages
To Next Page IconTo Next Page
Page #1 background imageLoading...
Page #1 background image
Instructions for Marantz PMD661 for Una Interviewers 2018 v1.1 17.04.2018
1
USING THE MARANTZ SOLID STATE PMD661 RECORDER
What should your kit comprise?
1. One Marantz PMD661 digital audio recorder.
2. AC lead to plug into the mains, which is what you should normally use for one-
to-one sit-down interviews. You should also always ensure that there are four AA
batteries slotted in as a back-up in the event of a power cut or surge which can lead
to data loss. Check the batteries are okay by switching on the Marantz with the mains
power removed: the battery indicator on the bottom right of the LCD display should
show a half or completely filled battery symbol (see page 12 of manual).
3. One Audio-Technica AT897 Short Shotgun Super-Directional Microphone and an
XLR connector lead. The mike does not need batteries as it uses ‘phantom power’
from the recorder so you must ensure that the ‘phantom power’ switch (markedP48’)
located near to the mike input sockets on the back of the recorder is switched on to
‘MIC ON’ (to the left position). You can use an additional Microphone and XLR
connector lead for the interviewer if you wish. You can use external clip-on
directional microphones lapel mic(s) instead if you wish [on our wish list as of 2017].
4. One nifty portable microphone stand which can sit on a table, [yes, that tiny
thing].
5. One or more 4GB SD (Secure Digital) memory cards, each of which will hold
around 3 hours and 50 minutes of stereo recording data (at 48kHz 24 bit). [you may
need to buy one of these if there is not one spare when you are interviewing].
6. Instruction manual. The manual explains every button and facility on the PMD.
You can access it online at
https://www.solidstatesound.co.uk/pdf/pmd661_manual.pdf or it is saved at our
google docs drive.
Pre-setting the Marantz to record using recommended settings
Refer to the instruction manual for precise instructions
We recommend that the PMD 661 should be preset to record Broadcast Wav Format
.wav files, not .mp3 files (the latter condense the sounds and must be
avoided), at 48kHz/24 bits, using the external stereo microphones. The recording
level should be preset at manual (so you must adjust the recording levels manually -
see below) and there is no auto-tracking so a single wav file will be created until you
press ‘stop’. Each continuous interview session should be recorded (and summarised)
as a single track.
The machine will remember the settings even if it is switched off .When you switch
on the machine you can toggle theDisplay’ button to check the correct settings.

Other manuals for Marantz PMD661

Question and Answer IconNeed help?

Do you have a question about the Marantz PMD661 and is the answer not in the manual?

Marantz PMD661 Specifications

General IconGeneral
Recording FormatMP3, WAV
Storage MediaSD/SDHC card
Microphone InputXLR/TRS combo jack
USBUSB 2.0
MicrophoneBuilt-in stereo microphones
Battery LifeApproximately 4 hours with alkaline batteries
Weight650 g (without batteries)
Sampling Rate44.1 kHz, 48 kHz
Bit Rate32kbps to 320kbps (MP3)
Inputs2 x XLR microphone inputs, 1 x 1/8" (3.5mm) line input
Outputs1 x 3.5 mm headphone
Power4 x AA batteries or AC adapter

Summary

What should your kit comprise?

Powering the Recorder

Connect to mains power and ensure backup batteries are present for uninterrupted operation.

Microphone Connection and Phantom Power

Connect the Super-Directional microphone using XLR, enabling phantom power (P48) on the recorder.

Microphone Stand

Utilize a portable stand for optimal microphone placement on a table.

SD Memory Cards

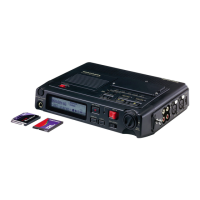
Use 4GB SD cards for stereo recording, ensuring sufficient capacity for interviews.

Instruction Manual Access

Access the full instruction manual online or via Google Docs for detailed information.

Pre-setting the Marantz to record using recommended settings

Recommended Recording Settings

Preset the recorder to Broadcast WAV format (.wav files), 48kHz/24 bits, using external mics and manual recording levels.

Getting started - recording

Inserting SD Memory Card

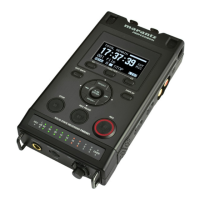
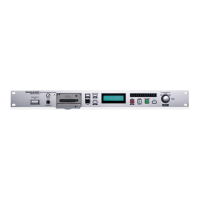
Insert the SD card into the recorder slot before powering on; handle with care.

Connecting AC Power

Connect the AC power lead to the recorder before switching it on.

Powering On

Switch on the recorder; power cycle if a card was inserted after powering up.

Checking Recording Capacity

Verify remaining recording time on the LCD screen; use the Display button if needed.

Connecting Microphone Lead

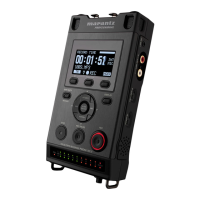
Connect the XLR lead to the recorder and microphone; ensure phantom power is active.

Microphone Placement

Position the shotgun microphone close to the interviewee on a stand or held steady.

Lapel Microphone Usage

Clip lapel mics securely to yourself and interviewee, away from clothing to avoid noise.

Recording Operation and Controls

Disabling Playback Speaker

Turn off the recorder's internal speaker using the HP/SPK VOL dial to prevent feedback.

Setting Recording Levels

Use REC PAUSE to enter record mode and REC LEVEL dials to adjust microphone input levels.

Starting and Pausing Recording

Press REC to start recording; use REC PAUSE to pause and REC to resume.

Stopping Recording

Use the STOP button to end recording; a new track is created upon recommencement.

Playback and File Management

Playback Operation

Press ENTER to playback; adjust volume and use track jump buttons to navigate recordings.

Copying Sound Files to Computer

Transfer WAV files from SD card to computer securely, organizing them into designated folders.

Deleting Data from the SD Memory Card

Pre-deletion Backup Confirmation

Ensure all data is backed up to the computer and external drives before deleting or reformatting.

SD Card Formatting Procedure

Format the SD card via the recorder's Utility menu to erase all data and prepare for reuse.
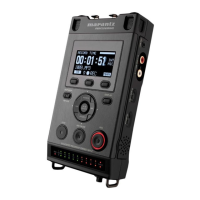
Related product manuals