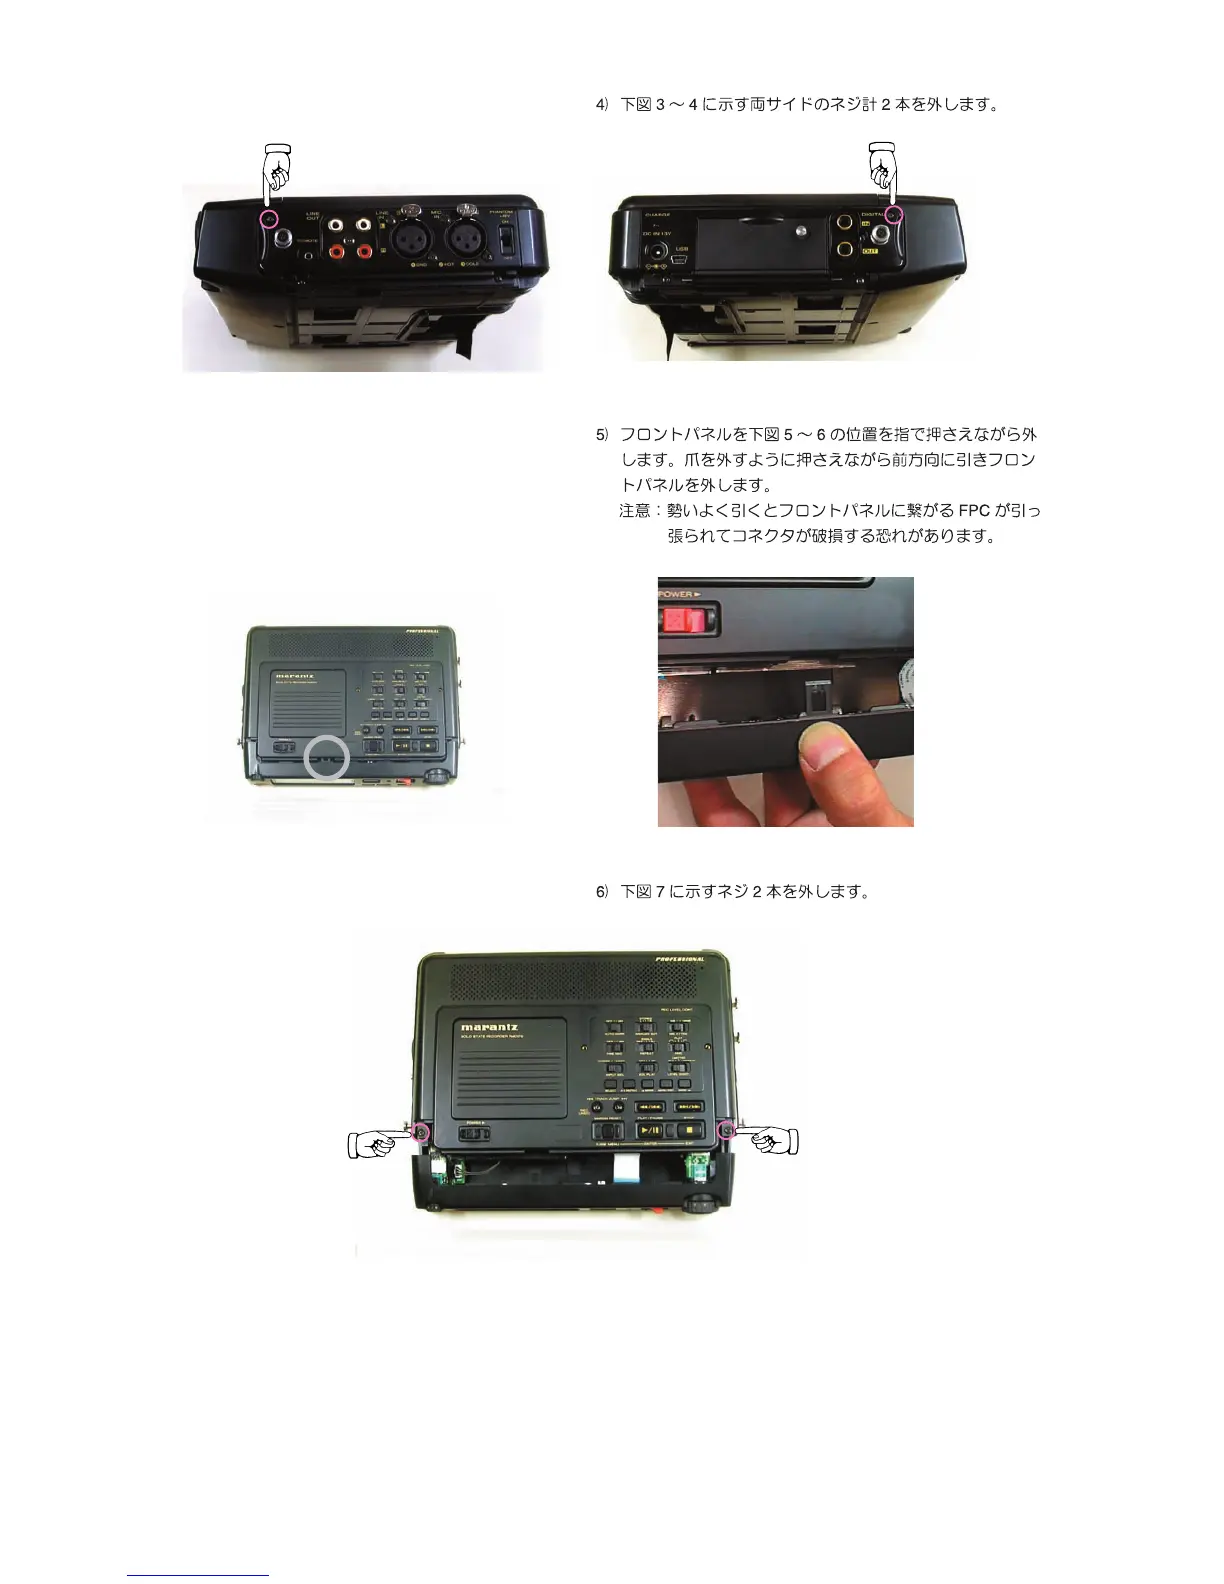
4
4) Remove 2 screws from both sides as shown in Fig.3 and
Fig.4.
5) Remove the front panel, holding it and pushing down with
thumb as shown in Fig.5 and Fig.6.
Cautions :
When removing the front panel, take care not to damage
the cable and connectors.
6) Remove 2 screws as shown in Fig.7.
<Fig.5 Holding position> <Fig.6 Removing the front panel>
<Fig.3 Po si tion of screw> <Fig.4 Position of screw>
<Fig.7 Position of 2 screws>
 Loading...