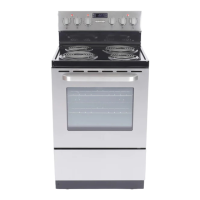
The Marathon MER241SS is an electric range designed for domestic cooking, featuring a cooktop with surface elements and an oven. It emphasizes safety, proper installation, and maintenance for optimal performance and longevity.
Function Description:
The Marathon MER241SS electric range serves as a comprehensive cooking appliance for households. It integrates a cooktop with multiple heating elements for surface cooking and an oven for baking and broiling. The range is equipped with controls for both the surface elements and the oven functions, including temperature and cooking mode selection. A small appliance outlet is also provided on the backguard for added convenience.
Important Technical Specifications:
- Dimensions: The range measures 45 1/16" (1145 mm) in height, 24" (610 mm) in depth, and 23 5/8" (600 mm) in width.
- Cooktop Elements: It features two 6" burners (small lower wattage) and two 8" burners (large high wattage) for varied cooking needs.
- Oven Functions: The oven offers "BAKE" and "BROIL" functions. The "BAKE" function utilizes a hidden bottom heat element for even baking and easier cleaning, while the "BROIL" function uses an upper heating element for high heat, projected downwards.
- Oven Light: An automatic oven light illuminates when "BAKE" or "BROIL" functions are in use and turns off when the oven function selector knob is set to "OFF." The oven light bulb specifications are 240V 60Hz, 25W, G9, and it is suitable for high temperatures (300°C - 570°C).
- Small Appliance Outlet: A convenient 120V outlet is located on the right-hand side of the backguard, protected by a circuit breaker.
- Electrical Connection: The range requires a 3-wire or 4-wire, 240V, 40A electrical connection, supplied by a dedicated circuit. It is equipped with a CSA International Certified Power Cord, intended to be plugged into a standard 14-50R wall receptacle.
- Anti-tip Device: An anti-tip bracket is included to prevent the range from tipping, crucial for safety.
- Levelling Legs: Four adjustable levelling legs are located at the corners of the range's bottom for proper installation and stability.
- Electronic Clock: Features a white LED clock with a minute timer.
Usage Features:
- Surface Cooking:
- To operate, push and turn the surface cooking control knob to the desired heat setting between "MIN" and "MAX."
- An indicator light illuminates when any surface element is in use.
- Proper pan size is crucial; utensils with flat bottoms that cover the heating element are recommended to prevent fire hazards and ensure efficiency.
- Glazed cooking utensils must be suitable for range top service to avoid breakage due to sudden temperature changes.
- Utensil handles should be turned inward and not extend over adjacent surface units to minimize burns and spills.
- Drip bowls must be in place during use to prevent damage to wiring or components.
- Protective liners (aluminum foil) should not be used to line drip bowls or oven bottoms unless specifically suggested in the manual.
- Oven Operation:
- Pre-heating: Before first use, the protective coating on heating elements must be burned off by setting the oven to 450°F for 15 minutes for both bake and broil elements separately, and burners to maximum for 5 minutes. Adequate ventilation is required during this process.
- Baking: Place racks in the correct position, turn the oven function selector to "BAKE," and set the thermostat control knob to the desired temperature. Allow the oven to fully preheat until the temperature light turns off before inserting food.
- Broiling: Use a slotted or angled broiler pan (sold separately) on the second rack position from the top. Turn the oven function selector to "BROIL" and set the thermostat to the desired broil temperature. The oven door should remain closed during broiling.
- Oven Racks: Two oven racks are adjustable and designed with stop-locks. They should be positioned when the oven is cool.
- Electronic Clock & Timer:
- Clock Set Up: Press the clock symbol, then use up/down arrows to set the time. Press the clock button again to confirm.
- Timer: Press the timer button, use up/down arrows to set the desired time. The LED timer indicator will flash, and a "beep" will sound when the timer starts and finishes. The timer does not control the oven temperature.
- Safety Precautions:
- Never leave surface units unattended at high heat settings.
- Do not abuse the oven door (e.g., standing, sitting, or leaning).
- Keep children away from the range during operation.
- Always disconnect the electrical supply before cleaning or servicing.
- Do not use flammable fluids or store combustible materials near the appliance.
- Do not use water on grease fires; smother with a lid or use a dry chemical/foam extinguisher.
- Ensure proper ventilation and do not obstruct airflow.
- The range is for domestic use only; commercial use voids the warranty.
Maintenance Features:
- Cooktop Cleaning:
- Wipe spills off elements with a damp cloth once they cool and controls are "OFF."
- For heavily soiled areas, use warm soapy water and a scrub pad.
- Lift-Up Cooktop: The range features a one-piece upswept lift-up cooktop for easy access underneath. To lift, open the oven door, push in the cooktop locking tabs on both sides, and gently lift up, then set the support rod into place. Ensure the range is unplugged before cleaning underneath.
- Oven Cleaning:
- The oven interior has a durable porcelain enamel finish.
- Oven Door Removal: The oven door can be removed for easier cleaning. Open the door fully, engage the retaining clips on both hinges, gently raise the door upward to withdraw the lower hinge pins, and rest the door face down on a soft, sturdy surface. Reinstallation is the reverse process.
- Inside Oven Door Glass: If food or liquid falls between the glass panels, remove the door, unscrew and unfasten the plastic latch at the top corner, remove the glass from the second blocking mechanism, clean, and reassemble.
- Removable Storage Drawer: The bottom storage drawer can be pulled out to its stop point and lifted up for cleaning. Do not store flammable materials in the drawer.
- Replacing Oven Light: Before replacing the bulb, ensure the oven cavity is cool and the electric supply is switched off. Remove the protective cover, unscrew and replace the bulb with a new one of the specified type (240V 60Hz, 25W, G9). Oven bulb replacement is not covered under warranty.
- Painted Surfaces: Clean with warm soapy water or a warm water/vinegar combination. For heavy baked-on spills, a spray-on oven cleaner can be used, but avoid using it on elements, the glass door, backguard, or controls.
- General Maintenance:
- Ensure all control knobs are in the "OFF" position after use.
- Do not attempt to modify technical characteristics or repair parts unless specifically recommended in the manual; refer to a qualified service technician for other servicing.
- Keep oven vent ducts unobstructed.
- Do not soak removable heating elements in water.
- Regularly check for proper levelling and anti-tip bracket engagement.
Warranty:
The Marathon MER241SS comes with a 2-year limited warranty covering parts and service/labor for defects in materials or workmanship, valid in Canada and the Continental United States with proof of original purchase and confirmed warranty registration. Service must be approved and provided by an Authorized Stirling Marathon Service provider. The warranty is void if the range is used in a non-domestic environment. Exclusions include damages from shipping, improper installation, misuse, abuse, commercial use, and certain parts like light bulbs.