www.MarCumtech.com
- 2 -
INTRODUCTION
Thank you for purchasing the Quest HD underwater viewing system from MarCum Technologies.
The Quest HD offers several technologies that are the first of their kind, making this system the
most technologically advanced underwater viewing system available. Using technology such as
an 7" Solar Intelligent-H2D display will deliver the sharpest, most vivid display, even in bright
sunlight. Color Kill technology allows you to switch between a Color or Black and White image on
demand, while maintaining crisp screen resolution. On-Screen displays of Camera Direction,
Depth, Temp and Battery Voltage take all the guess work out of your camera position so your new
Quest HD can be used to hunt for underwater treasures, locate the "spot on the spot", observe fish
in their natural habitat or learn how fish react to your lure or bait presentation. The applications are
endless, and it's never been easier or more fun to view.
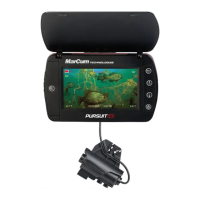
Features
480v x 800h Solar-Intelligent, H2D LCD monitor. The daylight viewable monitor requires no
sunshield while viewing outdoors, though it is recommended that you use the provided visor and
turn the monitor away from direct sunlight when using outdoors during the day. The ultra-thin
monitor housing is sealed with a rubber gasket and all plug-in connections are potted to
protect the internal electronics from the harsh elements.
Sony CMOS HD Image Sensor - .01 lux - Sony's next generation low-light camera. In order to
create an ultra-clear, HD picture. This camera offers a 90° angle of view, giving the user a wide
coverage area for maximium visibility.
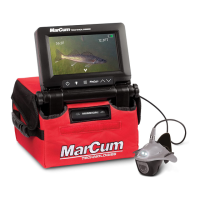
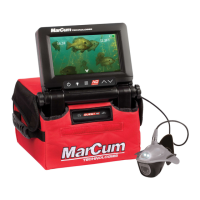
The Manta camera design matches the high-quality Sony CMOS HD Image Sensor. This lighting
option incorporates MarCum’s exclusive Darkwater lighting technology. Dark-water technology
greatly reduces particulate reflection and increases viewing distance by positioning the lights
above and behind the actual camera lens. For added open water stability or to use as a down
view camera, the fin (included) snaps into the rear of the Manta camera housing with ease.
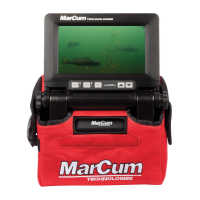
Getting Started
Remove the Quest HD from the packaging and place it on a level surface with the MarCum
Technologies logo facing towards you and right side up. Once opened, loosen the knobs on either
side of the monitor by turning each one counter-clockwise a considerable distance. Then depress
both knobs by pushing inwards and hold in place. This releases the lock on the monitor angle.
While depressing the knobs with the base of your palms use the index fingers of each hand and
gently lift the monitor up to the desired viewing position and release tension on the gimbal knobs.
Gently tighten the knobs until they are snug. The battery, camera and cable are now accessible
behind the monitor. It’s easiest to remove the hook and loop straps and unzip the soft pack case.
The battery has a wiring harness with “piggyback” terminals attached. The power cord from the
monitor attaches to this; the positive (red) terminal should already be attached. You should only
have to attach the negative (black) wire to the negative terminal, and you’re ready to go. The other
cord coming from the battery is the port to attach your battery charger, there is no reason for you
to disconnect any of these wires unless you are going to remove/replace the battery.
To turn "on" the Quest HD, press the power key which is located on the keypad on the lower left
side on the front of the monitor. After pressing the power key, a small red LED indicator light will
illuminate. The monitor will now display a picture. The camera can now be unwrapped from the
cable spool and deployed into the water to the desired depth.
 Loading...