www.MarCumtech.com
- 5 -
Depth Calibration: If the depth display ever indicates a non-zero depth with the camera out of
the water, possibly due to a change in barometric pressure. To reset the depth calibration, power
the system down and back on again.
Utilizing the HD video out jack: On the back of the monitor, there is a HD video out jack that
supports a version 1.4 interface. This can be used to attach a larger monitor, or an external
recording device. There are many compact recording devices available that will work great for
capturing video.
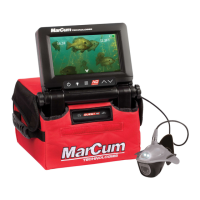
ICE FISHING APPLICATION
The Quest HD can be used to search for that perfect weed line or locate the crib or rock pile where
fish will generally school, entertain the kids, or as the perfect tool to enhance your ice fishing
experience. To use as a search tool, drill a series of holes through the ice in the location you’re
interested in fishing. The Quest HD is small enough to hold in your arms while walking from hole
to hole. Drop the camera down each hole in search for the best spot or until you locate fish. Keep
your eye on the directional and depth indicators to pinpoint the fish’s hideout. Once you’ve located
the spot, drill a hole 3- 4 feet away from the hole you’re actually going to fish in. Set the Quest HD
on the ice and lower the camera down the second hole. To assist in keeping the camera at the
desired depth and direction, it is recommended that an Automatic Camera Panner be used. Once
you send a lure or bait down and locate it with the Quest HD, you’re ready to fish.
The depth, direction and temp indicators on the Quest HD can be changed at any time by pressing
the OSD/Display button.
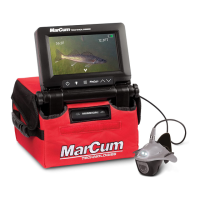
The Quest HD also includes a down viewing fin that snaps into the back of the Manta camera.
Once the fin is attached, the camera cable can be inserted through the cutout at the rear of the fin
and locked into place. It is recommended that you leave about six inches of excess cable, forming
a loop, before locking the cable into place. The camera can now be lowered into the hole to view
what is directly below you. This can be very helpful while fishing in shallow water.
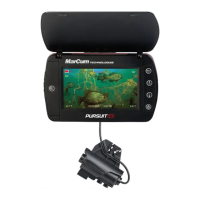
BATTERY CHARGING
Your MarCum Quest HD comes with a 3-stage battery charger. This style of charger has proven
to be the most effective and easiest to use of all charging systems available. Because this is a
3-stage charger, there is no danger of overcharging your battery. When properly cared for, a
sealed lead acid battery will last for at least a couple of years. Batteries are made to be used, and
they need to be used to make the most of them. The most important thing you can do is to prompt-
ly recharge your battery after each use. Not charging your battery immediately after use is the
number one thing that leads to battery failure.
For safety reasons, it is recommended that you place your system on a flat, hard surface like
cement or tile when charging it, away from any flammable materials. Be sure to disconnect the
charger from the wall when not in use, and avoid leaving your battery hooked up to the charger for
extended periods of time.
When you get home from a trip, put your battery on charge right away and leave it there overnight,
or for around 8-12 hours. Likewise, on the night before an ice fishing trip, put it on the charger
again, just to make sure. Again, there is no danger of overcharging your battery.
 Loading...