8 9
STEP 1.
INSTALL ECLIPSE UNIT
Fill aquarium to frame level.Place Eclipse
unit on top of aquarium.
STEP 2. REMOVE FILTRATION
ACCESS PANEL
Open Filtration Access Panel and slide
Hinge Pin (Fig.1) inward toward center
of panel to unlock.Lift panel away and
set aside.
STEP 3. PREPARE LIGHTING
Open Lamp Housing.Visually inspect Lamp
and Lamp connections to confirm that Lamp
has not been damaged or dislodged in transit.
If damage has occurred,call Marineland
Customer Service for replacement.
Taking care to prevent ballast from falling
into water,pass Light Cord under Router
and out through Cord Slot (Fig.2).
NOTE:You may want to attach Light
Cord to a timing device to ensure that
Lamps light at selected intervals.
STEP 4. INSTALL ECLIPSE CARTRIDGE
Rinse Eclipse Filter Cartridge thoroughly
under cold water to remove any dust.
Shake cartridge horizontally (blue side up)
to evenly distribute carbon over ribbed back.
Place Filter Cartridge into Filter Cartridge
Chamber (blue side up - Fig.3).
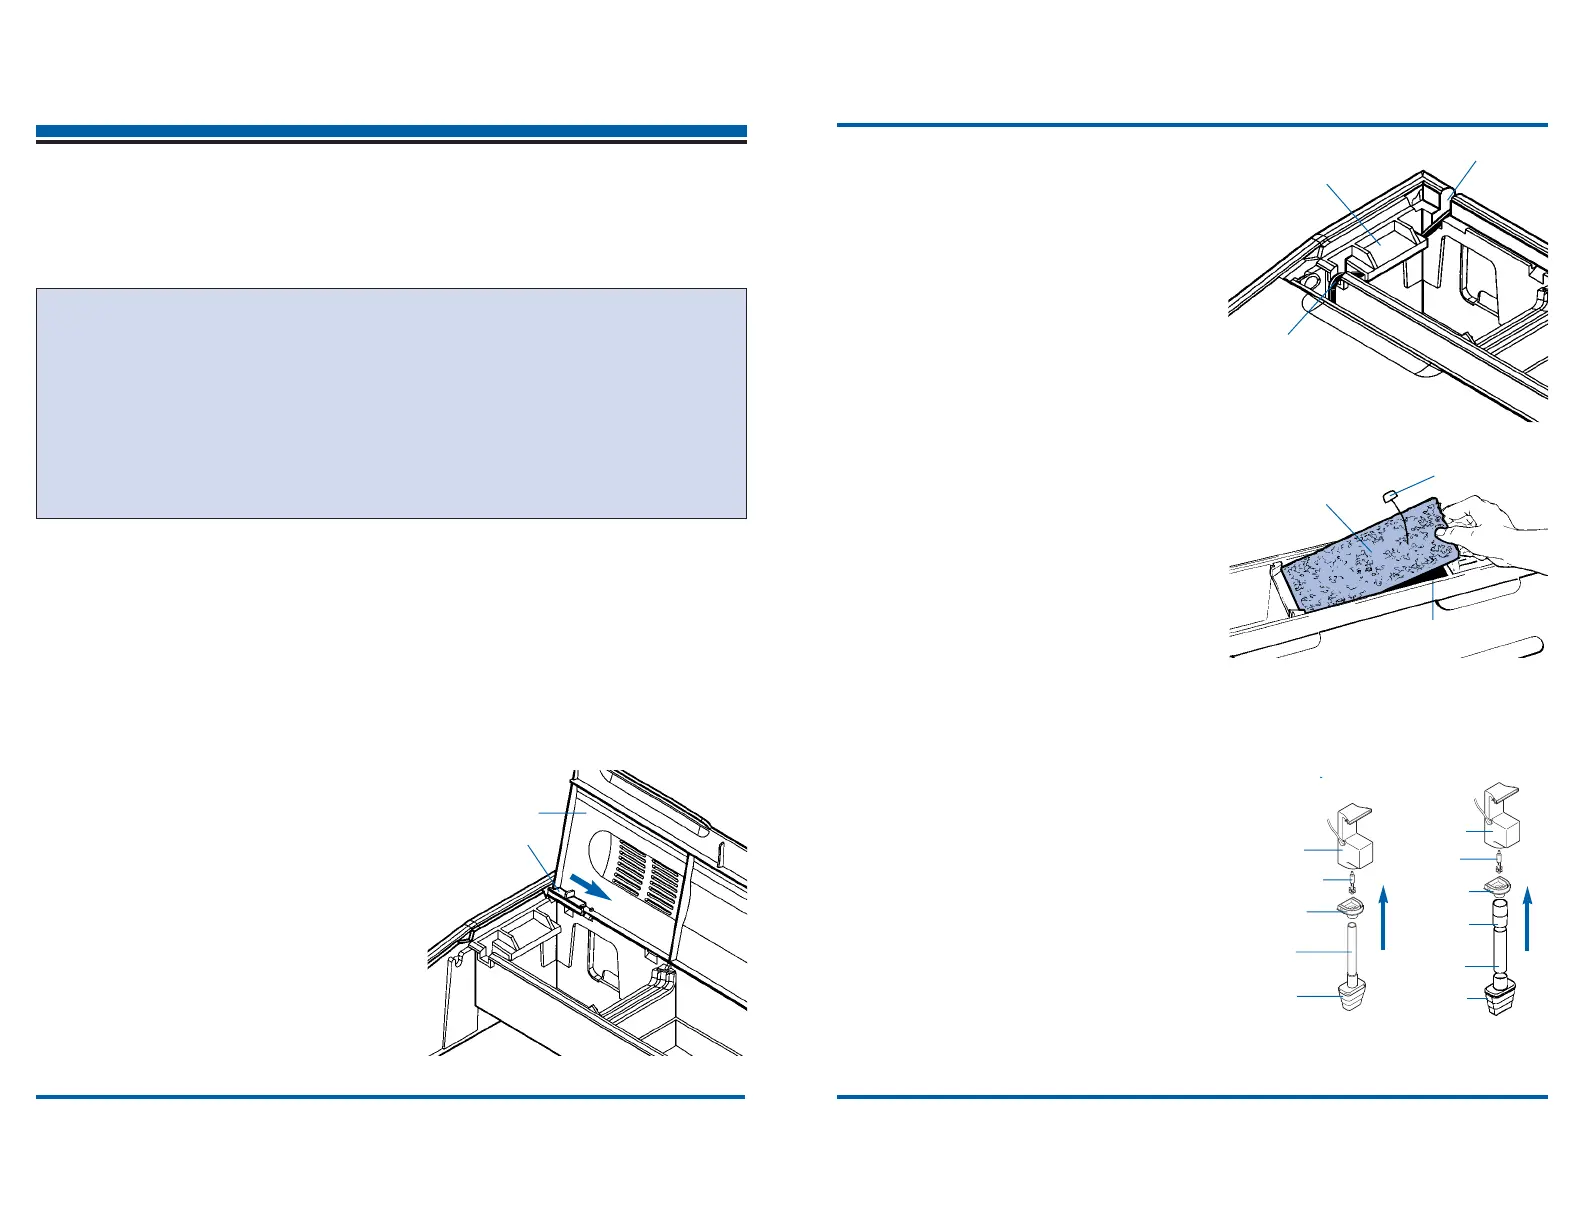
STEP 5: ASSEMBLE INTAKE TUBE AND STRAINER
Slip Intake Strainer onto end of Intake Tube.
Insert opposite end of Intake Tube into Impeller
Housing on bottom of Pump Motor Assembly
(Fig.4)
.For Eclipse
2
and Eclipse
3
,the Intake
Tube Coupler is used to join Intake Tube to
Pump Motor Assembly
(Fig.5)
.
NOTE:Magnetic Impeller Assembly is already
installed.Be sure that Intake Tube fits securely and
does not wobble.
Hinge Pin
Filtration Access Panel
FIGURE 1
FIGURE 2
ECLIPSE
1
:Fits 10”x 20”aquarium frames
(10 gallon,15 or 18 ‘high’)
ECLIPSE
2
:Fits 12”x 24”aquarium frames
(15 gallon,20 or 25 ‘high’)
ECLIPSE
3
:Fits 12”x 30”aquarium frames
(20 ‘long’,29 or 37 gallon)
ASSEMBL
ASSEMBL
Y/OPERA
Y/OPERA
TIONAL INSTRUCTIONS
TIONAL INSTRUCTIONS
10 simple steps to final assembly and
installation of your new Eclipse System.
Assembly/Operational and Maintenance instructions for the Eclipse
1
,Eclipse
2
and Eclipse
3
are virtually identical.For this reason,and in the interest of avoiding
confusion,the sections that follow feature diagrams for the Eclipse
1
model only.
You will find that the steps pictured are readily applicable to the Eclipse
2
and
Eclipse
3
models as well.Any variations are noted.
Most parts are preassembled and do not require disassembly prior to installation.
We recommend that you read the Maintenance section that follows to familiarize
yourself with the overall operation of the Eclipse System.
Light Cord
Eclipse Filter
Cartridge
Lift Tab
Filter Cartridge
Chamber
Light Cord
Router
Cord Slot
Impeller
Housing
Impeller
Housing
Intake
Tube
Intake
Strainer
Magnetic Impeller
Assembly
Impeller
Assembly
Intake Tube
Coupler
Pump Motor
Assembly
Pump Motor
Assembly
Intake
Tube
Intake
Strainer
ECLIPSE 1
ECLIPSE 2 & 3
FIGURE 3
FIGURE 5
FIGURE 4
 Loading...