8
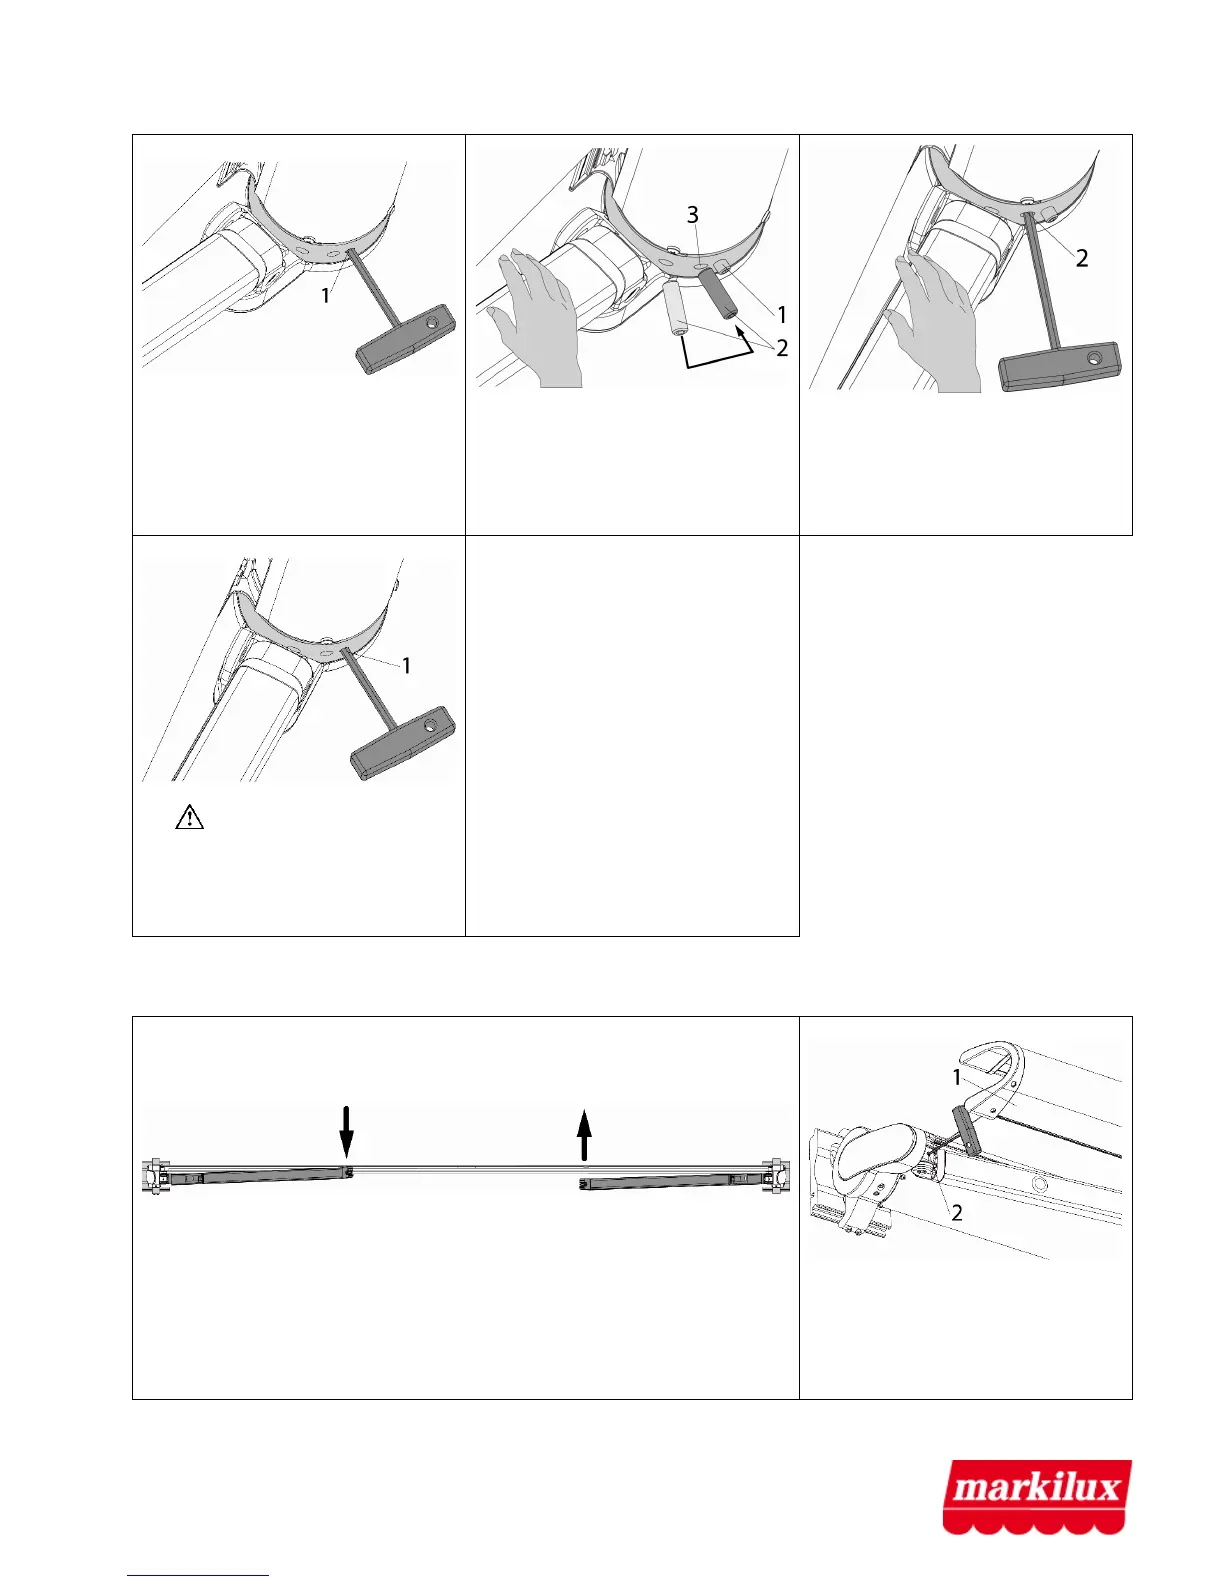
5.3 Ceiling-/ Rafter mount 36° - 70°
1. Extend awning and unscrew
the rear threaded pin SW 5 (1) at
both consoles by approx. 10 mm
from the consoles.
2. Screw the front threaded pin
SW 6 (2) at both consoles in the
middle threaded drilling (3).
While doing this take the pressure
of the arms by lifting them.
3. Set the required inclination by
turning the threaded pin SW 6 (2)
either way at each of the two
consoles. While doing this take
the pressure of the arms by lifting
them.
4. Attention!: Tighten the
rear threaded pin SW 5 (1) again
at both consoles so that the
awning is protected against
flipping up!
6. Arm position at retracted awning
1. If an arm is set too high or too low when the awning is retracted
and therefore the projection profile does not close properly, the arm
position is to be corrected.
2. Retract the projection profile
(1) that much that the security
threaded pin SW 3 (2) can still be
loosened. Loosen security
threaded pin.
 Loading...