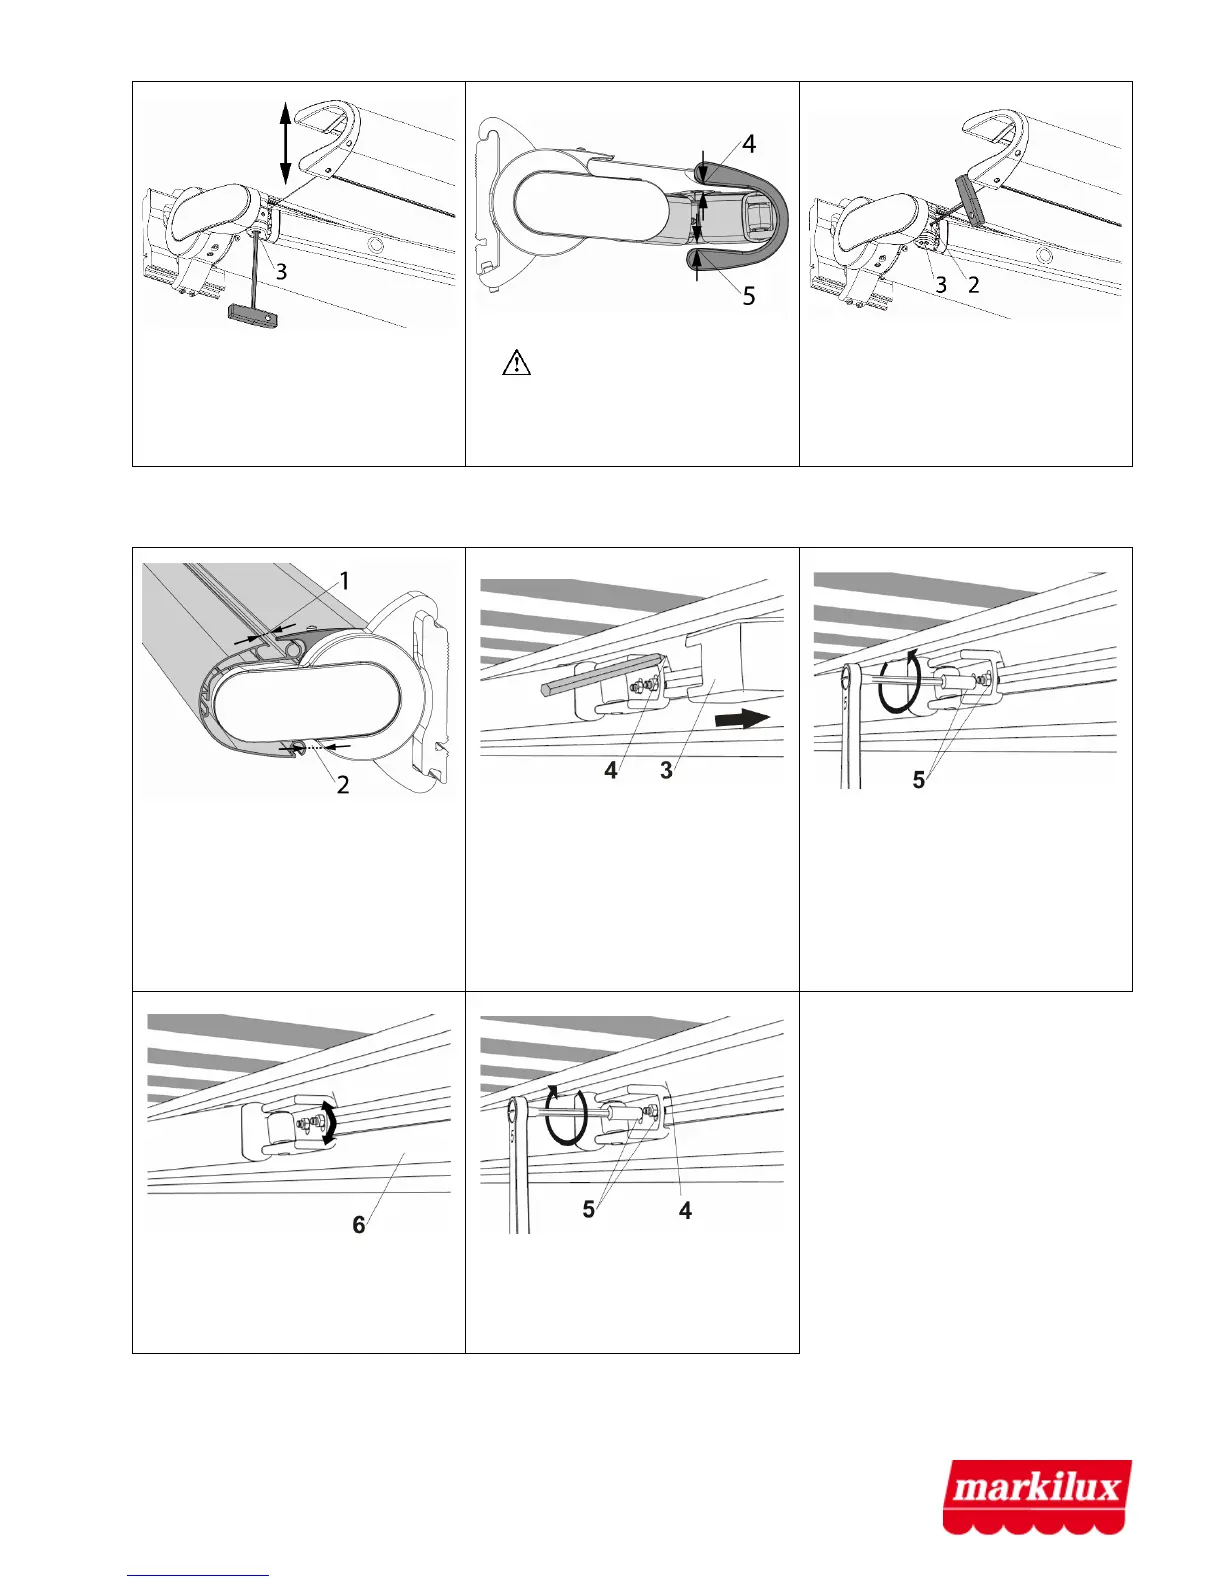
3. The articulated arm can be
raised and/or lowered by turning
the eccentric bolt (3).
4.
Attention!: Align the
articulated arms in such a way
that they do not hit the upper (4)
or lower edge (5) of the
projection profile!
5. Secure the eccentric bolt (3)
with the threaded pin (2). Check
the new setting of the articulated
arms by retraction and extension
of the awning.
7. Projection profile does not close properly
1. If the projection profile does
not close properly with the cas-
ing, a gap might form on top (1)
or below (2) a gap between the
top casing cover and the casing.
The front profile closing angle at
the projection profile can be cor-
rected.
2. Extend the awing completely
until the fabric is without tension.
Pull off the covering cap of the
projection profile bracket (3) and
mark the position of the projec-
tion profile bracket (4) using a
soft pencil.
3. Loosen the hexagonal nuts
SW10 (5).
4. Align the projection profile (6) 5. Align the projection profile
bracket (4) at the mark, then
tighten the hexagonal nuts SW 10
(5).
 Loading...