10
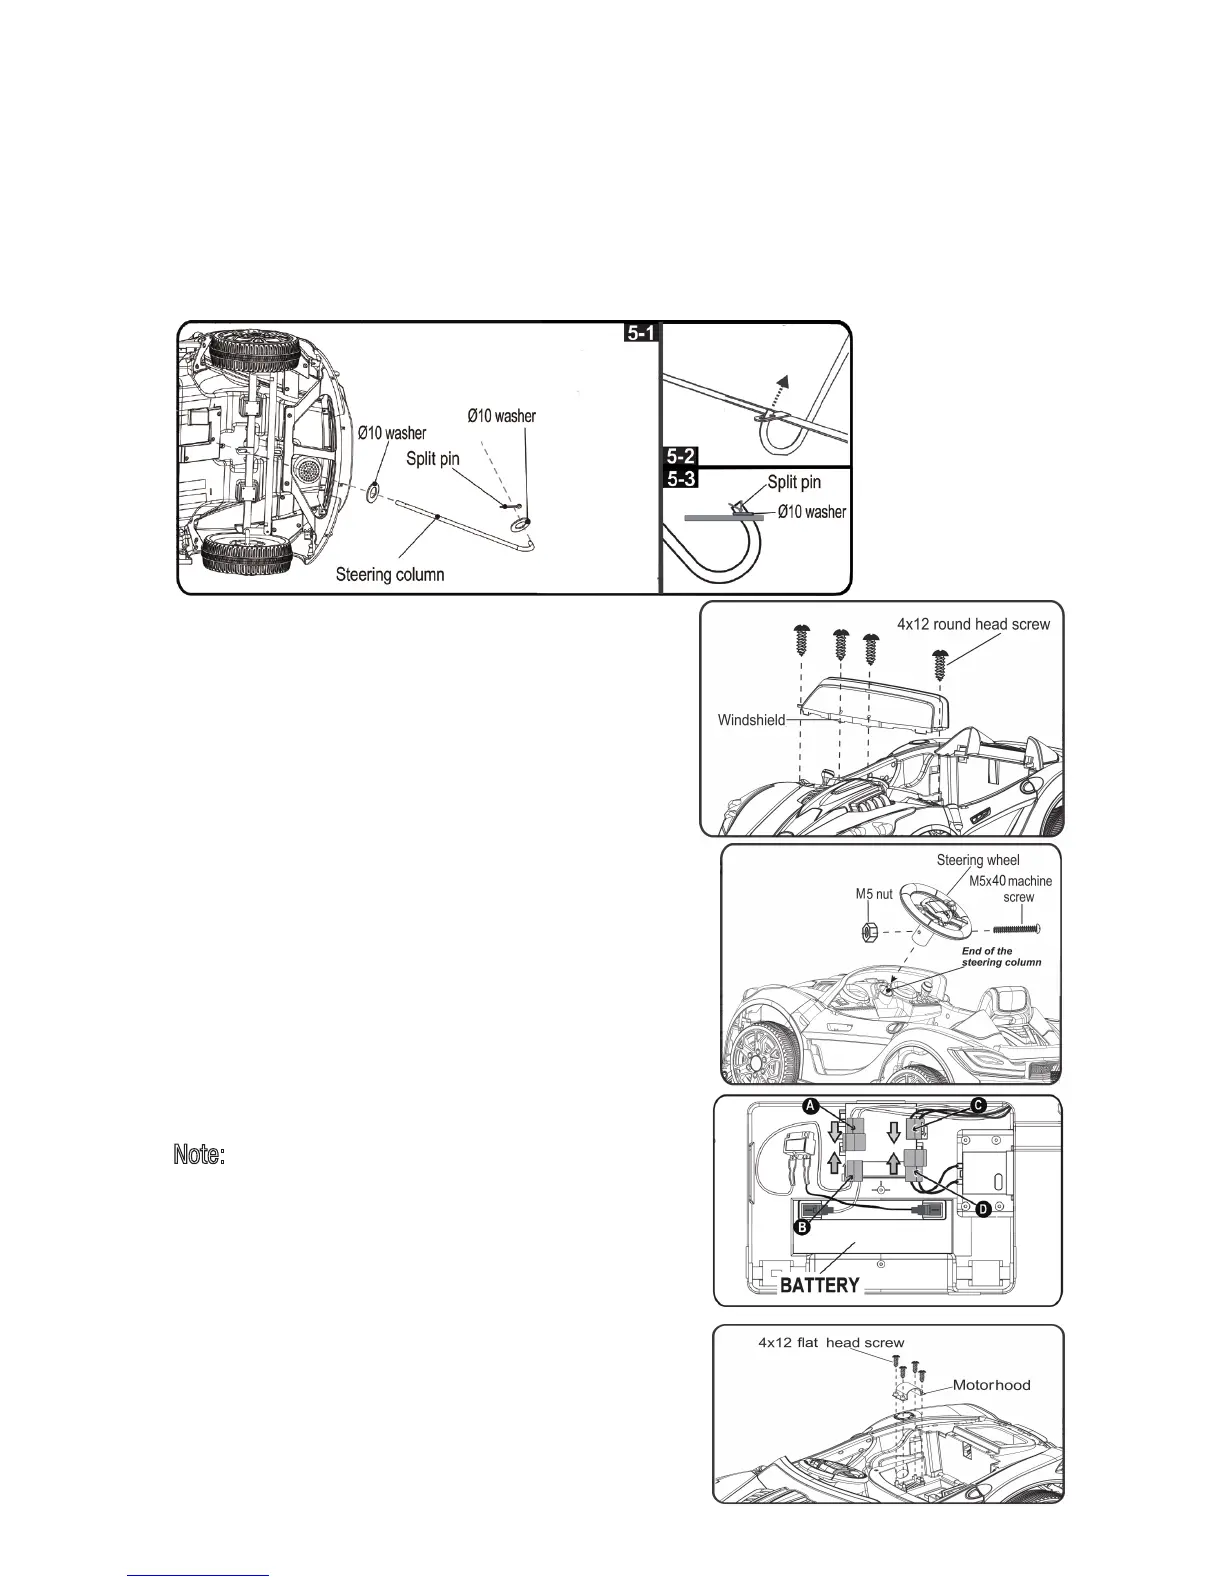
4. Steering Column Assembly
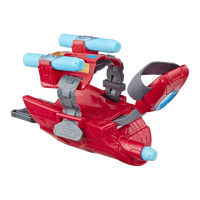
5. Windshield Assembly
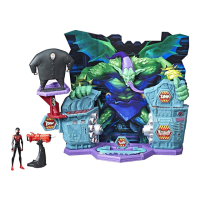
7. Power Supply Connection
8. Motorhood Assembly
. Fit the tabs on the windshield into slots located at
front of the vehicle as shown, push until you hear a
click.
. Turn the vehicle body upright.
. Insert four 4x12 round head screws, and tighten
securely with a screwdriver.
. Take out the motorhood from polybag.
. Install the motorhood in the proper position as shown,
and secure it with four 4x12 flat head screws.
Note:
The battery is disconnected for shipment to
prevent the battery from draining.
. Make sure to plug A connector into B connector.
(They are the same color to assure correct connection.)
. Make sure to plug C connector into D connector.
(They are the same color to assure correct connection.)
Turn the vehicle on its side as shown in pi cture below . .
.
.
.
Slide a 10 washer then insert the straight end of steering shaft through the hole in the
vehicle body until it sticks out of the hole on the top of the ve hicle body. <P icture 1>
Insert the bent end of steering column through the hole in the front axle
<Picture 2>
Fit a
Ø
Ø
10 washer and insert a split pin into the hole in the bent end of the steering
column,
use a standard slip joint pliers to open and split the pin ends
fall out) .<Picture 3>
(to assure the washer will not
linkage.
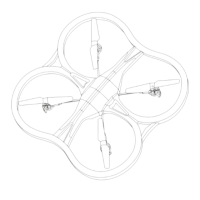
6. Steering Wheel Assembly
.
.
Remove the M5x40 machine screw and M5 nut from
the steering wheel with a screwdri
ver.
Insert the steering wheel onto end of the steering
column; line up the hole in the steering
hole in
wheel and the
the M 5x4 0 tresnier ;nmuloc gnireets
machine screw and M5 nut as shown and tighten it
with a screwdriver.