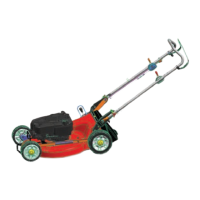
GRASS CHUTE TO BE ATTACHED AS SHOWN.
2 x screws from above with nuts underneath and
1 x screw from inside the housing with nut inside
grass chute.
DO NOT REMOVE THE GRASS CHUTE OR
HOLD THE CHUTE FLAP OPEN.
PERSONAL INJURY, INJURY TO
BYSTANDERS OR DAMAGE TO PROPERTY
COULD RESULT FROM OPERATING A
MACHINE WITHOUT THESE ITEMS FITTED
CORECTLY.
CHIPPER MOWERS
When using the chipper tube place the mower
on a level area where markings by he rotat-
ing chippings won’t matter. Before starting the
mower fit the catcher and set the cut height to
its lowest setting. Check that the chipper feed
tube is clear and the feed intake flap is in good
order.
WARNING
Check frequently that the blade is sharp and the
retaining screws are tight.
Branches up to 35mm can be chipped using
the chipper tube. Only green timber should be
chipped. DO NOT chip hard or dry wood. Hard
and/or dry woods can be place unreasonable
loading on the machine causing damage. Check
that there are no nails or foreign objects in the
material being chipped.
WARNING
Always stop the engine before attempting to
clear any obstruction from under the mower or in
the chipper tube.
Slowly feed material into the intake tube. Sturdy
gloves, footwear, ear and eye protection should
be worn. Empty the catcher frequently to avoid
building up chippings inside the mower housing.
Clear debris away from around the engine fre-
quently to prevent any restriction with cooling air
flow and prevent the risk of fire. Stop the engine
before removing the catcher.
AFTER MOWING
CLEANING
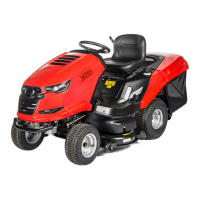
MODELS WITH A CYCLOWASH FITTING.
Stop the engine and remove the catcher. Attach
a garden hose fitting to the cylcowash fitting and
start the engine. Allow a good flow of water to
run for 2-3 minutes. Stop the engine and remove
the hose. Hose the Catcher.
Cyclowash Fitting
MODELS WITHOUT A CYCLOWASH FITTING.
Stop the engine and remove the catcher. Start
the engine. Keeping well clear of mowing parts,
apply a garden hose to the Wash port with a
good flow of water for 2-3 minutes. Hose the
catcher.
MODELS WITHOUT A CYCLOWASH PORT.
Stop the engine, when the blade has stopped,
disconnect the spark plug wire. Remove the
catcher and tip the mower in accordance with
the engine instruction book maintenance section
(spark plug uppermost). Hose the underside of
the mower clean. Hose the catcher.
DO NOT HOSE THE ENGINE, as water can
damage the air cleaner and the ignition system.
REFER TO ENGINE INSTRUCTION BOOK
MAINTENANCE SECTION BEFORE TILTING
MOWER. STORE YOUR MOWER ON ITS
WHEELS, not its side.
CAUTION
BLADES
DAMAGED BLADES AND WORN BOLTS ARE
MAJOR HAZARDS.
Check the blade mounting bolts at frequent
intervals for proper tightness.
Check the blade condition frequently, particu-
larly if the mower has hit a foreign object or is
vibrating. Sub-standard cutting and catching will
result from a neglected blade. Your Authorised
Dealer will be happy to sharpen or replace
blades as necessary.
CAUTION
ALWAYS USE GENUINE ORIGINAL EQUIP-
MENT PARTS TO ENSURE SAFETY AND
PROPER PERFORMANCE. Substitute parts can
be disappointing and dangerous.
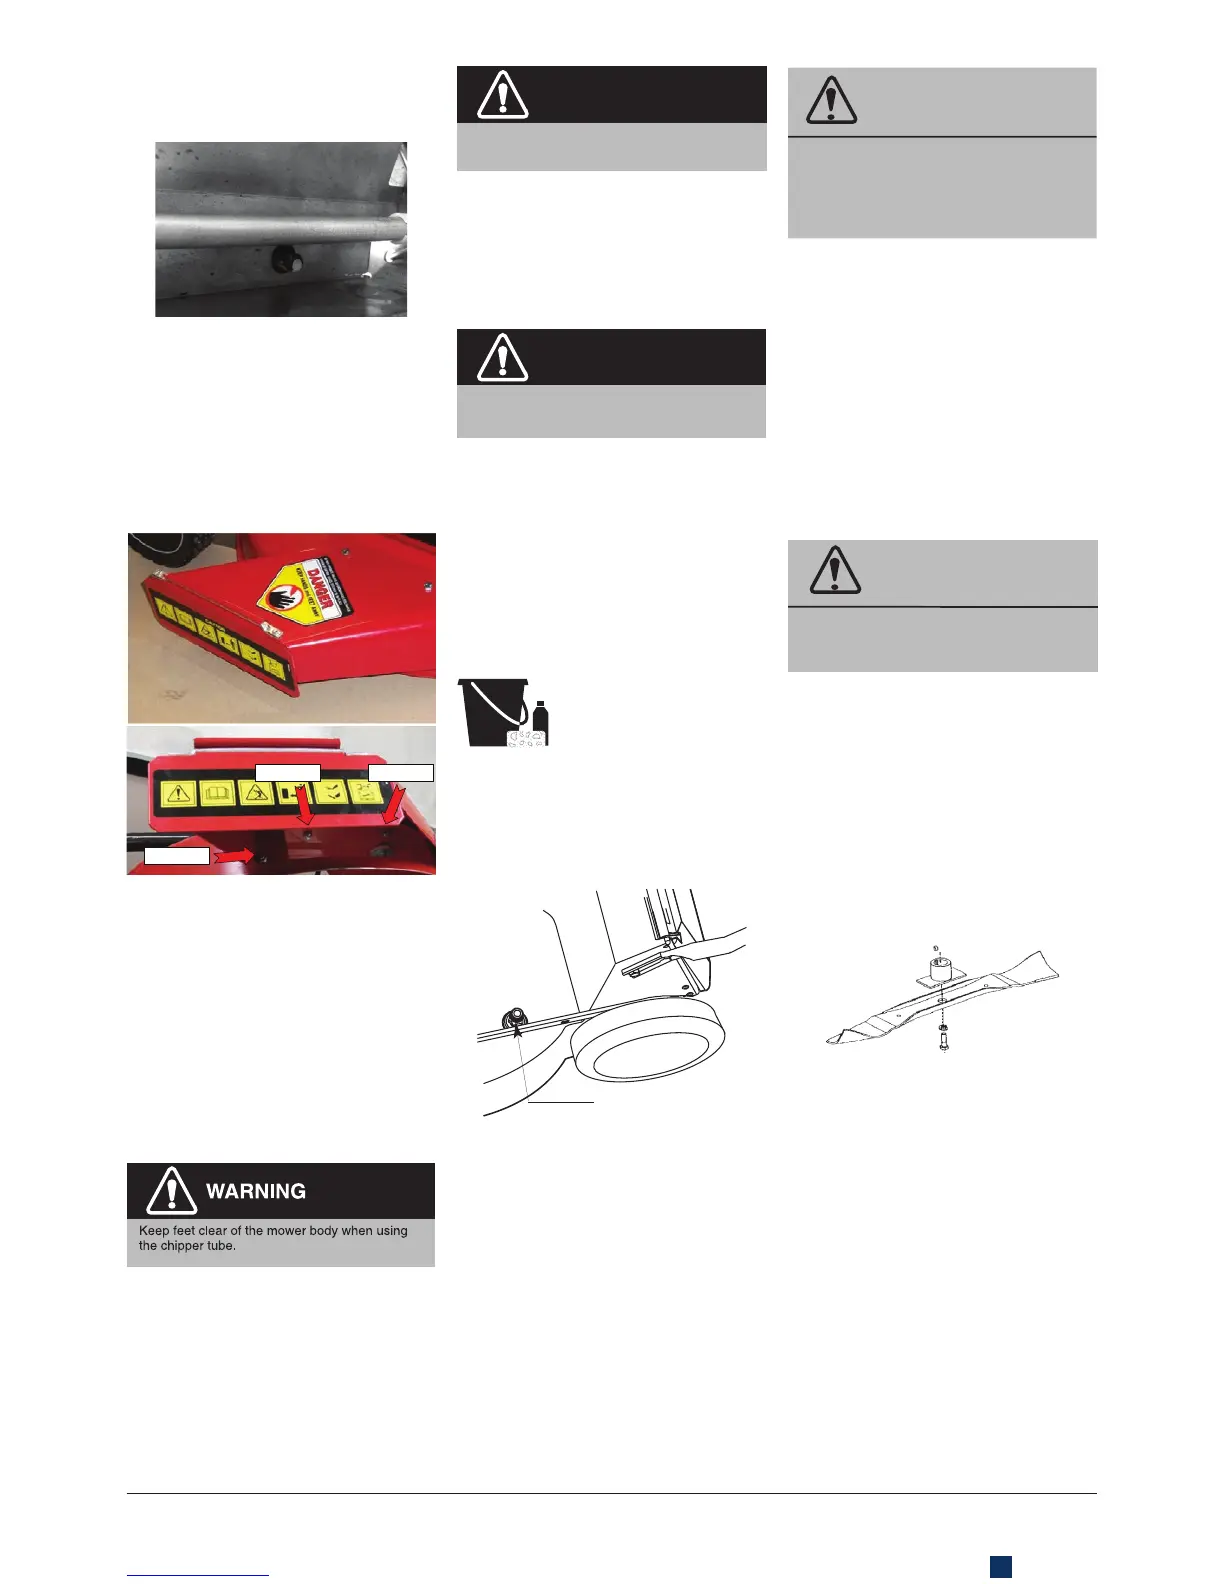
BLADE SERVICING INSTRUCTIONS.
BAR AND DISC BLADES.
1. Remove the spark plug lead and position it
to prevent accidental contact with the spark
plug.
2. Tilt the mower upright - refer to mainte-
nance section of the engine instruction
book before tilting the mower.
3. BAR BLADES. Remove the central bolt
and spring washer.
4. Remove the blade. Either sharpen and
balance the old blade, or fit a new one. As-
semble in the reverse order.
QUICK CUT BLADE/QUADCUT
®
BLADE.
Follow steps 1 and 2 above. The cutting tips can
be removed and replaced by removing the blade
carrier from the mower. Note the component
positions when dismantling. When refitting the
blade carrier ensure the slots fit properly over
the lugs and the drive plate, and replace the
mounting bolts if they show signs of wear.
 Loading...