3
1. INTRODUCTION
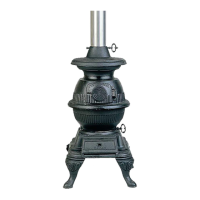
Congratulations on purchasing a Masport pot-belly stove. If correctly installed and operated according
to these instructions it will give many years of reliable service. Following these installation
instructions and the instructions accompanying your flue kit will ensure that the heater complies with
the requirements of the appropriate Safety Standard AS/NZS 2918.
WE RECOMMEND THAT THE INSTALLATION OF YOUR
MASPORT HEATER BE CARRIED OUT BY A SUITABLY
QUALIFIED SPECIALIST INSTALLER
CAUTION. SURFACES ONRADIANT HEATERS CAN BECOME VERY HOT.
IF CHILDREN OR ELDERLY AND INFIRM PERSONS MIGHT ACCIDENTALLY TOUCH
THE HEATER WHILE IT IS OPERATING, WE RECOMMEND THE INSTALLATION OF
SUITABLE PROTECTIVE GUARDING.
2. INSTALLING THE STOVE
This section covers both models. Pot belly stoves must not be installed below a heat sensitive ceiling
of less than normal height (approx. 2.4 metres). No wall or other immovable object may be within 1
metre of the front of the stove.
Finalise the installation position for your stove only after considering the necessary heater-to-wall
distances (see below) and checking the practicability of installing the flue system through the ceiling
and roof or wall. As a guide, the flue shielding and the 25mm clearance gap around it in the ceiling
space will occupy a diameter of approximately 275mm, and this must be available without the
removal of structural beams.
Pot belly stoves are radiant style heaters. As such, they very effectively distribute heat to their
surroundings. This means that heat sensitive walls, furniture and other objects must be kept at a safe
distance to avoid heat damage. Walls can be provided with heat shields to enable reduced wall-to-
stove installation distances to be achieved. Also, unless the stove is standing on a bare heat-proof
(concrete) floor, an insulating hearth (floor protector) will be required.
The minimum clearances to unprotected heat sensitive walls at the side and rear of the various stoves
are shown in the table below. Rear clearances are measured from the back face of the flue, while side
clearances are measured from the ring around the middle of the belly on PITTSBURGH &
KLONDIKE
Remember, these minimum clearances may be significantly reduced by suitable heat shielding.
(See later)
Table 1. MINIMUM CLEARANCES TO UNSHIELDED HEAT SENSITIVE WALLS (mm)
 Loading...