Page 10
GENERAL ASSEMBLY INSTRUCTIONS
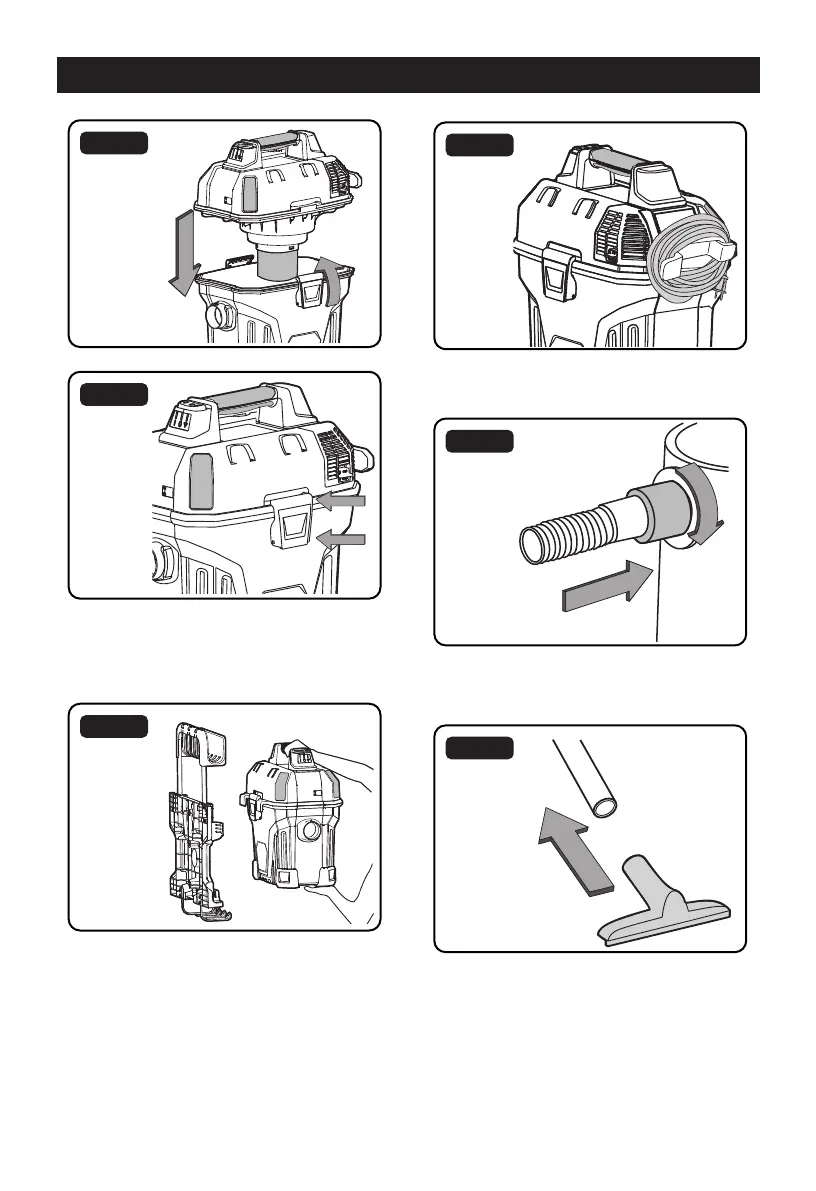
Fig. 12
Fig. 13
3. Mount the vacuum onto the mounting rack
by aligning the vac hanging hook on the
rear with slot on the mounting rack and
slide downward until it locks (Fig. 14).
Fig. 14
4. Wind the excess power cord around the
cord wrap hooks located on the side of the
vacuum (Fig. 15).
Fig. 15
5. Insert the locking end of the hose into the
vacuum port and lock into place (Fig. 16).
Fig. 16
6. Secure the desired accessory onto the end
of the hose (Fig. 17).
Fig. 17
 Loading...