23
especially when wearing rings and jewelry, could result in a serious burn.
To obtain the longest possible battery life, read and understand the operator’s
manual.
It is good practice to unplug the Charger/Adapter and remove the Lithium-
Ion battery pack when not in use.
For Lithium-Ion battery pack storage longer than 30 days:
Store the Lithium-Ion battery pack where the temperature is below 80°F
(26°C) and free of moisture.
Store Lithium-Ion battery packs in a 30%-50% charged condition.
Every six months of storage, fully charge the Lithium-Ion battery pack.
Exterior may be cleaned with a cloth or soft non-metallic brush.
BATTERY PACK REMOVAL AND PREPARATION FOR RECYCLING
To preserve natural resources, please recycle or dispose
of batteries properly. This product contains lithium-ion
batteries. Local, state, or federal laws may prohibit disposal
of lithium-ion batteries in ordinary trash. Consult your
local waste authority for information regarding available
recycling and/or disposal options.
WARNING! Upon removal of the battery pack for disposal or recycling, cover
the battery pack’s terminals with heavy-duty adhesive tape. Do not attempt to
destroy or disassemble battery pack or remove any of its components. Lithium-
Ion batteries must be recycled or disposed of properly. Also, never touch both
terminals with metal objects and/or body parts as short circuit may result. Keep
away from children. Failure to comply with these warnings could result in fire
and/or serious injury.
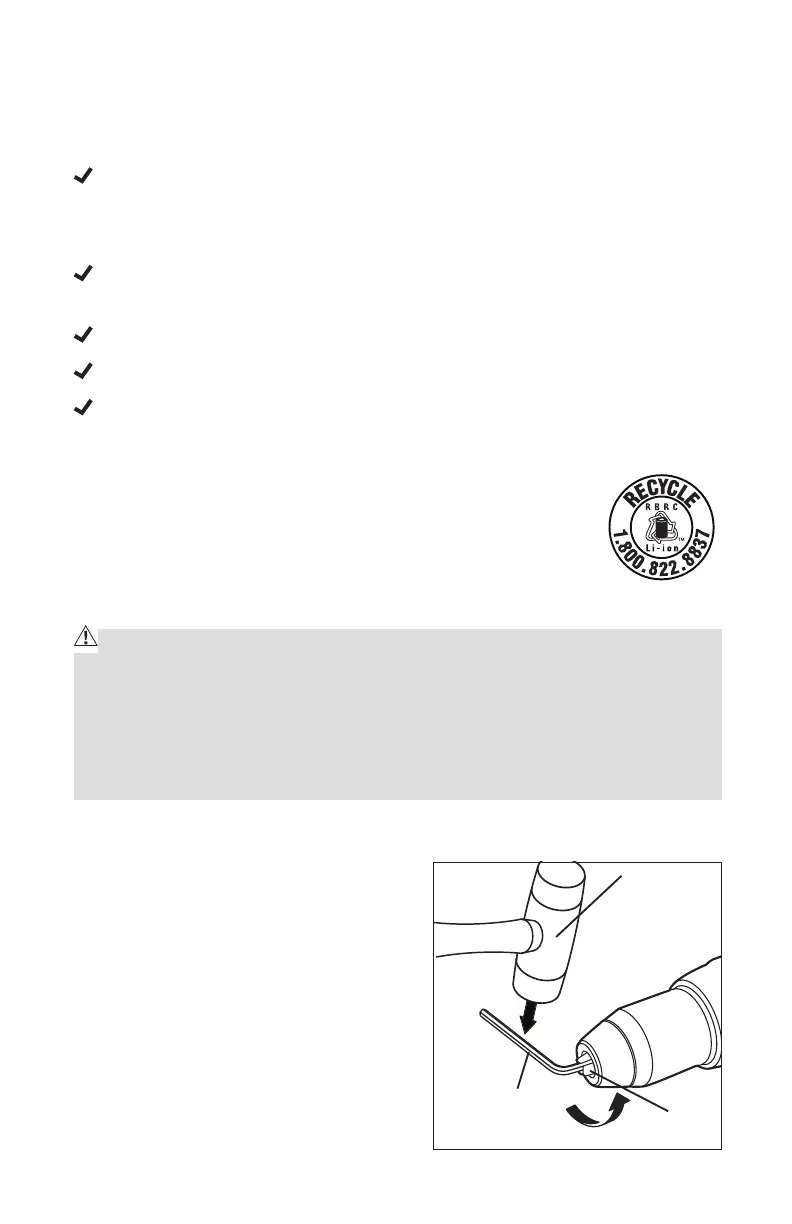
CHUCK REMOVAL (Fig. 14)
The chuck can be removed and replace
by a new one.
1. Lock the trigger switch by placing
the direction of rotation selector in
center (Lock) position.
2. Open the chuck jaws. Using a
screwdriver, remove the chuck
screw by turning it in a clockwise
direction.
3. Insert a 5/16-in. or larger hex key
into the chuck of the drill/driver and
Fig. 14