en
it
de
es
fr
nl
pt
da
no
sv
pl
ru
cs
hu
sl
tr
hr
lt
lv
et
ro
sk
bg
uk
bs
el
zh
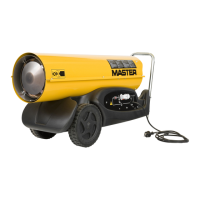
PLEASE NOTE: IF THE HEATER SWITCHES
OFF DUE TO LACK OF FUEL, TOP UP THE
TANK AND RESET THE HEATER (SEE PAR.
7.2.).
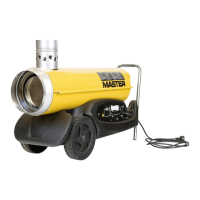
IMPORTANT: In indirect models,
combustion products are directed outside
through suitable chimney. CARRY OUT
THE CHIMNEY IN ACCORDANCE WITH
CURRENT SAFETY REGULATIONS AND
FOLLOW THE INSTRUCTIONS IN THE
RELEVANT SECTION OF THE MANUAL.
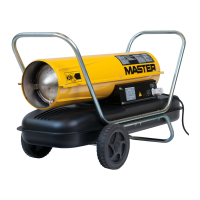
The appliance stops when an anomaly occurs.
The reset button turns on with a steady red
light (PIC. 17), it means the heater needs to be
reset. To reset the heater, press the reset button
all the way down (PIC. 18). Identify and remove
the cause that stopped the appliance (for
instance, obstruction of air intake and/or outlet,
total block of the fan, etc.). Please contact an
appointed service center for assistance in case
it is impossible to solve the problem.
Set the “I/0” button to “0” (PIC. 19). Flames
extinguish and the fan keeps on working until
the combustion chamber has fully cooled down.
Do not pull the plug out until the cooling
cycle has totally ended.
8. CLEANING THE FILTERS
THE FILTERS MAY NEED TO BE CLEANED
DEPENDING ON THE QUALITY OF THE
FUEL USED.
►8.1.1. Remove tank (A) cap.
►8.1.2. Take out the lter (B) from the tank.
►8.1.3. Clean the lter (B) with clean fuel,
without damaging it.
►8.1.4. Put the lter (B) back in the tank.
►8.1.5. Close cap (A).
DEPENDING ON THE MODEL:
►8.2.1. Take out the lter (A).
►8.2.2. Remove the pipe-clamping straps (B).
►8.2.3. Take out the pipes (C).
►8.2.4. Replace the lter (A) with an original
spare part.
►8.2.5. Put the pipes (C) back.
►8.2.6. Put the pipe-clamping straps (B) back.
►8.2.7. Put the lter (A) back into its original
position.
DEPENDING ON THE MODEL:
►8.3.1. Remove the cup (A).
►8.3.2. Take out the lter (B) from the cup.
Keep gaskets for later use.
►8.3.3. Clean the lter (B) with clean fuel,
without damaging it.
►8.3.4. Put the lter (B) back in the cup.
►8.3.5. Put the glass (A) back on and
reassemble the gaskets correctly.
See the preventive maintenance schedule.
9. STORAGE AND TRANSPORT
WARNING: Before moving the appliance,
the heater must be stopped (SEE PAR.
7.3.) and disconnected from the power
supply by pulling out the plug (PIC. 23),
wait for a complete cool down and close
the tank cap properly to prevent fuel
leakage. Keep the heater in horizontal and
stable position during transport.
IN ORDER TO KEEP THE HEATER IN
THE BEST POSSIBLE CONDITIONS, WE
RECOMMEND TO FOLLOW THE BELOW
PROCEDURE:
►9.1. Empty the fuel by removing the drain
cap at the bottom of the tank (PIC. 24-25).
Dispose the fuel in an appropriate container
in accordance with the current safety
regulations.
►9.2. To remove any residual remaining, pour
clean fuel and rinse the tank again.
►9.3. Close the drain cap and the tank cap.
►9.4. In order to keep the heater in the best
possible conditions, we recommend placing
it in a dry and safe place.
THERMOSTAT
In models with a thermostat connection,
remove the cap connected to the appliance
and connect the room thermostat (optional)
(SEE PIC. 26-27).