Si le brûleur en fonte brûle jaune ou pas du tout (marche à suivre)
Si votre brûleur ne brûle pas, s’éteint ou brûle jaune ou il y a une flamme à
l’intérieur du venturi, vérifiez le venturi du brûleur afin de vous assurer qu’il
n’est pas bouché. Les araignées ainsi que d’autres insectes risquent d’y
faire leur nid et de bloquer le flux d’air et de gaz. CONSERVEZ LE
REGISTRE DE RÉGLAGE FERMÉ APRÈS CHAQUE UTILISATION.
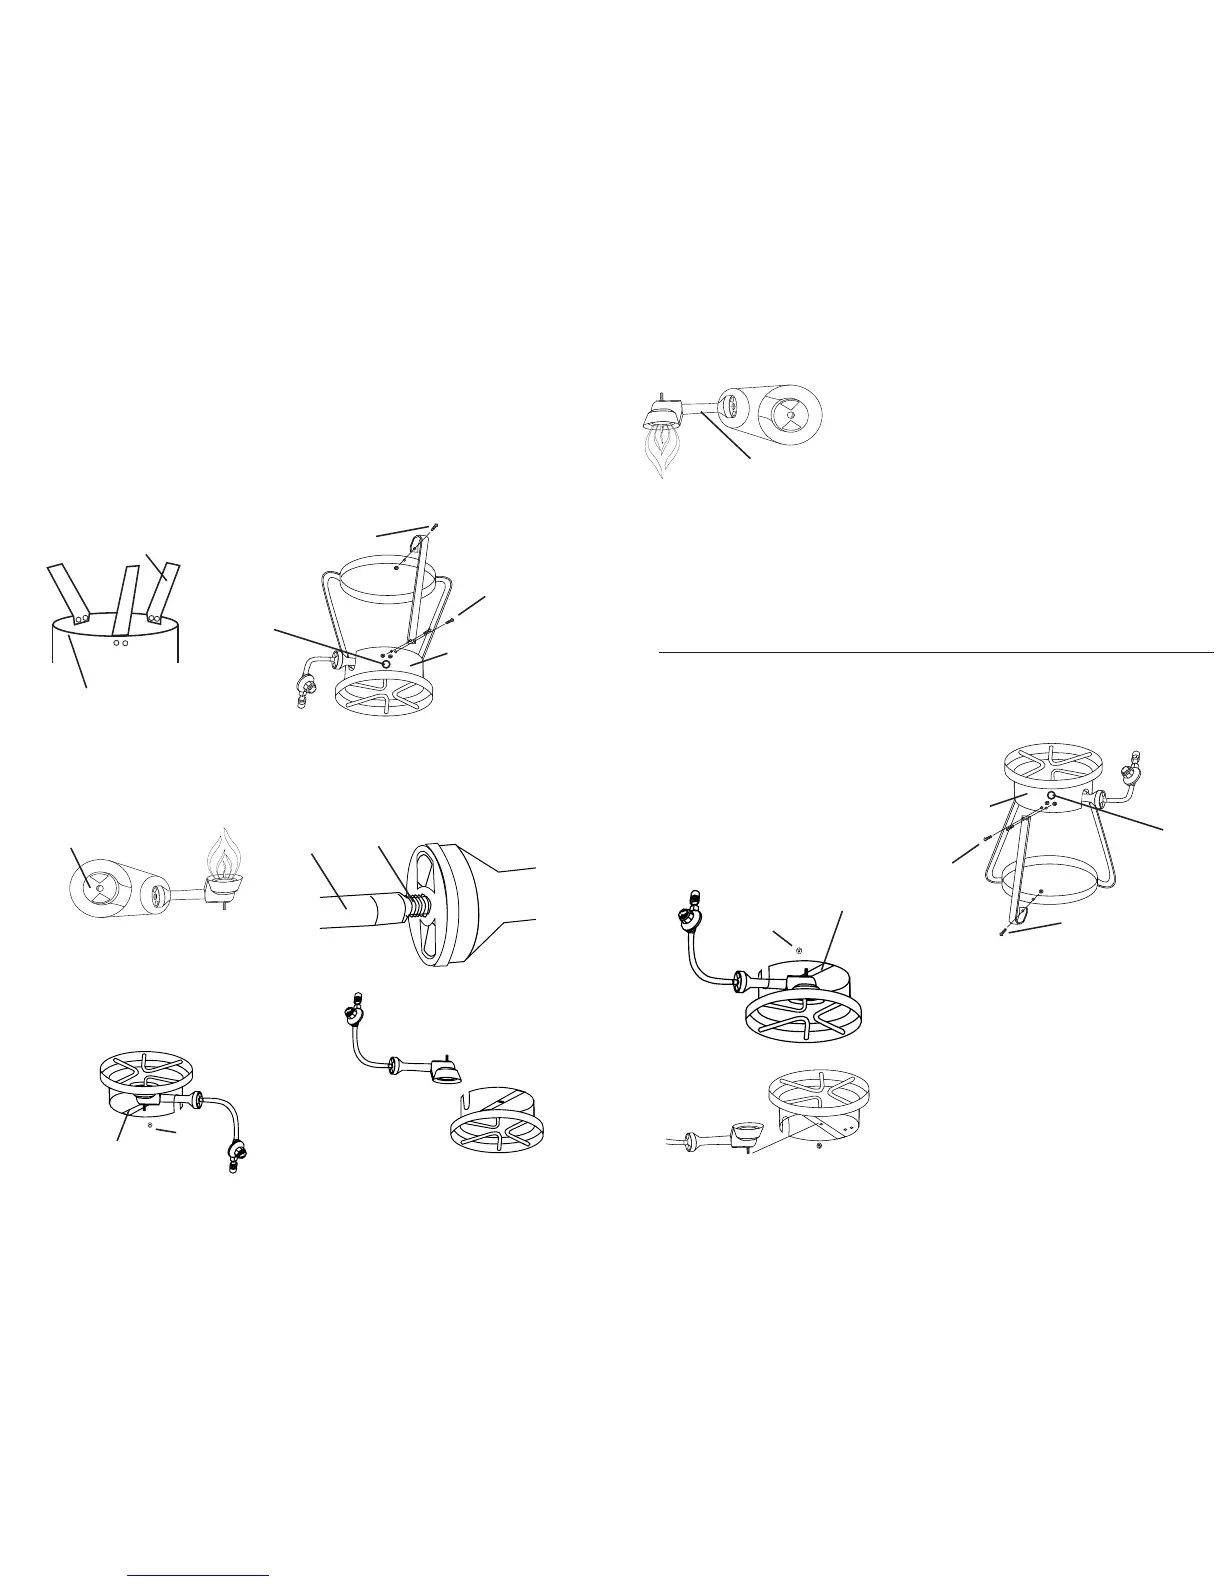
Comment nettoyer
Retirez le tuyau du brûleur à l’aide d’une clé de 7/16 po. Introduisez une
petite tige dans le trou où le tuyau était raccordé.
Tenez le brûleur en l’air afin de voir si la lumière
passe le trou. Si le trou n’est toujours pas propre,
rincez-le avec de l’eau. Une fois le brûleur propre,
remontez le brûleur (registre de réglage d’air, ressort,
tuyau.)
1. Retirez l’écrou du régulateur du brûleur et du
tuyau. Placez le brûleur sur la barre de support
du brûleur dans le trou central et fixez avec
l’écrou.
1 Fixez les trois jambes au pare-flammes en
premier à l’aide de 2 écrous de 1/4 po. et des
boulons pour chaque jambe. (Placez les jambes à
l’intérieur du pare-flammes).
2. Fixez la bague inférieure à chaque jambe avec
écrou et un boulon de 5/16 po. pour chaque jambe.
Instructions de Montage pour Friteuse et Cuiseur à
Gaz LP pour Usage en Plein Air
LIRE ATTENTIVEMENT TOUTES LES MISES EN GARDE AVANT D’ASSEMBLER OU D’UTILISER
VOTRE RÉCHAUD. VÉRIFIER QUE LA BOÎTE CONTIENT TOUTES LES PIÈCES.
Montage du brûleur
sur réchaud simple
Montage des jambes du réchaud
Barre de support
du brûleur
Écrou et boulon de
5/16 po.
Écrou de 1/4
po. et boulons
Pare-flammes
Trou d’allumage
Écrou
POUR USAGE EXTÉRIEUR UNIQUEMENT / NE JAMAIS
LAISSER SANS SURVEILLANCE
Liste des pièces:
Réchaud, brûleur en fonte avec tuyau et robinet
régulateur, 3 jambes, bague inférieure. Sachet de boulons pour
jambes, récipient, couvercle, thermomètre, panier à crochet, crochet.
Venturi
3
Outdoor LP Gas Fryer / Boiler Assembly Instructions
READ ALL INSTRUCTIONS AND WARNINGS CAREFULLY BEFORE
ASSEMBLY OR OPERATION OF YOUR COOKER.
PLEASE CHECK CONTENTS OF BOX FOR ALL PARTS.
Burner Assembly to Cooker Stand
Burner and Hose Assembly
1. Remove nut from pre-assembled
burner regulator and hose. Place
burner onto burner mount bar in
center hole and secure with the nut.
1. Place air shutter onto the venturi.
2. Slide the small open end of the spring onto the threaded end of the hose.
3. Hold back on the spring and thread the hose into the end of the burner venturi.
Burner Mount Bar
Air Shutter
Hose
Nut
OUTDOOR USE ONLY / NEVER LEAVE UNATTENDED
Parts List:
Cooker Head, 3 Legs, Foot Ring, Cast Iron Burner with Hose and Regulator
and Hardware Pack
Spring
5/16” Nut and Bolt
1/4” Nut
and Bolts
Wind Shield
Cooker Leg
Wind Shield
Lighting Hole
Mounting Cooker Legs
1. Secure all 3 legs to the windshield first using 2- 1/4” nuts and
bolts per leg. ( Place legs inside wind shield as shown )
2. Secure bottom ring to each leg using a 5/16” nut and bolt
per leg.
3
 Loading...
