24 www.mastercool.com
COMMANDER4100-E*
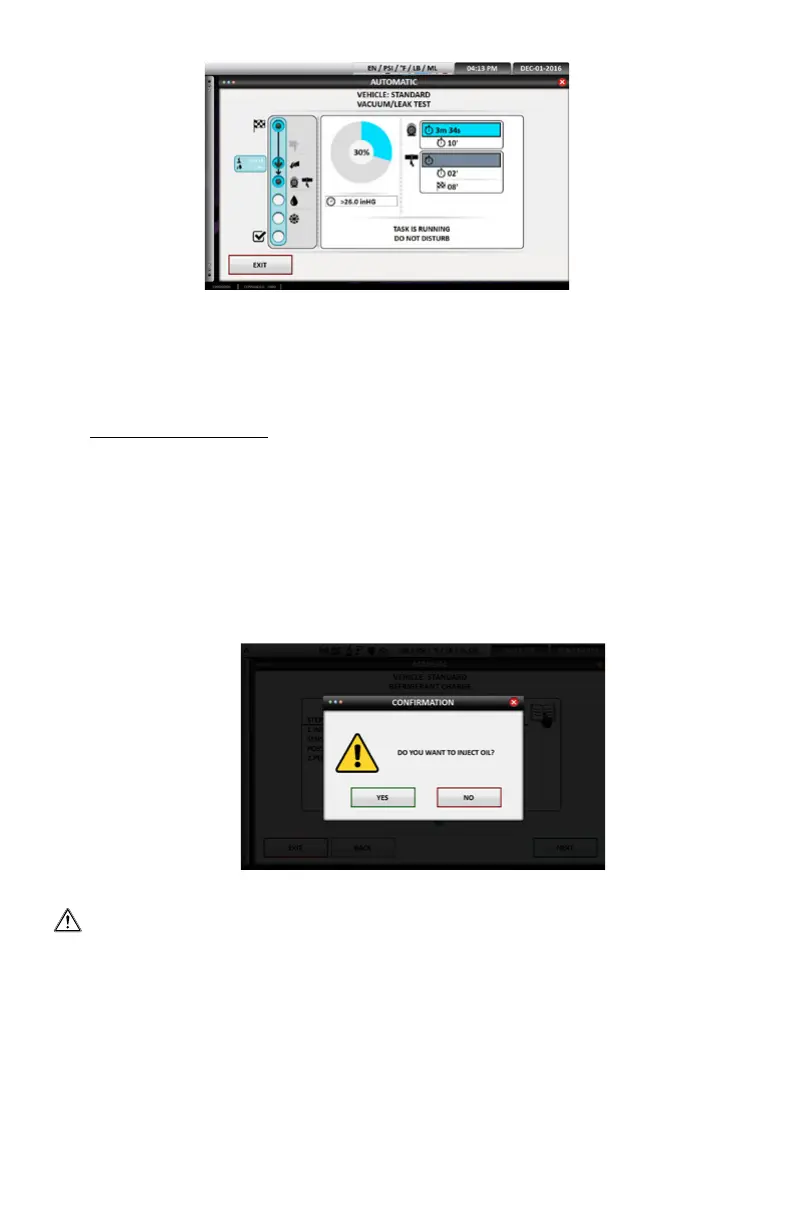
• Graphic and % of vacuum completed
• Time in minutes and seconds of completed vacuum
• Total vacuum time programmed
• Amount of vacuum leak test time if 10 minutes or more were programmed
• Current vacuum pressure
Automatic Leak Check Passed
• The screen display will go back to blue and continue with remaining vacuum time programmed if
vacuum leak test is passed.
• If the vacuum leak test failed, LEAK TEST FAILED will be displayed. The machine will terminate the
automatic process and return to the main screen.
1. Turn the red and blue couplers counterclockwise and disconnect them.
2. Find the leak and repair the system.
3. If refrigerant was used to find the leak, perform automatic or manual procedure
again to remove any refrigerant in system. Repair the leaks
4. Perform vacuum and vacuum leak check again.
After vacuum leak check is passed, automatic charge will be displayed.
Oil Injection
• DO NOT INJECT OIL AFTER THE VACUUM PROCESS
• DAMAGE TO THE IDENTIFIER MAY OCCUR
• WHEN USING AUTOMATIC OR MANUAL PROCEDURE, PLEASE FOLLOW THESE INSTRUCTIONS FOR OIL
INJECTION
1. Start the charge process
2. Let the machine run the vacuum and decay process
3. Let the machine charge 15%
4. Check for evaporator leaks
5. Check for rear evaporator leaks
6. Before the “next” button is pressed
7. Disconnect the low side coupler and inject the oil
8. Re-attach the low side coupler
 Loading...