AC Current Measurment (AC/DC)
1. Set the function/range switch to the AC/DC position.,and Push the Select
pushbutton onceor twice, until “AC” appears in LCD
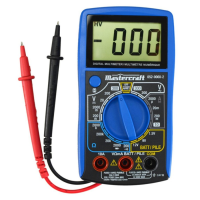
2. Insert the black (negative) test lead into the "COM" jack and the red (positive)
test lead into the mA/µA TEMP jack. For current measurements from 400 ma
to 10 A, insert the red test lead into the 10 A jack. Set the function switch to
10 A. NOTE: The multimeter will be in auto-ranging.
3. Remove power from the circuit under test. Then open up the circuit at the point
where you wish to measure current.
4. Touch the black lead tips to the negative side of the circuit. Touch the red test
lead tips to the positive side of the circuit.
5. Apply power to the circuit.
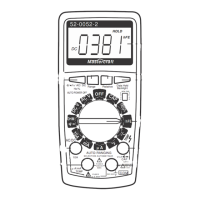
6. The value and polarity of the current will appear on the LCD.
CAUTION: Never apply the voltage over 400 mA or 10 A to the corresponding
jack. Never connect test leads with circuit when changing the position of the
function switch. Do not make current measurements on the 10 A scale for longer
than 15 seconds every 30 minutes. Exceeding 15 seconds may cause damage
to the multimeter and/or test leads.
Resistance Measurment (Ω)
1. Set the function/range switch to the OHM / position.
2. Insert the black (negative) test lead into the "COM" jack and the red (positive)
test lead into the V/Ω/F/ / jack.
3. Press the / button until OL and M½ appear on the LCD.
4. Touch the test lead tips across the resistor under test, read the value on the
LCD. If the resistor is part of the circuit, it is necessary to disconnect one end
of the resistor to avoid the unwanted interference from the rest circuit. NOTE:
The multimeter will be in auto-ranging.
CAUTION: Never measure a resistor that has voltage on it.
Diode Test
1. Set the function/range switch to the OHM / position.
2. Insert the black (negative) test lead into the "COM" jack and the red (positive)
test lead into the V/Ω/F/ / jack.
3. Press the / button until OL and ½ appear on the LCD.
4. Touch the test lead tips across the diode under test, read the value on the LCD.
5. Reverse the test leads' positions across the diode and read the value.
6. The results may be as follows: If one reading is around 0.5 and the other reading
is OL, the diode is good; if both readings are OL, the dilde is open; if both readings
are 0 or a very small number, the diode is shorted-out. (If the diode is part of
the circuit, it is necessary to disconnect one end of the diode to avoid the
unwanted interference from the rest of the circuit).
CAUTION: Never measure a device that has voltage on it.
7