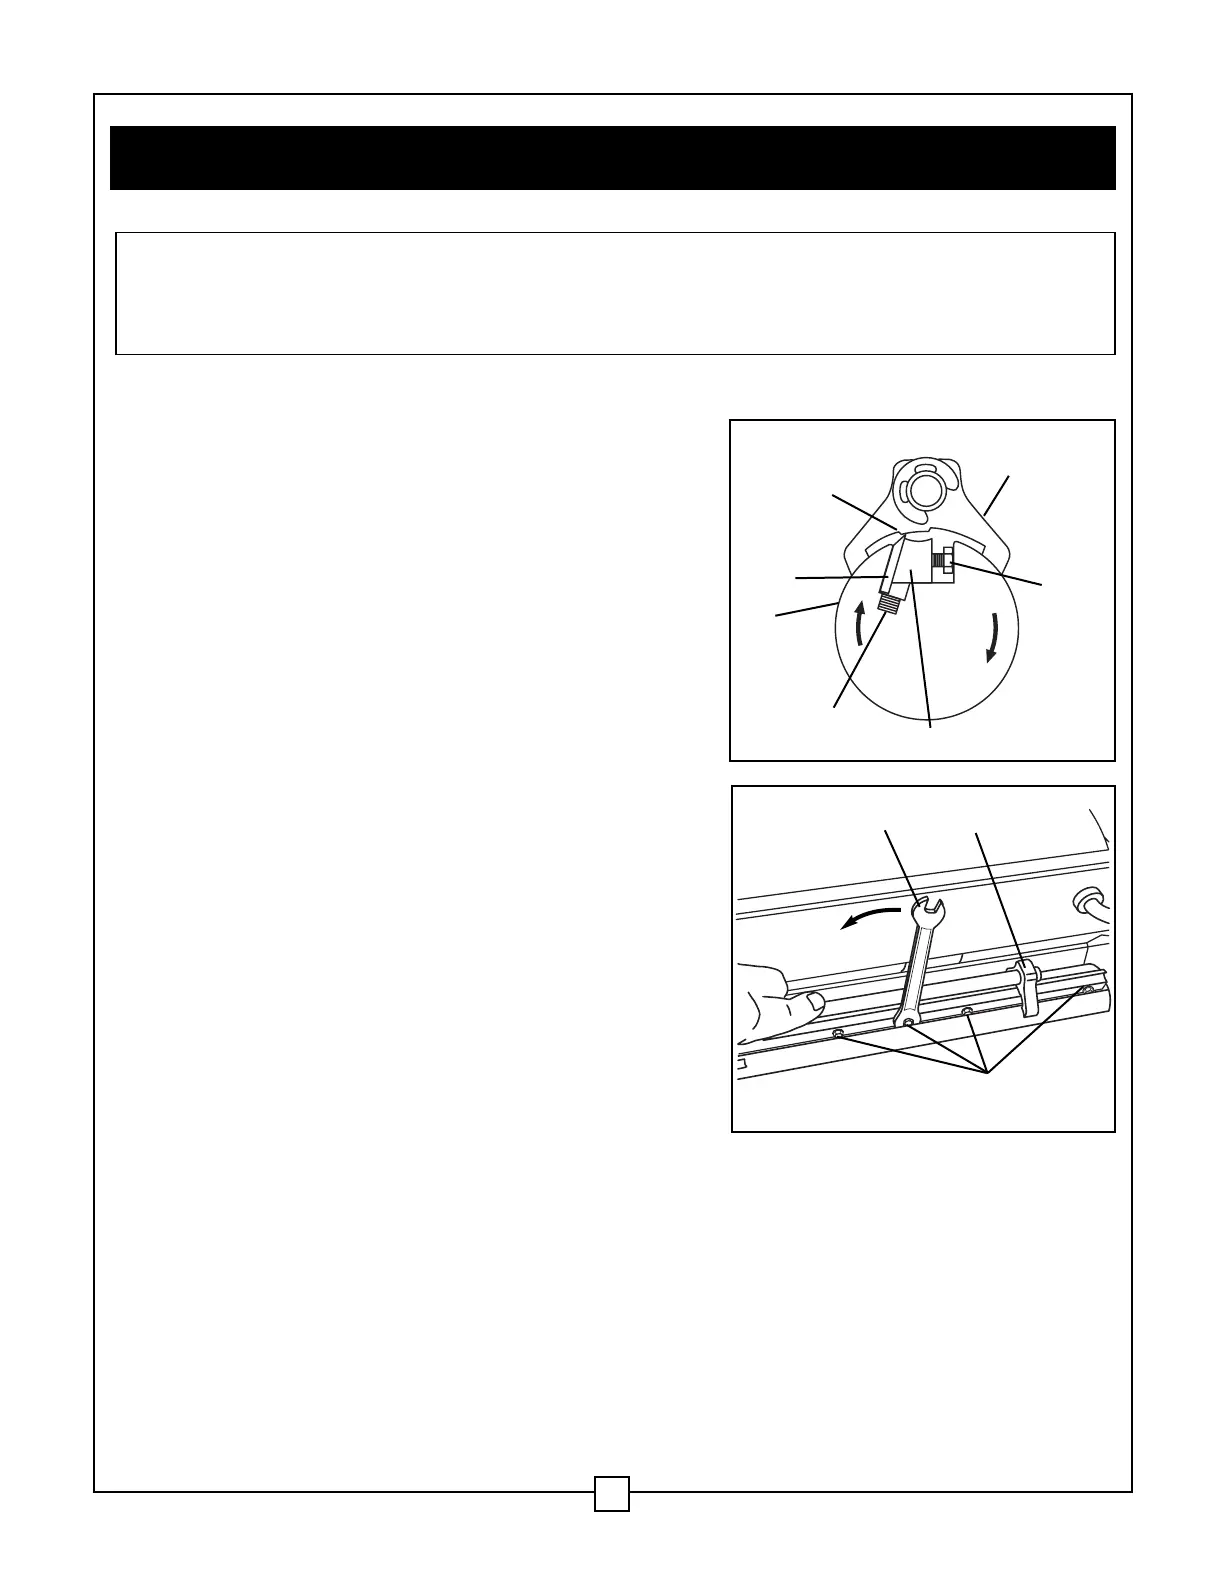
Knife installation (Fig. 15 and 16)
1. Clean knives regularly. Gum and pitch collects on
knives, and causes excess friction during operation.
Knives will overheat and wear. Remove knives to
clean. Use a gum and pitch remover.
2. Carefully place the knife (1) back in the cutter
head (2). Make sure the springs (3) are in place.
The knife must be installed as shown in Fig. 14.
3. Place the knife depth/alignment tool (4) on the cutter
head, as shown in Fig. 15, with the lobe (5) making
contact with the edge of the knife.
4. Apply light pressure to the knife depth/alignment
tool (4) and make sure the knife and knife
anchor (6) are centred in the cutter head.
Note: The knives and the knife anchors must be
centred in the cutter head. If the knives and anchors
are not centred in the cutter head, they will rub
against the cutter head carrier and planer damage
will result.
5. While applying light pressure to the knife
depth/alignment tool (4), tighten the anchor
screws (7) by turning in a counter-clockwise
direction (8) alternately from one side to the other,
starting from the outside and working toward the
inside. Repeat these steps for the second knife.
6. Reinstall the guard and the cover. Use care when
installing the planer cover, and make sure the
measurement scale is outside of the cover.
7. Clean the exterior of the planer with a clean dry rag.
Apply a light coat of paste wax in order to ease
cleaning and reduce dust build-up.
WARNING: TURN THE POWER SWITCH TO THE OFF POSITION AND UNPLUG THE
POWER CORD FROM THE POWER SOURCE BEFORE ADJUSTING, MAINTAINING,
CLEANING, OR LUBRICATING THE PLANER. USE CARE WHEN HANDLING THE
KNIVES. THE CUTTING EDGE CAN BE VERY SHARP.
VIII. Maintenance (continued)
20
Fig. 15
Fig. 16
8
4
7
1
2
4
5
3
6
7


 To Next Page