Replacing cutter head knives and cleaning
Change one knife at a time. Take note of the orientation
of the knife and the knife anchor. Make sure the springs
below the knife stay in place when you remove and
install the knife.
Inspect the feed rollers after every use. Resin and tar
will build up. Use a non-flammable tar and pitch remover
solvent to clean the rollers.
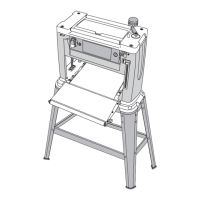
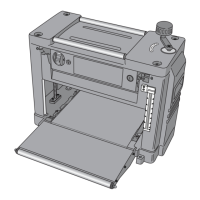
Cutter head guard (Figs. 12 and 13)
1. Turn the thickness planer OFF and unplug it.
2. Rotate the cutter head depth adjustment handle (1)
to raise cutter head to the highest position.
3. Remove the cutter head depth adjustment
handle (1).
4. Remove the 4 cover screws (2) using the hex key
supplied.
5. Remove the cover (3).
6. Remove the 2 hex bolts and washers (4) that
secure the dust chute (5).
7. Use a clean dry rag to wipe away any build-up of
debris from underneath cover and the guard. Use
penetrating oil to clean all moving parts and the
depth adjustment screws. Apply a light coat of
medium weight oil after clean-up. Apply a light coat
of paste wax to the table and in-feed and out-feed
surfaces. Do not use too much wax; it can hinder
the planing and staining of your workpiece.
Knife removal (Fig. 13 and 14)
1. Rotate the cutter head at the pulley (6) so that one
knife is facing up.
2. Loosen the knife anchor screws (7) by turning the
screws in a clockwise direction (8).
3. Carefully remove the knife.
WARNING: TURN THE POWER SWITCH TO THE OFF POSITION AND UNPLUG THE
POWER CORD FROM THE POWER SOURCE BEFORE ADJUSTING, MAINTAINING,
CLEANING, OR LUBRICATING THE THICKNESS PLANER. USE CARE WHEN
HANDLING THE KNIVES. THE CUTTING EDGE CAN BE VERY SHARP.
VIII. Maintenance
19
Fig. 12
Fig. 13
1
3
4
5
6
2
2
Fig. 14
8
7