16
OPERATING INSTRUCTIONS
Grinding
•Adjustthetoolresttoaccommodatelargeorunusuallyshapedworkpieces.
•Alwayskeeptheworkpiecemovingacrossthefaceofthegrindingwheel.Grinding
continuously on the same spot on the wheel will cause grooves to be worn into the
wheel. The wheel may crack or become damaged more easily, and grinding of other
objects will be difficult.
•Iftheworkpiecebecomeshot,dipitintowateroroiltocoolit.
•Alwaysgrindonthefaceofthewheel(aroundthediameter),NEVERonthesides.
Side pressure on grinding wheels can cause cracking and damage.
•Ifthefaceofthegrindingwheeliswornunevenly,becomesgrooved,orisnolonger
smooth and flat, the wheel should be reshaped with a dressing tool (not supplied).
•Ifthegrindingwheelisnolongerround,thewheelshouldbereshapedwithadressing
tool or replaced.
•Ifthesurfaceofthewheelbecomesloadedanddullwithworkpiecematerial,the
wheel should be cleaned with a dressing tool.
•Afterreshaping,alwaysreadjustthetoolrestsandsparkarrestors.
TWIST DRILL BITS
Drill bits are best sharpened on a
sharpening jig, available at most
hardware stores, but can be “dressed
up” on your grinder. Begin on one
side of the point at the existing angle,
then twist the bit while maintaining a
constant angle with grinding surface.
Sharpen only the tip. This technique
requires considerable practice, so
take your time and make a few “dry
runs” first with the grinder off. Be
sure to maintain the original cutting
edge angle as this is important to
the efficiency of your bits. One tool
rest has a V-groove that is correctly
angled for most drill bits.
COOLANT TRAY
When grinding, metal objects
become heated quickly. It is
important to keep moving the object
back and forth across the face of the
grinding wheel and to cool the object
frequently using the coolant tray.
ON
OFF
L
H
1
model no. 055-3503-6 | contact us 1-800-689-9928
17
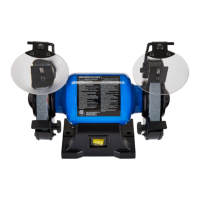
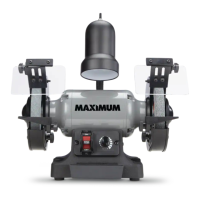
MAINTENANCE
Maintenance
Installing or Changing the Wheel
1. Raise the eye shield (1) out of the way
and place the spark guard (6) in its
highest setting.
2. Loosen the knob (2) and remove the
tool rest assembly (3) and carriage bolt
(4).
3. Remove the two screws (5) from the
left side wheel cover and then remove
the outer cover.
ON
OFF
L
H
1
2
3
4
5
6
4. To prevent wheel rotating, place a wood
wedge (1) (not supplied) between the
wheel and the wheel cover as shown.
Remove the hex nut (2) (as shown in right
fig.
CAUTION!
Turn off and unplug the bench grinder. Use only grinding wheels that measure
6" (150 mm) in diameter. This tool has 1/2" (12.7 mm) arbours on both sides.
NOTE:
Using a metal object, like a screwdriver,
is not recommended as it may damage the
grinding wheel.
Maintenance Required Frequency
Check power cord Before each use
Check wheels for cracks Before each use
Check moving parts for alignment and binding issues Before each use
Dress grinding wheels As needed
Replace grinding wheels (see manual section for specifics) As needed
Clean and vacuum dust from the motor housing and other
grinder parts
As needed
Replace work-light bulb As needed
Service beyond recommended maintenance on these tools should only be
performed by an authorized, qualified technician.
 Loading...