model no. 054-7281-0 | contact us 1-800-689-9928
14
model no. 054-7281-0 | contact us 1-800-689-9928
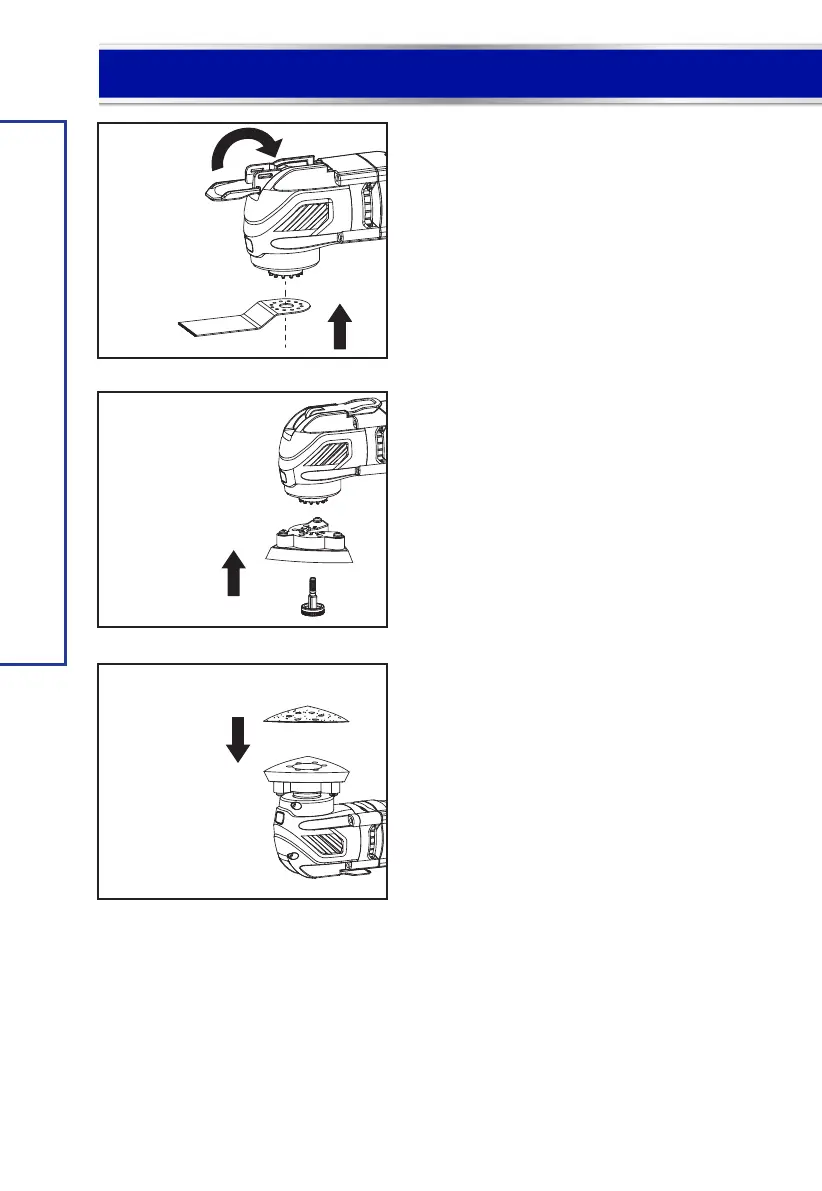
2) Insert the flush-cutting blade onto the accessory interface
(6), (if necessary, re-insert the flange) then press down on the
flange with a finger to keep the blade temporarily secure. Flip
the lever (1) back down to the seated position to secure the
accessory. (See Fig. C)
MOUNTING/CHANGING THE SANDPAPER (See Fig.
D, E)
2a) Flip the tool-less blade change lever (1) forward to the
open position to loosen the flange (7). Remove the flush-
cutting blade. Insert the detail sanding base (12) onto the
accessory interface (6), (if necessary, re-insert the flange) then
press down the flange with a finger to keep the accessory
temporarily secure. Flip the lever (1) back down to the seated
position to secure the accessory.
2b) Place the sandpaper directly onto the base plate and align
the holes of the perforated sandpaper with the slots of the
perforated detail sanding base. Press the sheet onto the detail
sanding base. Firmly press the multi-crafter with the installed
sandpaper against a flat surface and briefly switch the
power tool on. This provides for good adhesion and prevents
premature wear. If one point has become worn after use, pull
off the sandpaper, turn it 120°, and re-install.
OPERATING INSTRUCTIONS
Fig. C
Fig. D
Fig. E
Fig. F
Fig. G
Fig. H
Fig. B1
1
2
1
2
1
2