Page 8
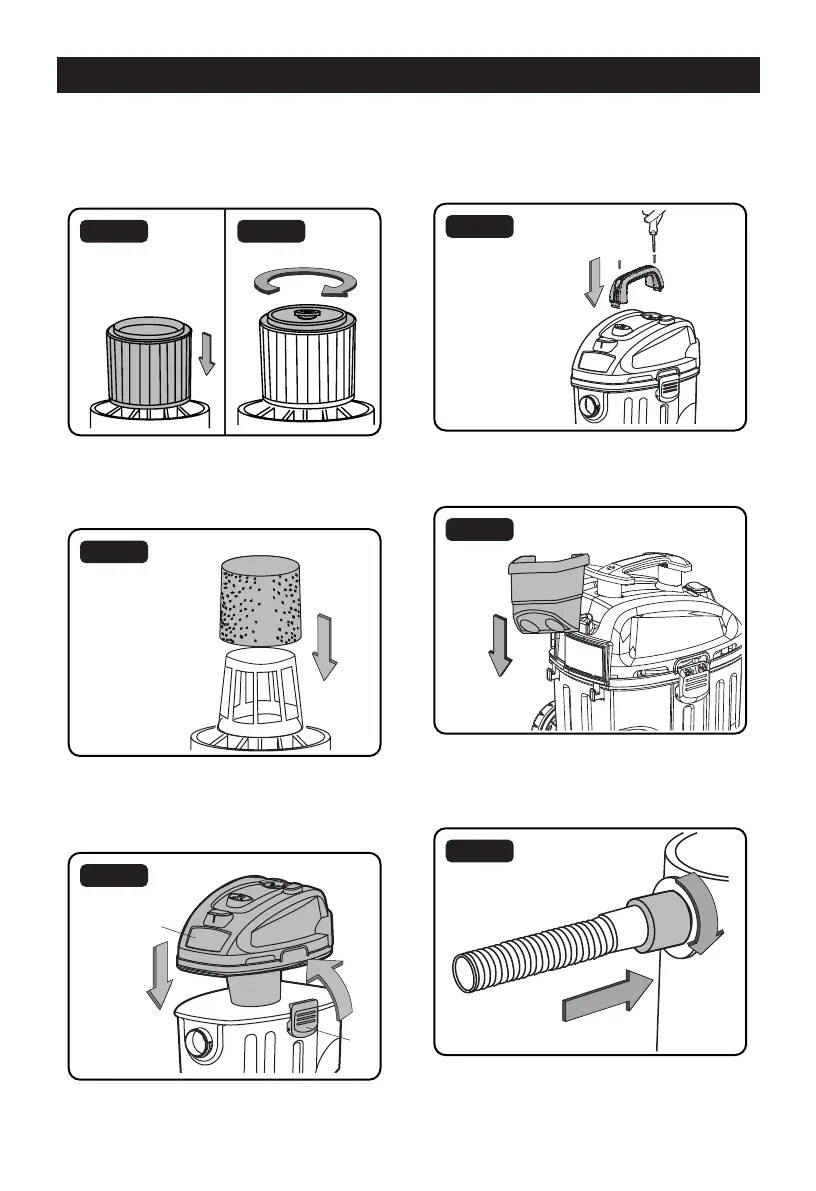
7. Your vacuum comes ready for dry vacuum
cleaning. If cartridge filter is not installed
refer to page 15 for filter installation
(Fig. 8 & 9).
Fig. 8 Fig. 9
8. For wet vacuum cleaning, install the
supplied foam wet filter (Fig. 10). See page
17 for filter installation.
Fig. 10
9. Place the power head back on the
collection tank, aligning the top section with
the latches, and lock into place (Fig. 11).
Fig. 11
10. Insert the handle into the slots located on
the top of the power head and secure it with
the screws provided. Do not overtighten the
screws (Fig. 12).
Fig. 12
11. Hang the tool caddy on the hooks on the
rear of the vacuum (Fig. 13).
Fig. 13
12. Secure the large end of the hose onto the
vacuum port on the collection tank and
screw into place (Fig. 14).
Fig. 14
GENERAL ASSEMBLY INSTRUCTIONS