Page 8
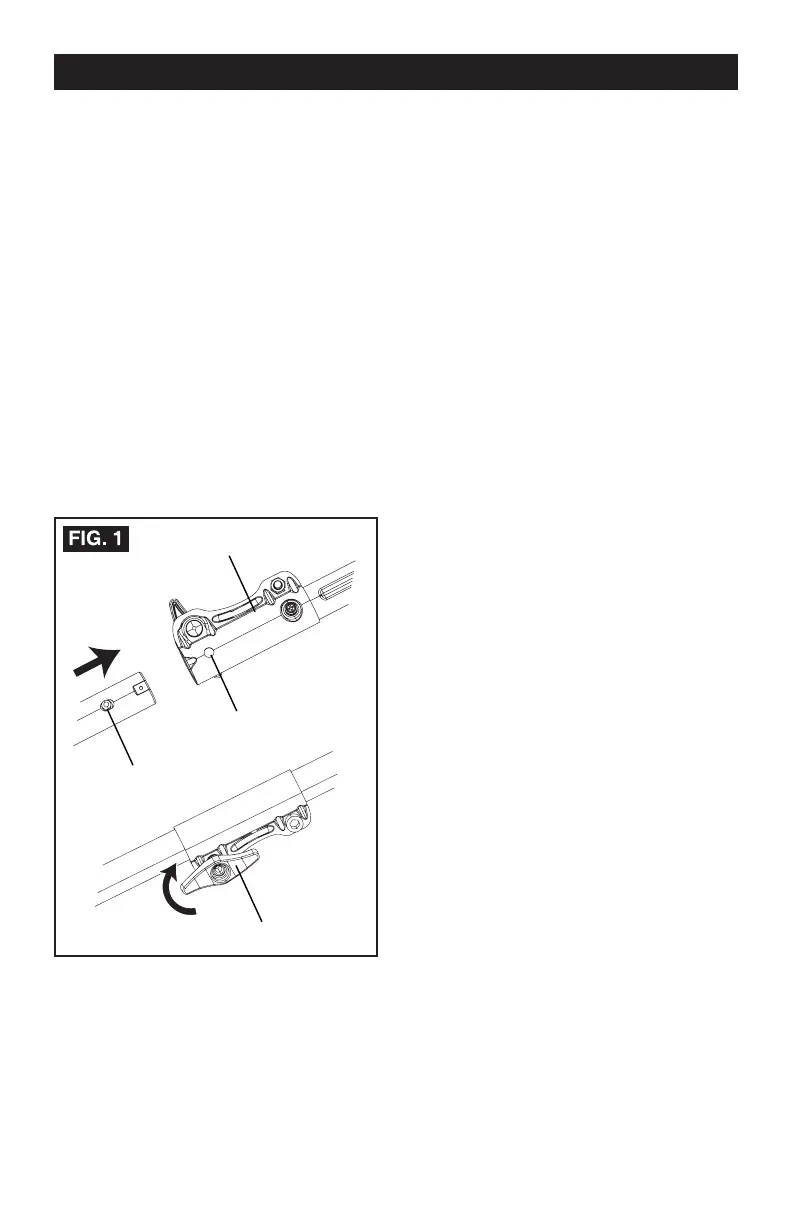
locks into the positioning hole.
NOTE:
If the button does not release
completely in the positioning hole, the shafts
are not locked into place. Slightly rotate from
side to side until the button is locked into
place.
5. Tighten the attachment knob securely.
To remove the attachment from the power
head
For removing or changing the attachment:
1. Stop the power head.
2. Remove the battery from the power head.
3. Loosen the attachment knob.
4. Push in the release button and twist the
shafts to remove and seperate ends.
UNPACKING
This product requires assembly.
• Carefully remove the product and any
accessories from the box.
• Inspect the product carefully to make sure
no breakage or damage occurred during
shipping.
• Do not discard the packing material
until you have carefully inspected and
satisfactorily operated the product.
• If any parts are damaged or missing, please
call 1-844-MSTR4CE (844-678-7423) for
assistance.
ASSEMBLE THE SHAFT
To install the attachment to the power
head
The attachment connects to the power head
by means of a coupler device.
1. Loosen the attachment knob on the coupler.
2. Push in the release button located on the
attachment shaft.
3. Align the button with the guide recess on
the power head coupler and slide the two
shafts together.
4. Rotate the attachment shaft until the button
ASSEMBLY
Release button
Coupler
Guide recess
Knob