3
P u t you r s a f e t y g la s s e s.
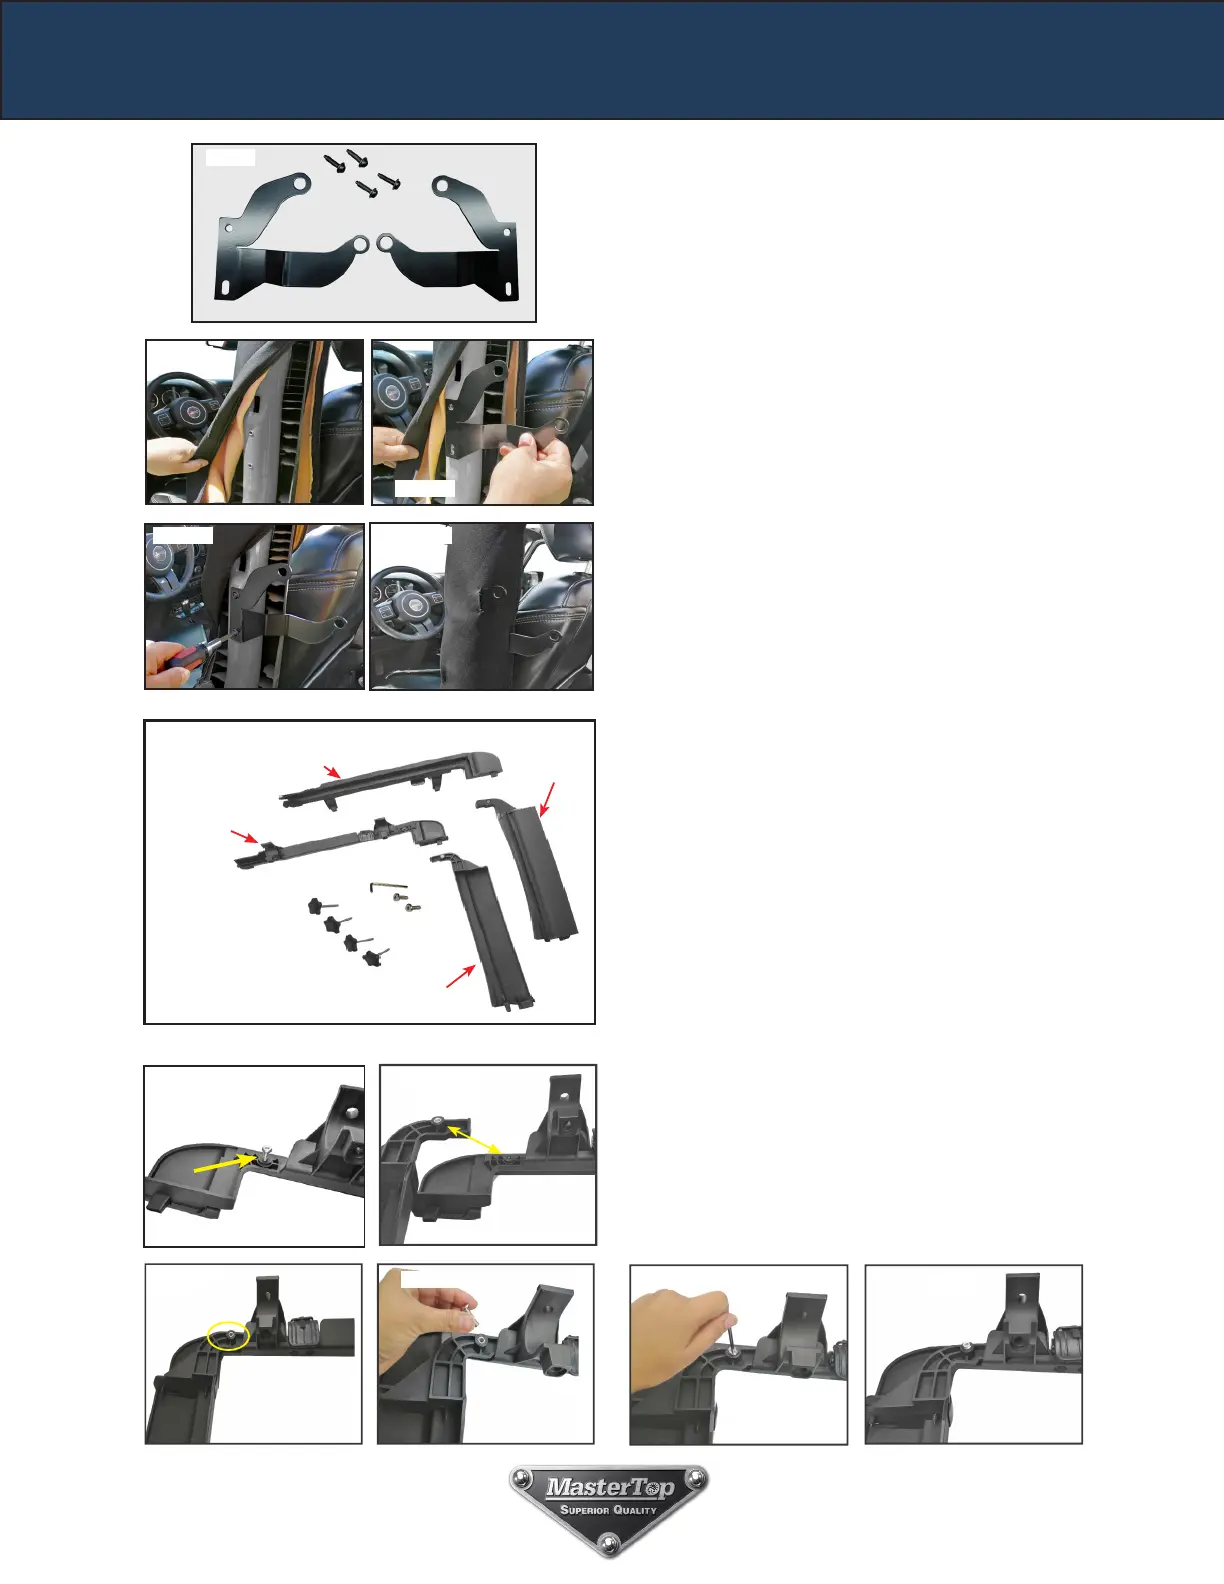
Locate the (2) bow mounting brackets and (4) Torx
head pivot bracket bolts shown in FIG 9. Carefully
unzip the roll bar padding on the vertical side tube
to expose the two factory holes in the roll bar (FIG
10 ) .
Place the bow mounting brackets over the factory
holes making sure the bracket is right side up as
shown in FIG 11 and using the T-30 Torx head
pivot bracket bolts, install brackets to the roll bar
(FIG12).
Step 1: Install Bow Mount Brackets to Roll
Slip the roll bar padding back over the installed
brackets carefully slipping the bracket mounts
through the slits in the roll bar padding (FIG 13).
Repeat on passenger side.
FIG 9
FIG 10
FIG 11
FIG 12
FIG 13
Step 2: Door Surrounds Assembly
Passenger Side
Over Door Assembly
Passenger Side
Pillar Assembly
Driver Side
Over Door Assembly
Driver Side
Pillar Assembly
Knobs
Locate the driver’s side rear over door assem-
bly and the driver’s side pillar assembly shown in
FIG14.
In the driver’s side rear over door assembly, there
is a screw, installed for shipping (Fig 15). Remove
this screw and set aside. Line up the Driver’s side
Rear over door assembly and the driver’s side pillar
assembly as shown in Fig 16 & 17 making sure the
holes line up. Insert the screw over the top of the
hole as shown in Fig 18. Tighten this screw using
the enclosed 4mm allen head tool securing the two
pieces (Fig 19 & 20).
Repeat this procedure on the other side.
FIG 14
FIG 16FIG 15
FIG 18
FIG 17
FIG 19 FIG 20
JK Soft Top Hardware Installation
 Loading...