5
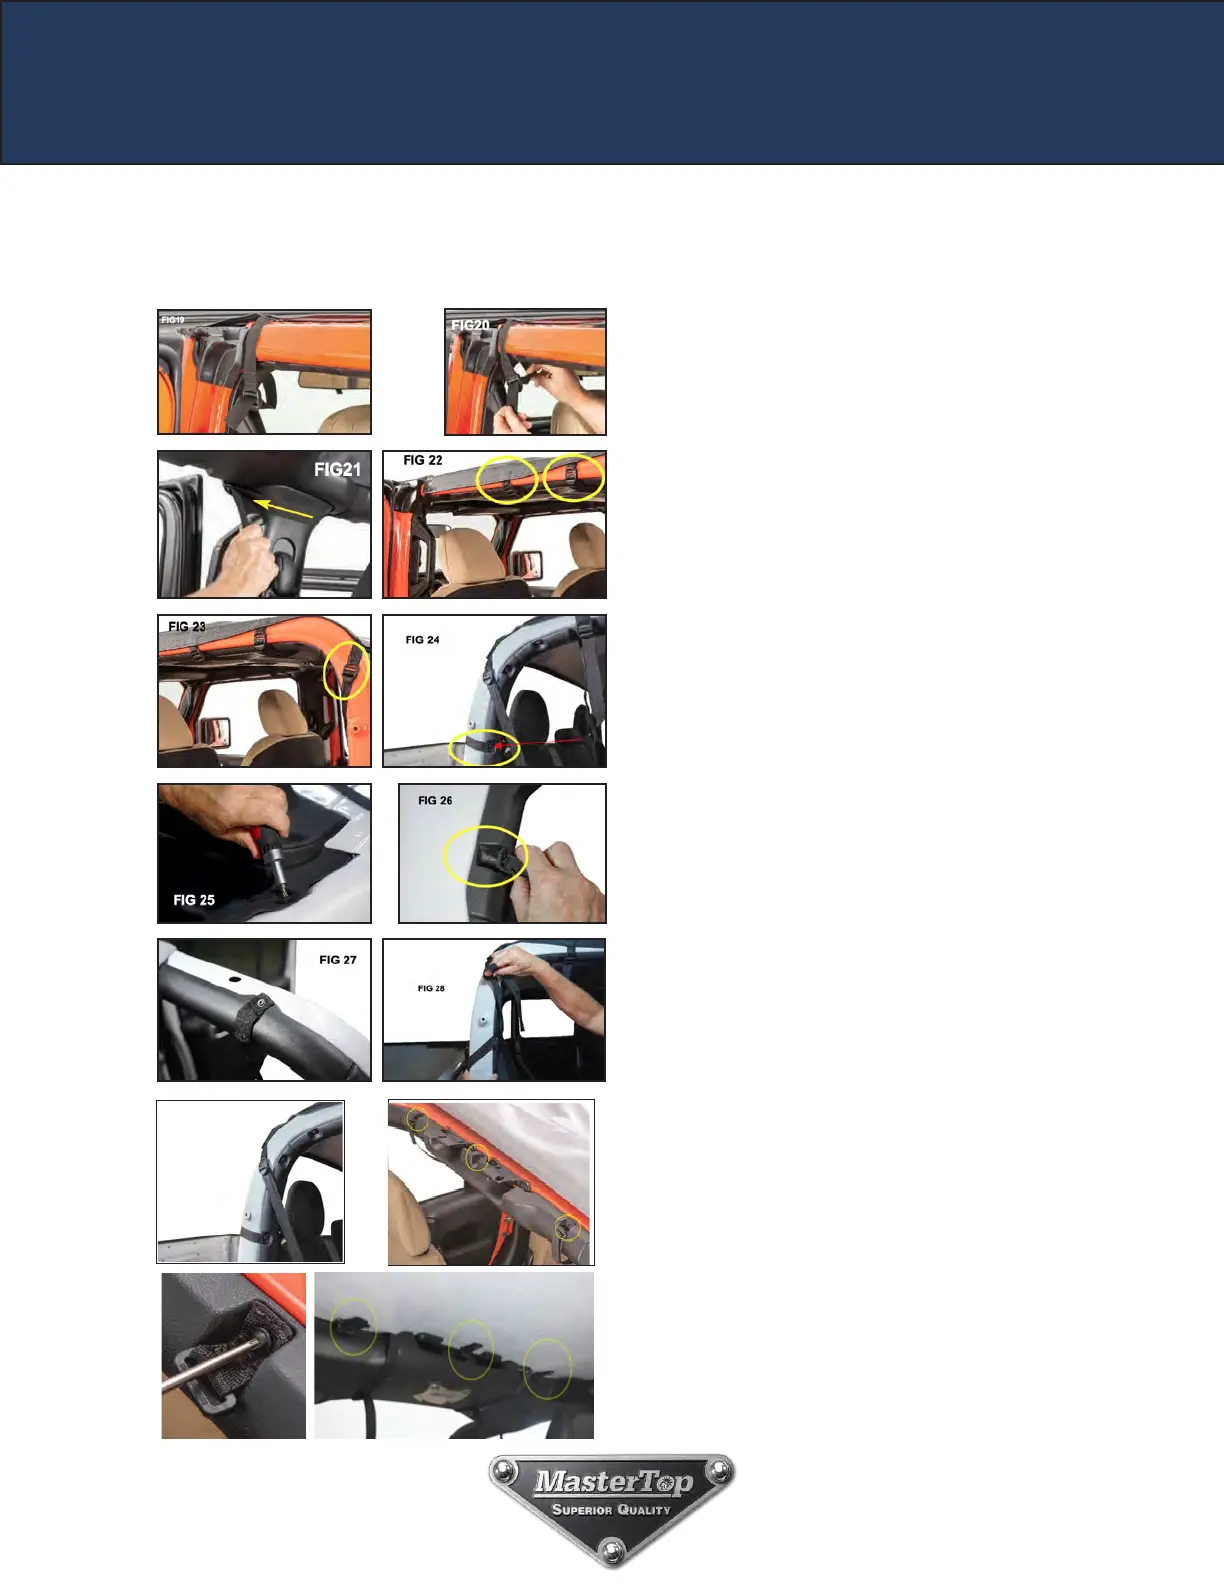
Installation of Bimini Top:
Step 6: Attach the Two Front B-Pillar Straps
With the back of the top resting on the rear roll bar,
locate the B-Pillar straps located just behind the front
door (FIGs 19 & 20).
With the rear door open, wrap the strap down and
around the inside of the B-Pillar and attach the strap
to the buckle as shown (FIGs 20 & 21).
Repeat on the other side of the vehicle. Tighten these
straps.
Step 7: Attach the Two Center Rear Straps Locate
the two Center rear straps as circled in FIG 22. Wrap
the straps around the roll bar and attach it to the
buckles installed on the top. Repeat on the other side
and tighten these straps starting on one side and then
to the other to ensure the top is cente-red.
Step 8: Attach the Back Two Rear Corner Straps
Locate the rear corner strap as shown in Fig 23.
These straps will go around the roll bar and attach
back to a factory mounting point on the lower portion
of the roll bar (FIG 24). Using a T25 Torx Driver and
bit (found on the on-board tool kit) remove the original
screw, slip the screw through the Buckle strap and re-
attach the screw (Fig 24, 25, 26 & 27). Pull the rear
corner strap up and around the inside of the roll bar
(Fig 28) and attach the strap to the buckle (Fig 29).
Repeat on other side and cinch these corner straps
tight.
Step 8A: Attach the Three D-Ring Attachments to
Sound bar Locate the three D-Ring straps. Go inside
the vehicle and on the inside of the B pillar there are
three Torx screw attachments that hold the plastic
moldings to the B-Pillar as circled in FIG 29A.
Using a T25 (from your on-board Torx tool kit) remove
these screws and place the screw through the
webbing hole in the D-Ring strap. Re-install (FIG29B)
the screws to the B-Pillar. On the underside of the
Bimini top are three Hook and Loop straps. Attach
these straps to the three D-rings you Just installed
(Fig 29C). Pull these straps tight and secure the hook
and loop. Tighten all straps to take out wrinkles and
to keep the top from Flapping. See page 7 for Bimini
Top Plus Adjustments and Care & Maintenance.
FIG 29
Your Bimini Top Plus is now Installed
FIG 29A
FIG 29B
FIG 29C