6
Installation of the Optional Gladiator Wind Stopper:
The MasterTop Wind Stopper is designed to work in tandem with the Bimini Top Plus. For the Wind Stopper
to attach correctly to the Bimini Top Plus, you must buy these two components as the kit part
#
148507XX.
The Bimini Top Plus included in this kit has a strip of hook and loop fastener attached to the rear of the Bimini
Top Plus:
The Wind Stopper straps are designed to fit over the Bimini Top Plus
straps as shown to the left. The rear window can be un-zipped and folded
down inside the vehicle behind the rear seat (See left).
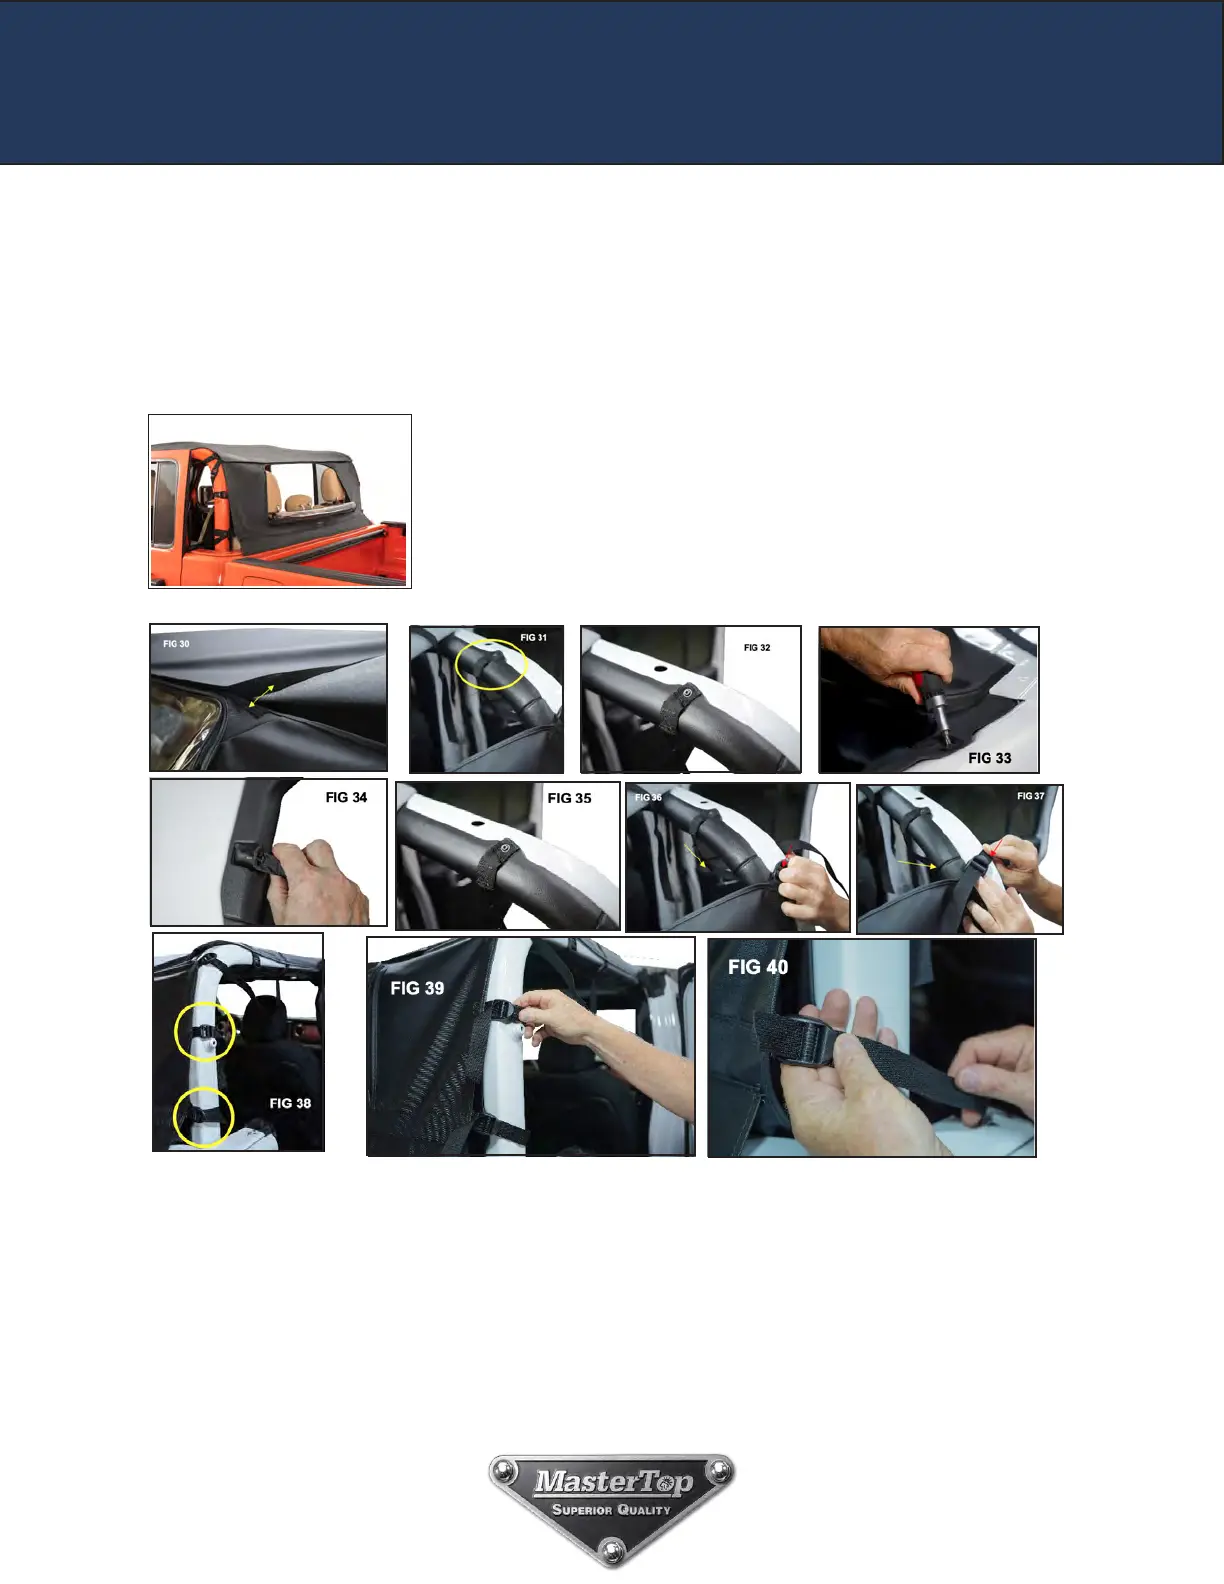
Step 1: Attach the Wind Stopper to the Roll Bar
For ease of install, find the center of the Wind Stopper and attach it to
the center of the Bimini Plus hook and loop strip. Keep the edges of the
hook and loop un-hooked. This will hold the Wind Stopper up while you
attach the side straps (FIG 30).
Locate the factory mounting point circled in FIG 31. As you did in step 8 of the Bimini Plus install, remove
the factory Torx head screw with the T25 driver and bit, place the screw through the corner strap and secure
the screw back in the roll bar (FIG’s 33, 34 & 35). Wrap the secured strap under the roll bar and back
around as shown in FIG 36. Attach the strap to the buckle (FIG 37). Repeat this on the other side securing
the Wind Stopper in place.With the Wind Stopper secured at the top two corners, locate the two side straps
as shown in FIG 38. Attach these straps around the Roll Bar and loosely tighten (FIG’s 39 & 40). Repeat on
the other side tightening the straps from one side to the other to make sure the Wind Stopper is centered.