7
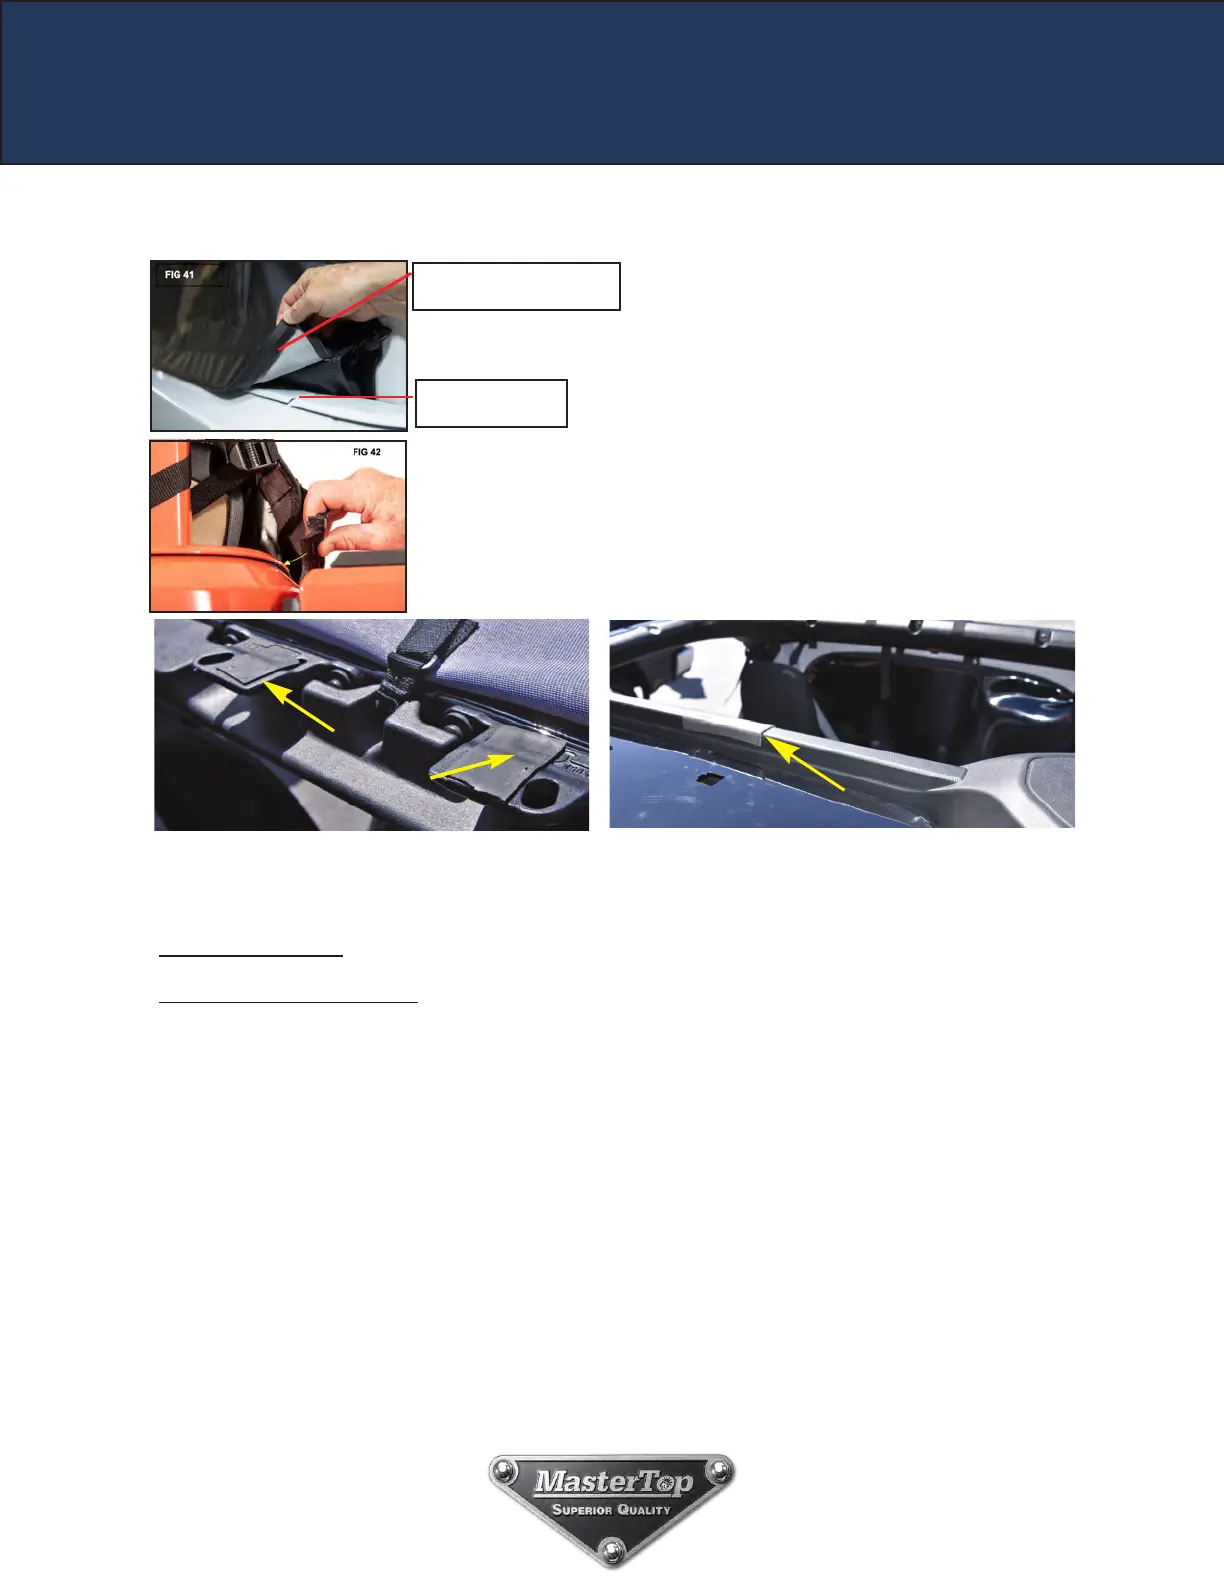
Step 2: Attach the Wind Stopper to the Truck Bed
Belt Rail on back
of truck bed
Plastic strip sewn into
Wind Stopper
Locate the plastic strip sewn into the bottom of the Wind
Stopper. This strip will be inserted into the “lip” located on the
back of the truck bed. This “lip” is called a belt rail (FIG 41).
Attach the top Hook and Loop strip all the way across the
back of the Bimini Plus securing the Wind Stopper to the
Bimini Plus. Slip the Plastic strip into the belt rail all the way
across the back of the truck bed (FIG 42). Once inserted,
tighten all side and top straps while making sure the Wind
Stopper is centered between the roll bars.
The Wind Stopper and Bimini Plus Combo is now
installed. Please see below for Bimini Top Plus
Adjustments and Care & Maintenance Tips
Care and Maintenance of your MasterTop
ShadeMaker™ Bimini Plus Top:
Your MasterTop ShadeMaker Bimini Top or Bimini Top Plus is made of the nest materials available but to
keep it looking new and for the maximum possible wear, it will need periodic cleaning and basic maintenance.
The main threat to your soft top is pollutants, dirt and grime. By keeping your top clean you will prolong the life
of your top.
We recommend the following to keep your top like new:
Washing:
The top fabric should be washed often using a mild soap, warm water and a soft bristle brush. You can also
use special soft top cleaners available on our Distributors websites. Make sure that after cleaning you rinse
with clear water to remove all traces of soap to avoid residue. Hang to dry, do not put a Top in a clothes dryer.
For more information on MasterTop:
This and other helpful product information is available on www.mastertop.com
Please visit our website frequently for product updates and exciting news.
Using/Adjusting your Bimini Plus Top:
Your Bimini Top Plus is designed to fit tight but due to wind currents at several different speeds, you may
experience a “slapping sound”. The best way to eliminate that sound is to make sure the top is tight and by
using the included adhesive backed foam on those spots that are the most susceptible to the flapping:
For Hard Top Owners:
On the flat Freedom panel mounts Located behind the front seats on the Sound bar (FIG43)
For Hard and Soft Top Owners:
On the top edge of the Sound bar (FIG 44)
FIG 43
FIG 44
 Loading...