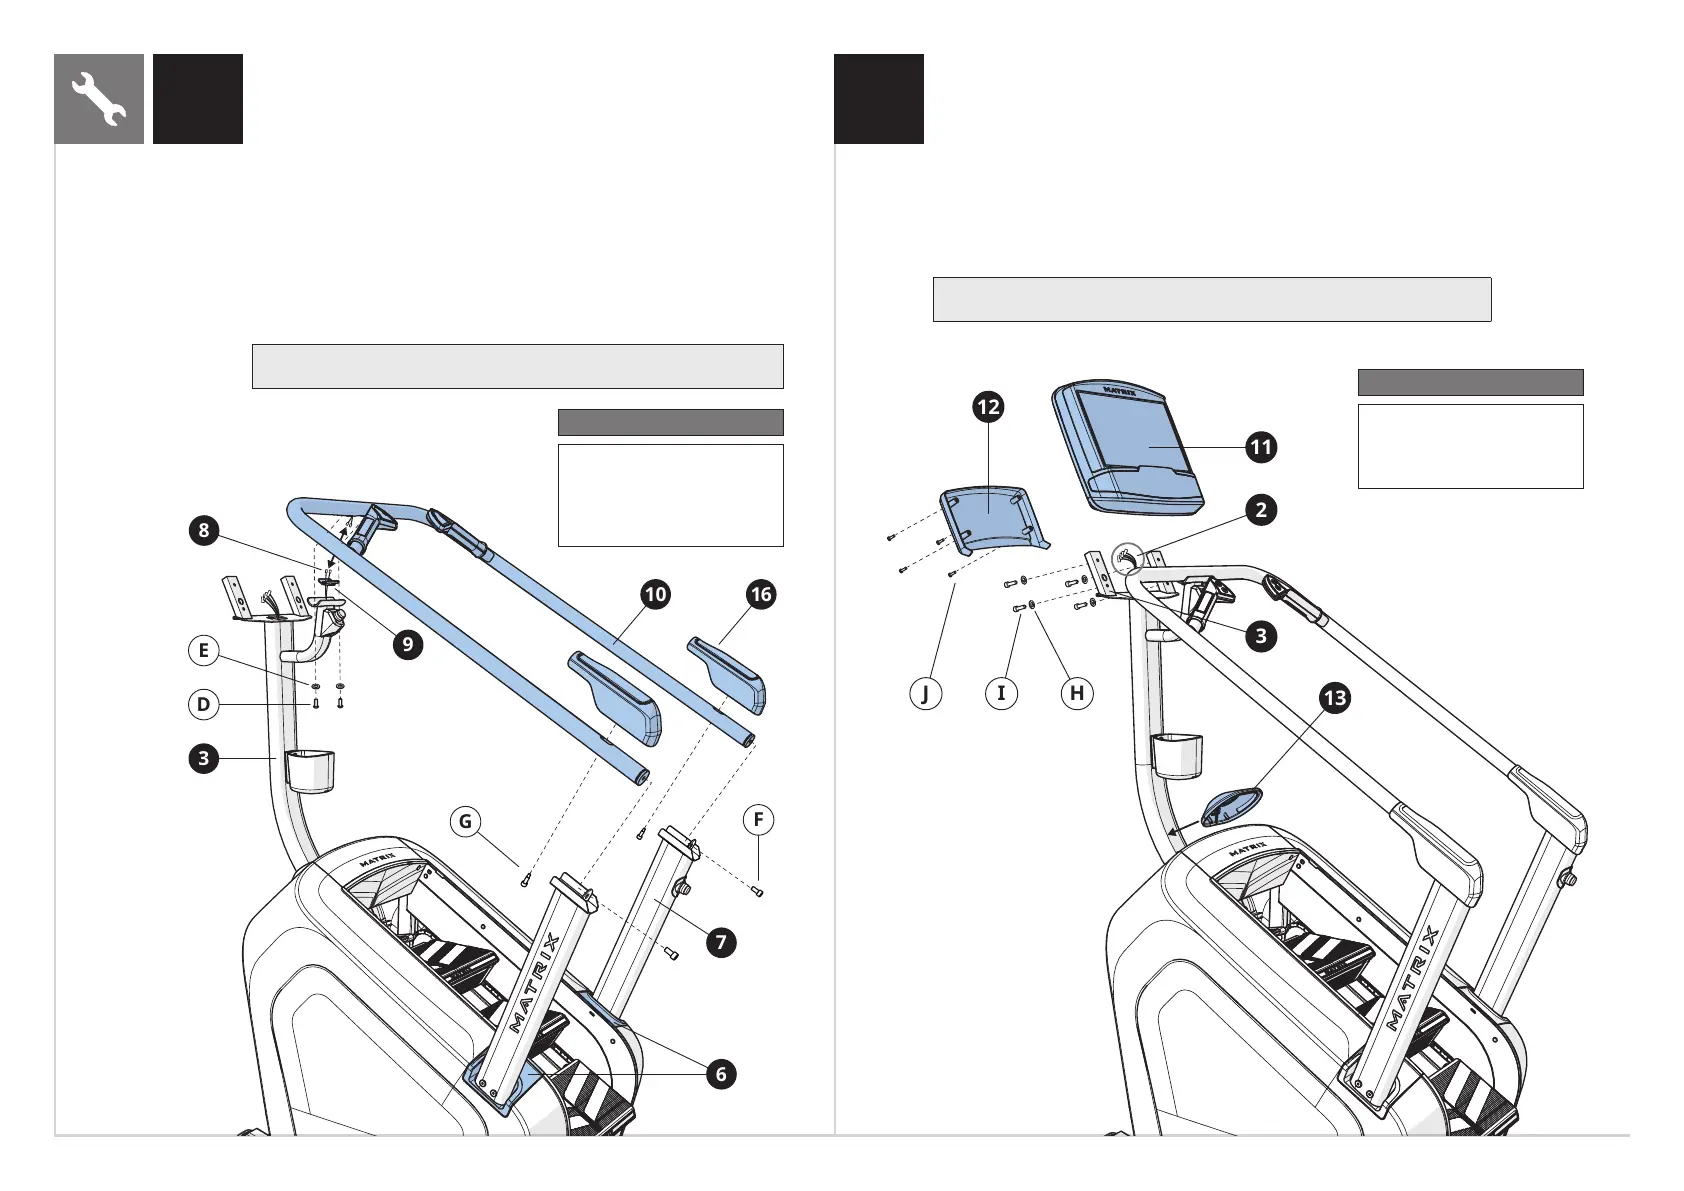
6
3 4
Hardware For Step 3
Description Qty
D
E
F
G
Button Head Bolt
Arc Washer
Bolt
Guide Bolt
2
2
2
2
ENGLISH
• Open HARDWARE FOR STEP 4.
• Connect the CONSOLE CABLES (2) to the CONSOLE (11).
• Attach the CONSOLE (11) to the CONSOLE MAST (3)
using 4 FLAT WASHERS (H) and 4 BOLTS (I).
• Attach the CONSOLE BACK COVER (12) to the
CONSOLE (11) using 4 SCREWS (J).
• Slide CONSOLE MAST COVER (13) onto console mast.
• Tighten bolts (I) to 9.5 Nm / 7 lb-ft.
Note: Be careful not to pinch wires while attaching the console.
Hardware For Step 4
Description Qty
H
I
J
Flat Washer
Bolt
Screw
4
4
4
• Open HARDWARE FOR STEP 3.
• Guide PULSE WIRES (8) on CONSOLE MAST (3) through RUBBER
GASKET (9) and connect to wires on HANDLEBAR (10).
• Attach HANDLEBAR (10) to CONSOLE MAST (3)
using 2 BOLTS (D) and 2 ARC WASHERS (E).
• Attach HANDLEBAR (10) to HANDLEBAR MASTS (7) using 2
BOLTS (F). Tighten bolts to 39 Nm / 28.8 lb-ft.
• Tighten all bolts from steps 1–3 to 24 Nm / 17.7 lb-ft.
• Slide HANDLEBAR COVERS (6) down and snap into place.
• Attach CONNECTER COVERS (16) to HANDLEBAR (10) using 2
GUIDE BOLTS (G). Tighten bolts to 9.5 Nm / 7 lb-ft.
NOTE: Be careful not to pinch wires while attaching the handlebar.