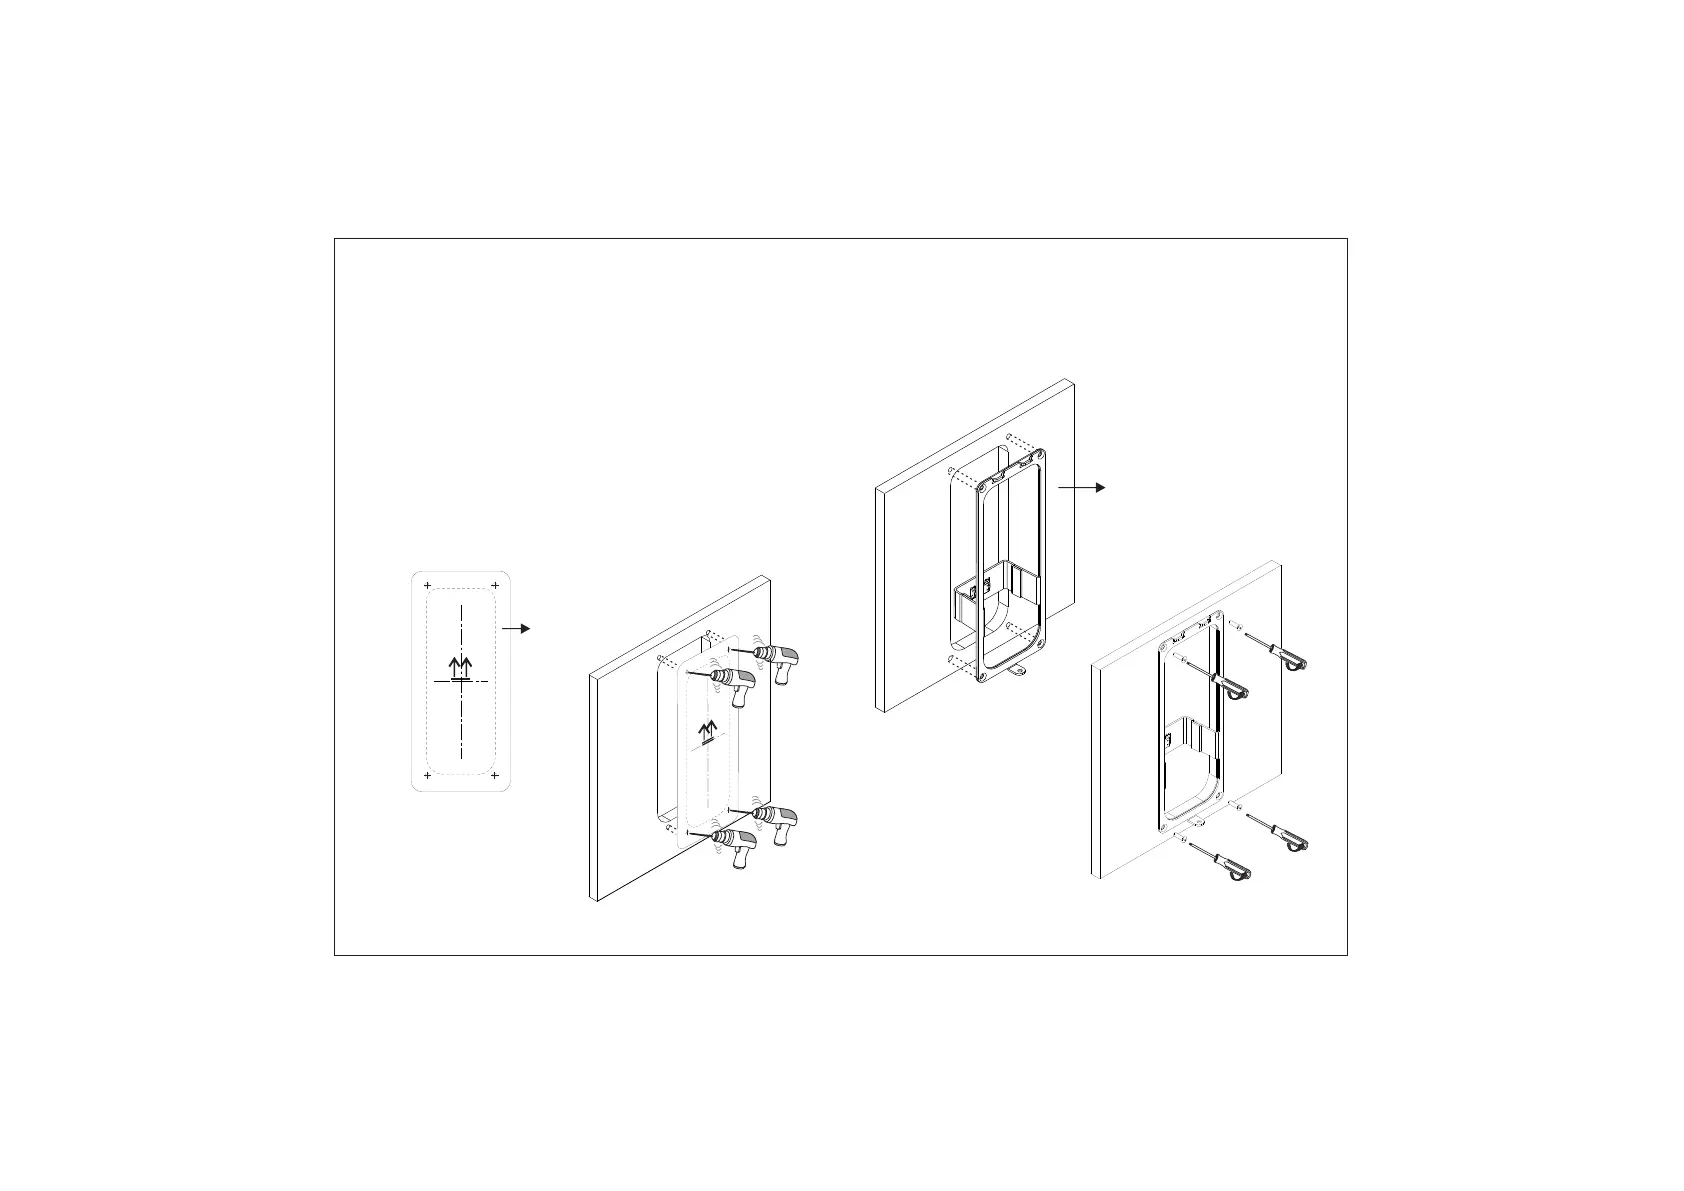
Step 2: Place and fix the Flush Mounting plate with the supplied
screws. Tighten the screws with screw driver.
Figure 7
15
16
Installation Instruction: Flush Mounting
Step 1: Place the Flush Mounting Template on the desired
installation surface.
• Mark the area along the dotted line and trace the four screw
holes (say A,B,C,D) on the wall as shown in Figure 7.
• Now drill the dotted line area and four screw holes (say
A,B,C,D) on the wall as illustrated in Figure 8.
Flush Mounting
Plate
A
B
C
D
Flush Mounting
Template
Figure 8
A
B
C
D