5 | Version 1 | January 2022
Table of Contents
Console Setup
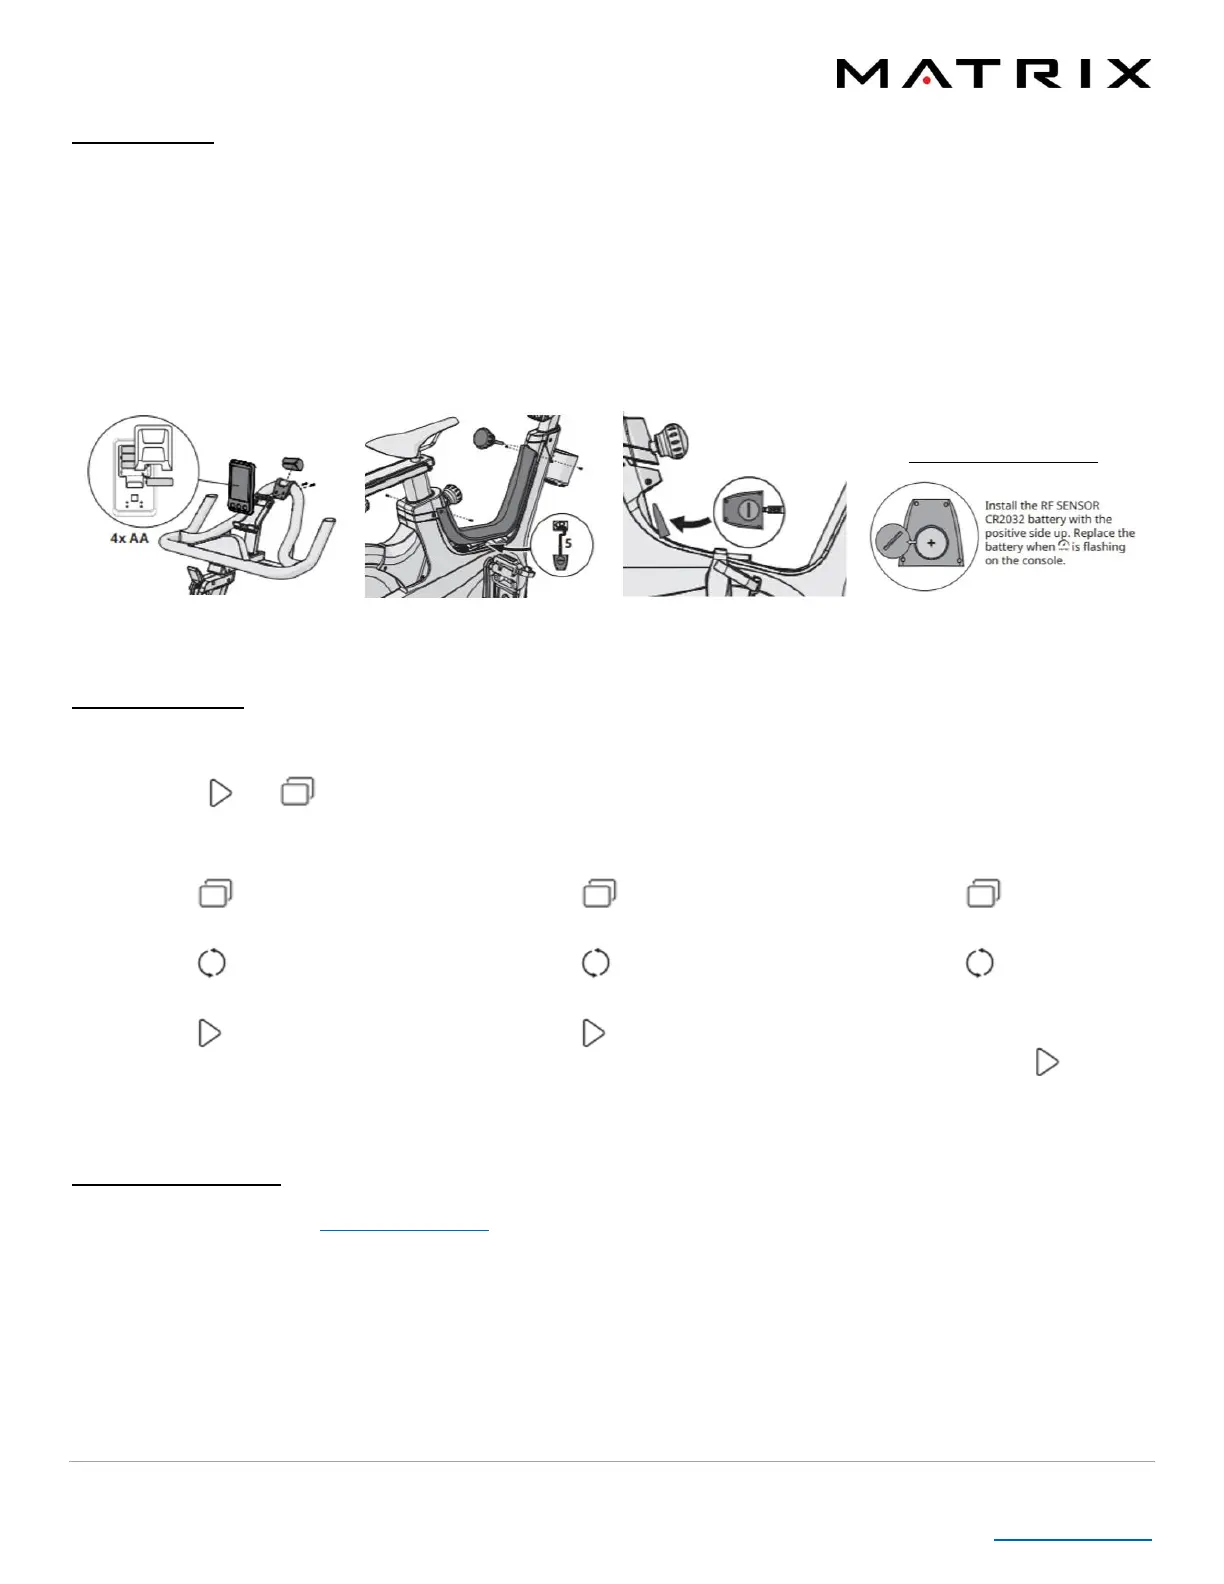
1. Install the console bracket onto the handlebar, then slide the foam sheet between the handlebar and console
bracket.
2. Install 4 AA batteries into the console.
3. Attach the console to the console bracket using 2 screws.
4. Remove the 4 screws and the handlebar adjustment knob from the frame, then remove the plastic cover.
5. Plug the unused wire into the RF Sensor.
6. Using the Velcro, mount the RF Sensor to the Main Frame.
7. Reinstall the plastic cover and handlebar adjustment knob.
Machine Settings
You may adjust settings to customize the console.
Press and hold and for 3 to 5 seconds to enter Machine Settings. The console will display “SET” when ready.
Model Selection
1. Press once to enter
the Model Selection page.
2. Press to select the
frame model.
3. Press to select and set
the frame model.
Brightness Setting
1. Press twice to enter
the BL page.
2. Press to adjust the
brightness
3. Press to set the
selected brightness.
Unit Setting
1. Press three times to
enter the Unit page.
2. Press to scroll to Miles
or KM.
3. With your selection
shown, press to save
and set.
Cleaning the Console
Use a micro-fiber cloth and LCD screen cleaner to clean the console screen as needed. If you do not have a screen
cleaner, use a damp (with water) micro-fiber cloth instead.