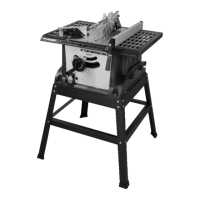
17
2. Since the work is pushed along the fence, it
must have a straight edge and
make solid contact with the table.
WARNING: The saw guard must always be used.
The guard has anti-kickback
ngers to help prevent kickback and a splitter to
prevent the saw kerf from closing and binding
the blade.
3. Start the motor and advance the work, holding
it down against the fence.
4. Never stand in the line of the saw cut when
ripping.
5. Hold the work with both hands and push it
along the fence and into the saw blade.
6. When the work piece is fully on the table, it
can then be fed through the saw blade with one
hand.
7. When the work is beyond the saw blade and
anti-kickback ngers, the feed can continue to
the end of the table, after which the work is lifted
and brought back along the outside edge of the
fence.
8. The cut-o stock remains on the table or tilts
up slightly and is caught by the rear end of the
guard or slides o the table to the oor.
9. If the cut-o stock remains on the table, it is
not touched with the hands until the saw blade
is stopped, unless it is a large piece allowing safe
removal.
10. If the ripped work is less than 4" (10 cm) wide,
a push stick, as supplied (UU, ), or made out of
scrap wood, should always be used to
complete the feed as shown in g.22.
11. Use feather boards for all non “thru-sawing”
operations where the guard and spreader
assembly must be removed. Feather boards are
used to keep the work in contact with the fence
and table and help prevent kickbacks. Clamp the
feather boards to the fence and table so that the
leading edge of the feather boards will support
the work piece until the cut is completed.
12. Always replace the guard and spreader
assembly when the non thru-sawing operation is
completed.
ADJUSTMENTS
WARNING: Before performing any adjustment,
make sure the tool is unplugged from
the power supply and the switch is in the OFF
position. Failure to follow this warning
could result in serious personal injury.
To avoid unnecessary setups and adjustments, a
good practice is to check your
setups carefully with a framing square and make
practice cuts in scrap wood before
making nish cuts in good workpieces. Do not
start any adjustments until you have
checked with a square and made test cuts to be
sure adjustments are needed.
TO CHECK THE ALIGNMENT OF THE RIP FENCE
TO THE BLADE
See Figure 23.
WARNING: To reduce the risk of injury,
alwaysmake sure the rip fence is parallel to
the blade before beginning any operation.
∙ Unplug the saw then remove the blade guard
assembly.
∙ Unlock the rip fence by depressing the trigger
lock and lifting the locking handle.
∙ Place a framing square beside the blade and
move the rip fence up to the square.
Take the dimension on the rip scale.
∙ Move the rip fence back and turn the framing
square 180° to check the other side.
∙ If the two dimensions are not the same, loosen
the two screws on the fence and align it.
∙ Retighten the two screws.
∙ Make two or three test cuts on scrap wood. If
the cuts are not true, repeat the process.
NOTE: The rip fence must be secure when the
locking handle is engaged. The
clamp screw on the rear of the rip fence is
tightened by turning clockwise to
increase tightness of the rear of the rip fence.
TO SET THE 90° POSITIVE STOP
See Figure 24.