43
Adjustment of the hedge trimmer with
articulated arm
Warning!
The knives are very sharp. Do not touch the
blades with your bare hands. Do not rub the
blades against your body.
The hedge trimmer with articulated arm must
not be switched on or used, when the cutting
attachment is in storage / transport position.
Always wear gloves when working with the
hedge trimmer.
Lay the hedge trimmer on a level, even surface.
The engine should be on the tank guard. Make
sure the blade cover is overlaid.
1. Hold the handle that is directly behind the
hand guard with your right hand.
Hold the hedge trimmer’s locking lever with your
left hand, see A 44.
A44
1
1. Locking lever
Important! The lock prevents the bolt from being
accidentally released.
2. Press the unlocking device with your left index
nger. Press the unlocking device with your left
thumb. See A 45.
A45
2
1
1). Unlocking
2). Locking device
3. While pressing the locking device, turn the
hedge trimmer with the locking lever until it
aligns with the outer tube (180 ° angle). See A 46.
A46
1
4. Release the unlocking device and the locking
device and make sure that the unlocking device
and the locking device lock again.
5. Remove the blade cover. Now you can start the
engine.
Adjust the hedge trimmer to the
desired cutting angle
Warning!
Do not touch the blades when the engine is
running. The blade can vibrate even when the
engine is idling.
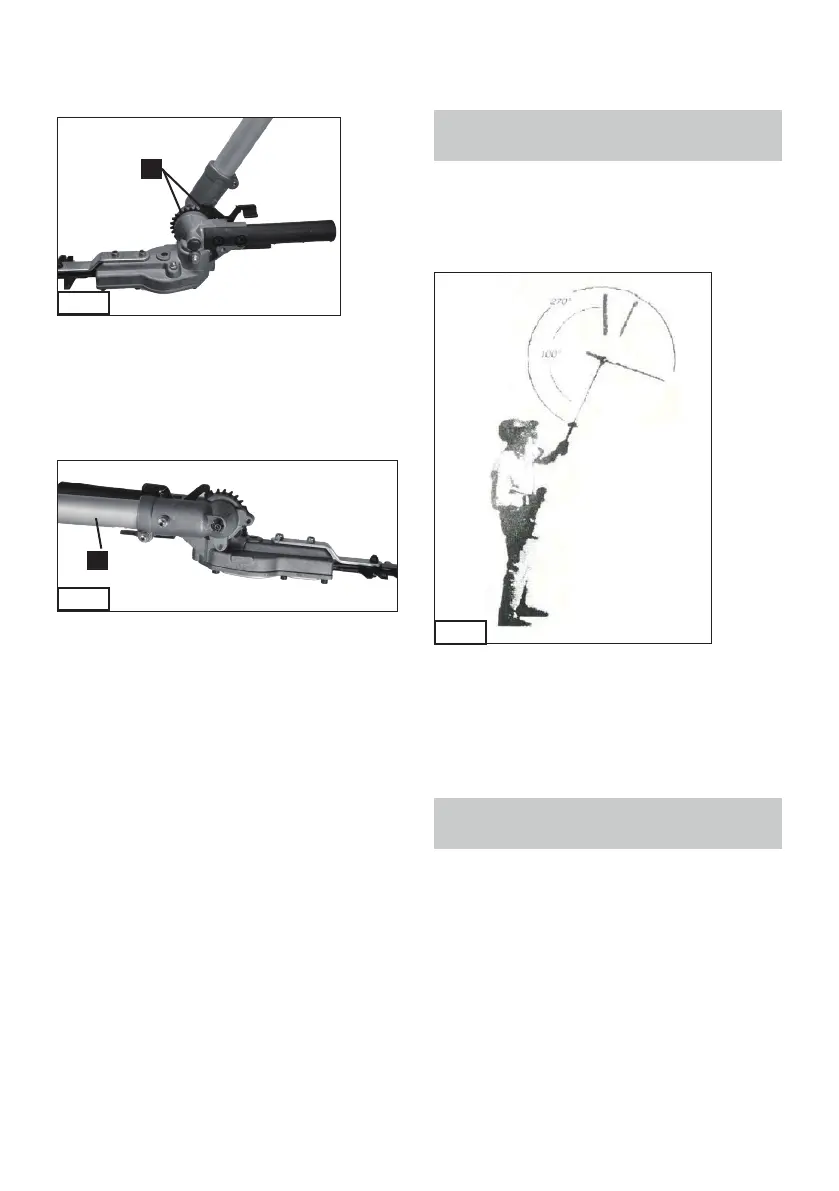
A47
Various blade angles are possible. The hedge
trimmer can be adjusted in 12 dierent angles
from 80 ° to -90 ° with respect to the outer tube,
see A 47. On the previous page, you will learn
how to set them. After each adjustment, make
sure the lock is securely locked in place.
Prepare the hedge trimmer for storage
or transport
Warning!
If you bring the hedge trimmer to the storage
position, the engine should not run.
1. When the engine is o, pull the blade cover
over the blade.
2. Turn the hedge trimmer in such a way that
it runs parallel to the tube (see steps on the
previous page). Make sure that the locking device
and the unlocking device are securely engaged.
See A 48.
 Loading...