3 max mobility
®
PushTracker User’s Manual 4
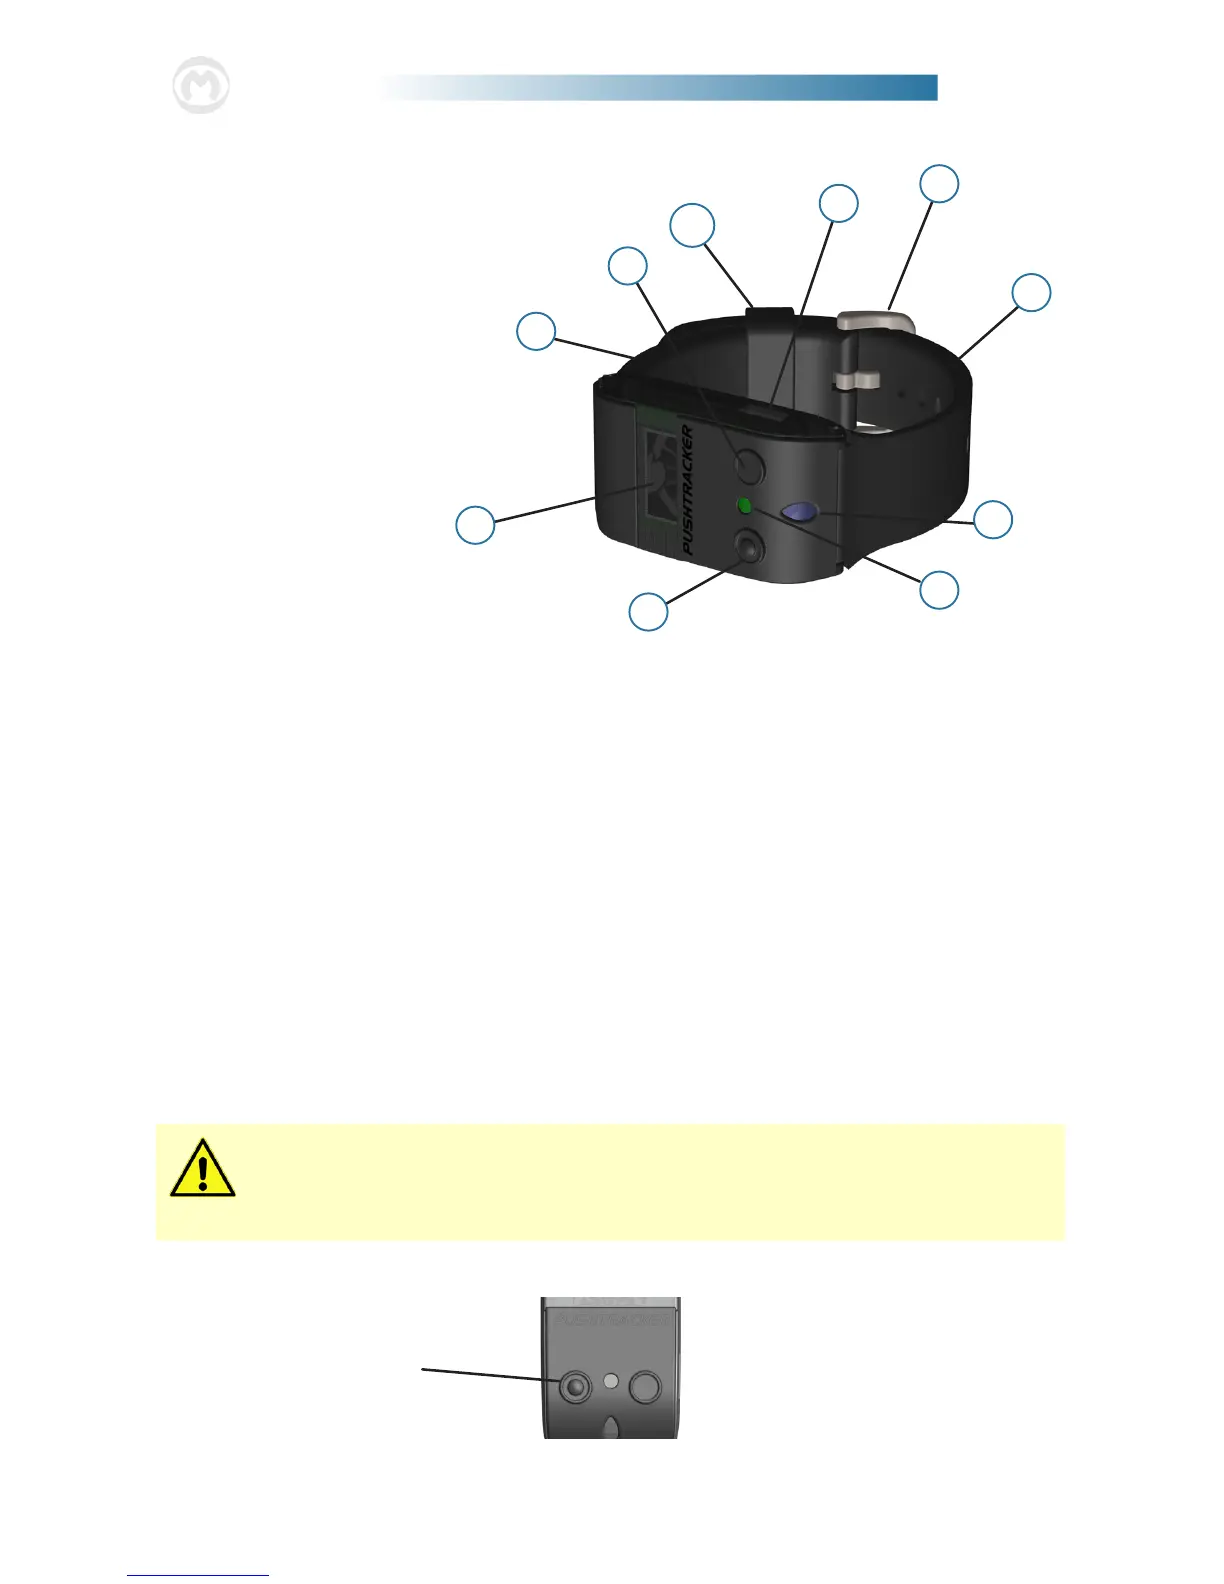
6
10
8
1
2
7
4
3
9
1. OLED Display
2. Power Assist Button
3. App Connection Button
4. Charging LED
5. Indication LED
6. Buckle Band (Black)
7. Clasp Assembly
8. Strap Band (3 Sizes / Black)
9. USB Charging Port
10. Strap Holder
List of Components
2. Using Your PushTracker
Attaching Your PushTracker
e PushTracker is designed to comfortably and securely attach to the top part of
wrists of all sizes. It has an embedded accelerometer to recognize when you push,
when you want to activate the power assist and also when you tap your hand against
the handrim to deactivate the power assist. Additionally, it is equipped with an
OLED screen, LEDs and vibration motor to indicate dierent information, states
and activations / deactivations that occur during everyday use.
e band on the PushTracker (see Specication Sheet for material) is designed for
most users; but if you have diculty securing the buckle / clasp, it doesn’t t right, or
you wish to have one of a dierent color / material, the band can be easily replaced
with essentially any 0.70 in (18 mm) wide o-the-shelf watch band of your choosing.
Press and release to
turn Power Assist
ON and OFF
5
It is recommended that the PushTracker be worn snug on your wrist to
get the most reliable recognition of your hand movement for SmartDrive
operation, propulsion activity tracking, etc.
Button Function