3
UNPACKING INSTRUCTION
CAUTION! Carefully unpack the box upon receipt. Check the contents to ensure that all parts are present and have been
received in good condition. Notify the shipper immediately and retain packaging material if any parts appear damaged from
shipping or the package itself shows signs of mishandling. Save the package and all packaging materials. If the product must be
returned, it is important that the product is returned in the original factory box and packaging. If the device has been exposed to
drastic temperature fluctuation (e.g. after transportation), do not switch it on immediately. The arising condensation water might
damage your device. Leave the device switched off until it has reached room temperature.
POWERSUPPLY
The label on the back/under side of the product indicates the mains voltage to which it must be connected. Check that the mains
voltage corresponds to this. Any other voltage than the one indicated may cause irreparable damage to the unit. The unit must
also be connected directly to the mains voltage and no dimmer or adjustable power supply may be used.
Always connect the device to a protected circuit (circuit breaker or fuse). Make sure the device has an appropriate
electrical ground to avoid the risk of electrocution or fire.
ASSEMBLY INSTRUCTIONS BENCH
1. Place the seat upside down.
2. Lift both the left and right legs upwards.
3. Slide leg supports into brackets to lock the legs in position.
4. Rotate the caps to stabilize the bench.
NOTE: make sure the leg supports are sitting all the way inside the bracket.
Sit down and play music like never before.
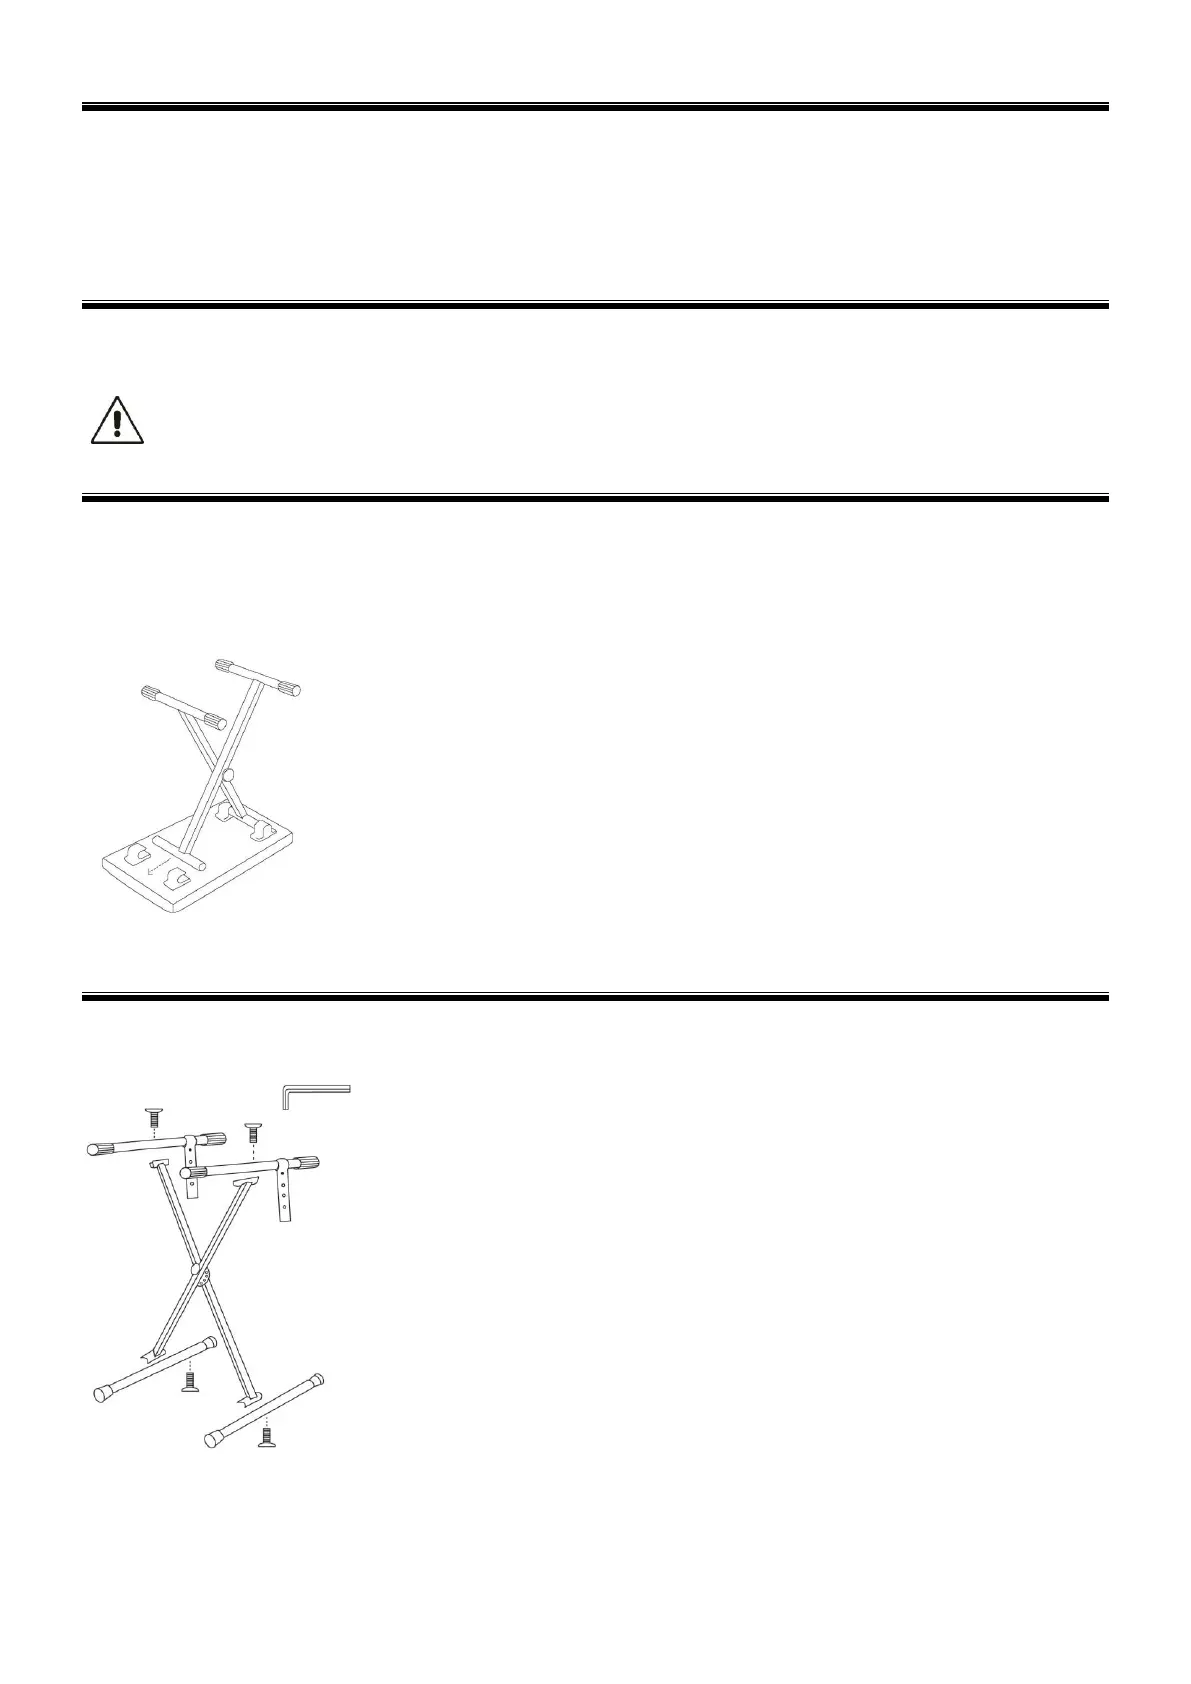
ASSEMBLY INSTRUCTIONS STAND
1. Place the feet on the floor in the position indicated in the illustration.
2. Using the screws, secure the X bracket onto the feet using the Allen wrench
3. Place the upper support bars onto the upper part of the bracket and secure with the screws using the Allen wrench. Do not
overtighten.