17
STEP 12
LIFT START UP / FINAL ADJUSTMENTS
DURING THE START-UP PROCEDURE, OBSERVE ALL OPERATING COMPONENTS AND CHECK FOR PROPER
INSTALLATION AND ADJUSTMENT. DO NOT ATTEMPT TO RAISE VEHICLE UNTIL A THOROUGH OPERATIONAL
CHECK HAS BEEN COMPLETED.
1. Apply white lithium grease or equivalent to the inside of the Posts where the Slide Blocks glide.
2. Test the Power Unit by pressing the UP Button. Raise the Lift a few inches and check all Hose connections for leaks.
If the motor gets hot or sounds peculiar, stop and check all electrical connections. Check the Hydraulic Fluid Reservoir
for sucient uid.
3. Raise the Lift to its maximum height o the oor until the Lift Head stops.
4. Lower the Lift down below the rst safety stop.
1. Perform the following procedure with no weight on the Lift.
2. The Lift should be fully lowered before proceeding.
3. Carefully check around and under the Lift for any obstructions. Clear any obstructions before proceeding.
4. Connect the Hydraulic Hoses and make sure the Hydraulic Fluid Reservoir is full.
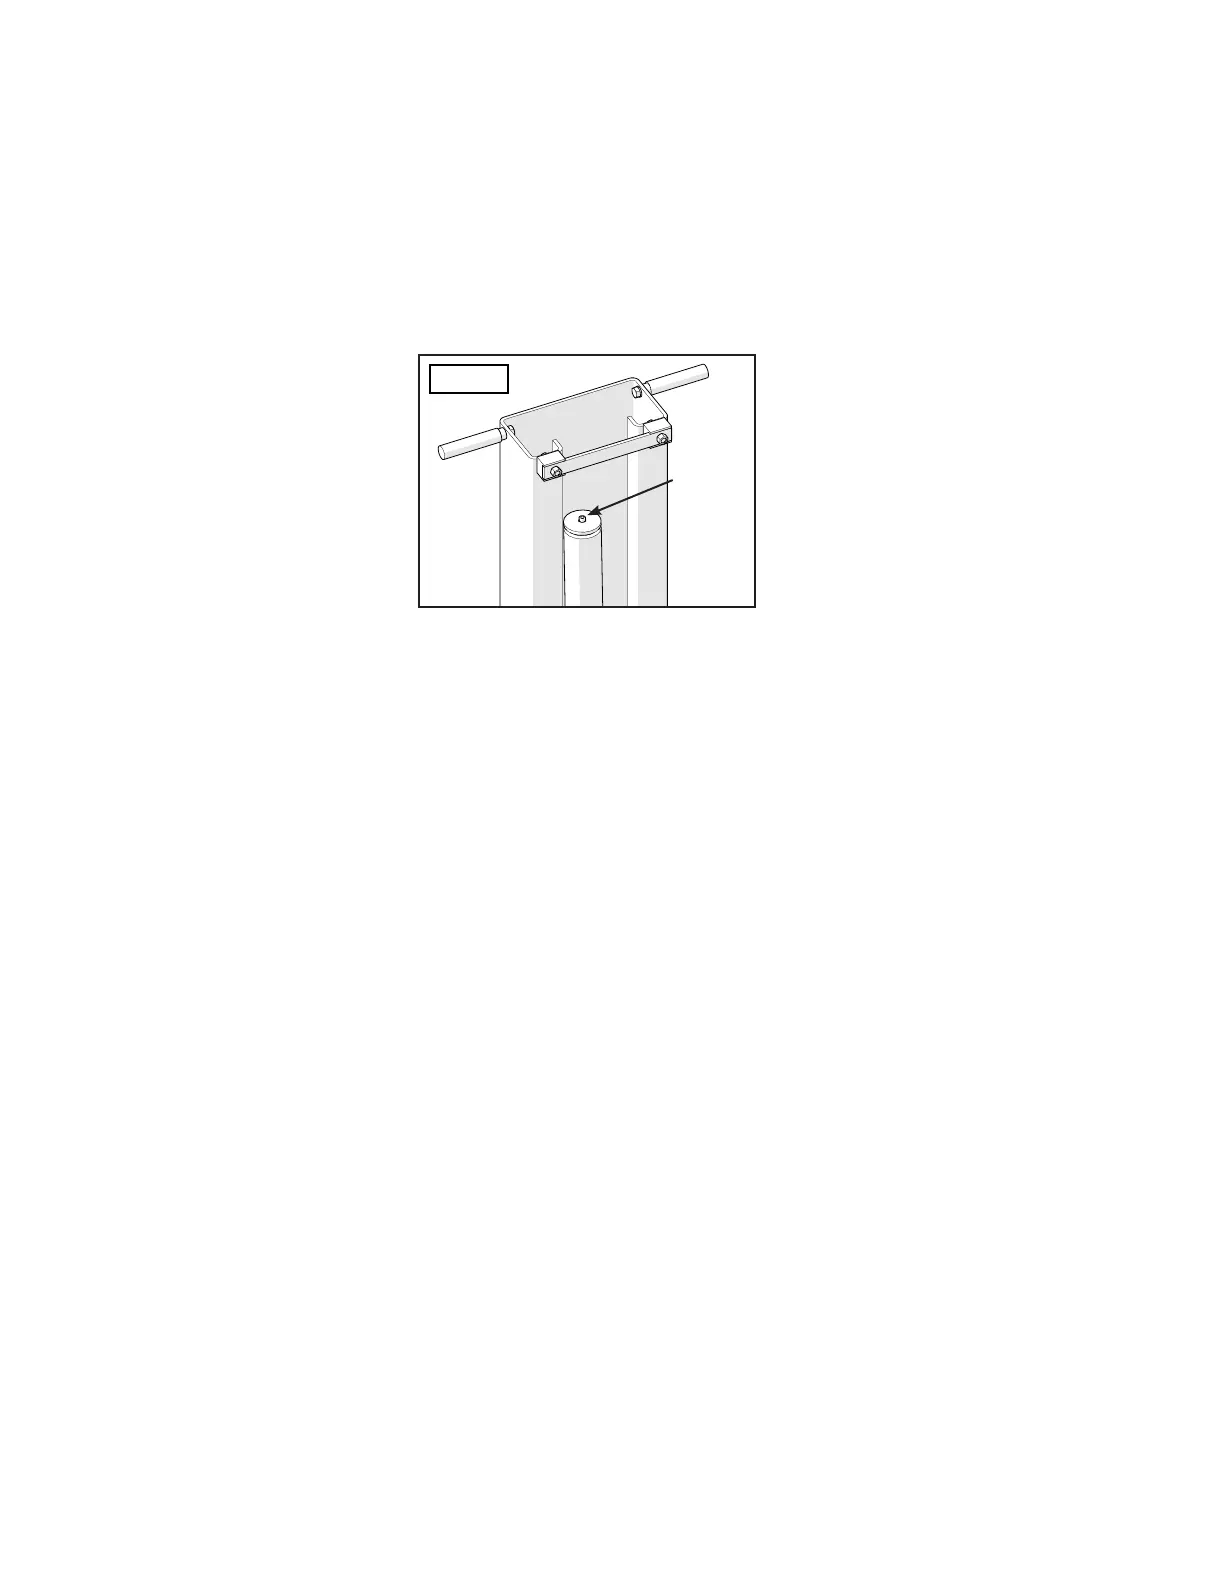
5. Loosen, but do not remove, the bleeder screws on the top of each Hydraulic Cylinder using a hex wrench.
STEP 11
BLEEDING THE CYLINDERS
Bleeder
Screw
Fig. 19
6. With no weight on the Lift, raise the Lift to its maximum height and check the Bleeder Screws for air bubbles or oil
escaping as the Lift is rising. Air will continue to exist from the loosened bleeder screws.
7. After the Lift reaches its maximum height, keep pressing the UP button for another 3 seconds.
8. Immediately return to the Hydraulic Cylinders and re-tighten both Bleeder Screws.
9. Lower the Lift back down to the ground.
10. Repeat the procedure until you have purged the air out and the Lift maintains level lifting and lowering.
 Loading...