Page 6 of 11 M-KIT118/119/120 Assembly Instrucons 181-03007
These instrucons must be followed exactly. Failure to follow these instrucons could damage the product or result in injury to persons
using or assembling the product. Maxon Furniture Inc. shall not be liable for any costs, loss, damage, expenses or injuries resulng from
failure to properly assemble the product in accordance with these instrucons.
Maxon Furniture Inc. Customer Service: 1-800-876-4274
While holding the Angle Alignment Bracket 9.
(AAB) in place, connect the second PL4848
Panel by inserng the I-Beam Panel Connectors
as directed in Steps 5 - 6.
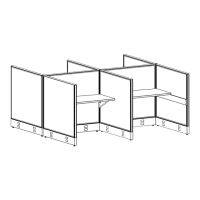
Connue adding PL4848 Panels and PLCP48 10.
Corner Posts in the order shown by inserng
Straight Alignment Brackets to support the
PLCP48 Corner Posts (Figures 5.a - 5.h).
TIP! You will need three Straight
Alignment Brackets total.
Install one Angle Alignment Bracket with each 11.
PL4848 Panel added.
TIP! You will need seven Angle
Alignment Brackets total.
Insert I-Beam Panel Connectors for all PLCP48 12.
Corner Post to PL4848 Panel connecons as
directed in steps 5 - 6.
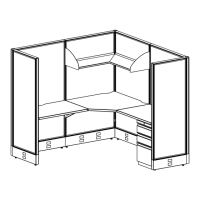
Figure 5
Figure 5.a
Angle Alignment Bracket (AAB)
Straight
Alignment
Bracket
Corner
Post
Figure 5.b
Figure 5.c
AAB
Figure 5.d
AAB
Figure 4
Angle
Alignment
Bracket
Interior Assembled View
Figure 5.e
AAB
Straight
Alignment
Bracket
Corner
Post
Figure 5.f
Figure 5.g
AAB
Figure 5.h
AAB
 Loading...