INSTALLATION
05
MXR-2Y is all-in-one style, which only
require connecting to the power supply
and exhaust pipe to use, thus omitting the
installation steps. We will mainly introduce
the installation steps of MXR-1F.
5.1.1 Installation Position
The main device can be installed inside or outside of the
vehicle. However, when it is installed outside the vehicle, a
shield (not included) to prevent damage due to external
forces (e.g. stone damage) should be provided. The heater
must not be immersed in water or exposed to rain. If the
heater suffers corrosion due to rain or other water, immedi-
ately cease using it and have all of its components inspected
by a qualified technician.
5.1 Installation Of Heater Body
PARKING AIR HEATER
15
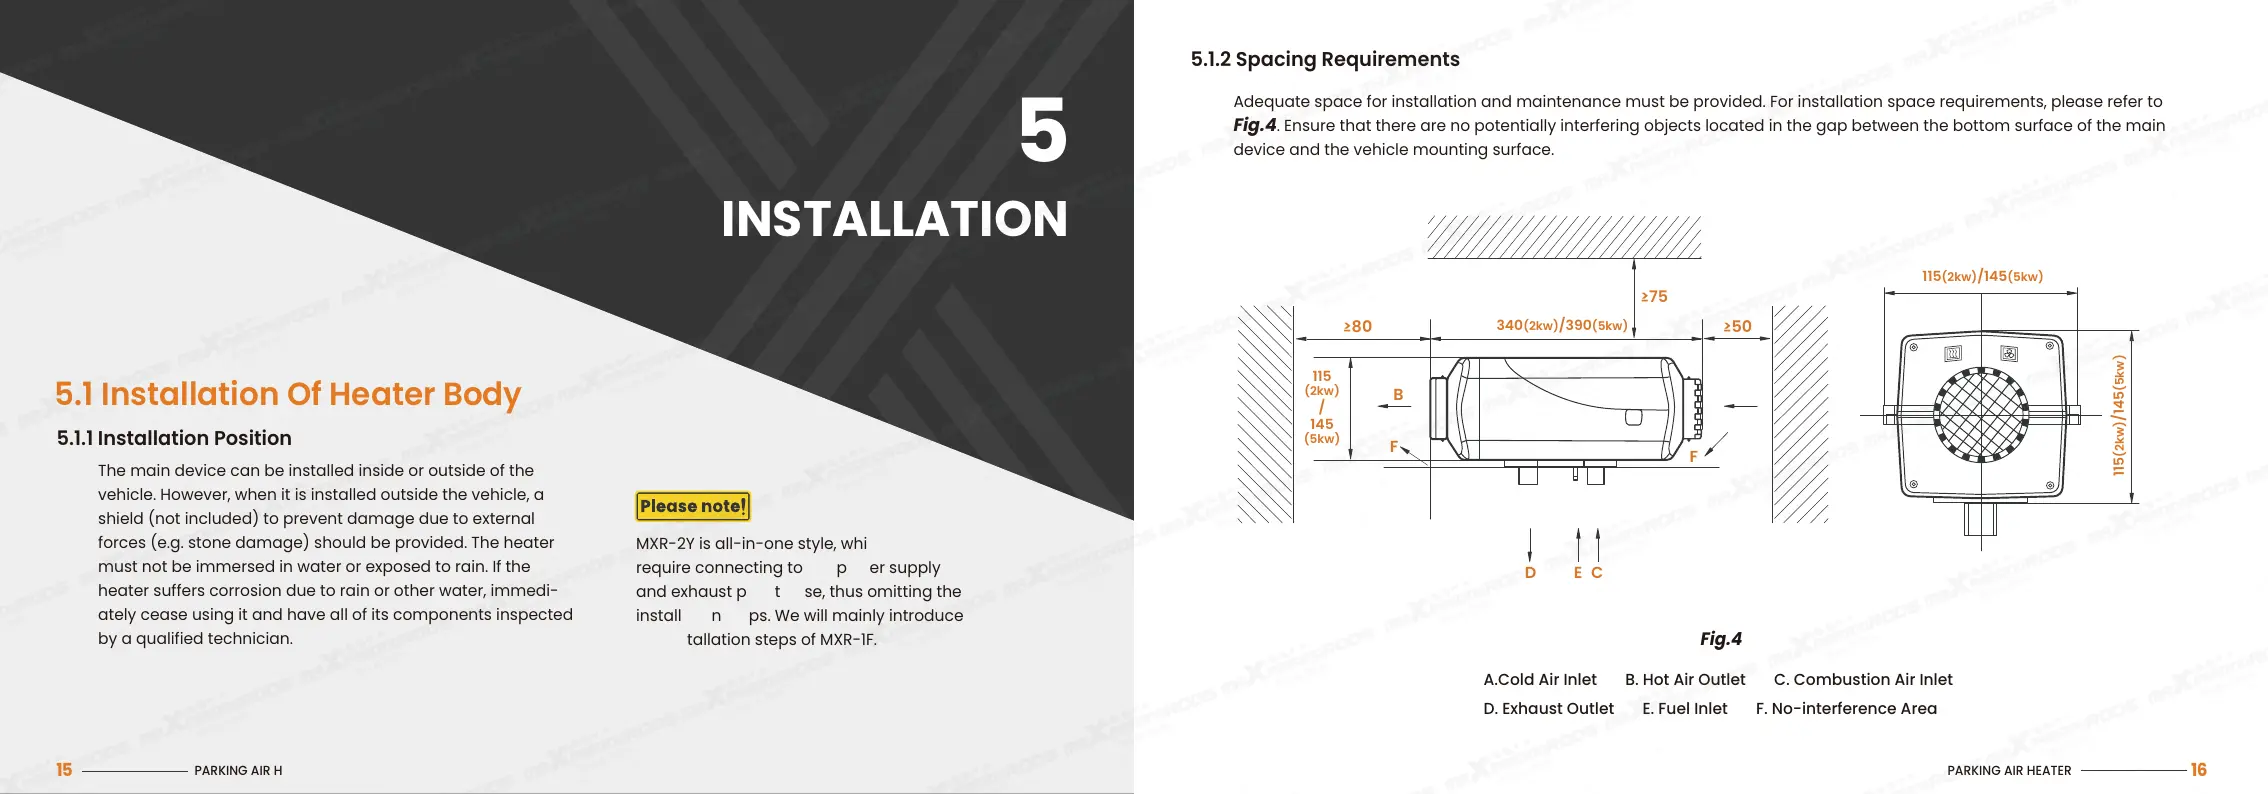
5.1.2 Spacing Requirements
Adequate space for installation and maintenance must be provided. For installation space requirements, please refer to
Fig.4. Ensure that there are no potentially interfering objects located in the gap between the bottom surface of the main
device and the vehicle mounting surface.
A.Cold Air Inlet B. Hot Air Outlet C. Combustion Air Inlet
D. Exhaust Outlet E. Fuel Inlet F. No-interference Area
Fig.4
115(2kw)/145(5kw)
115(2kw)/145(5kw)
≥80
≥50
B
CED
F
F
A
340(2kw)/390(5kw)
≥75
115
(2kw)
/
145
(5kw)
PARKING AIR HEATER
16