7
ENG
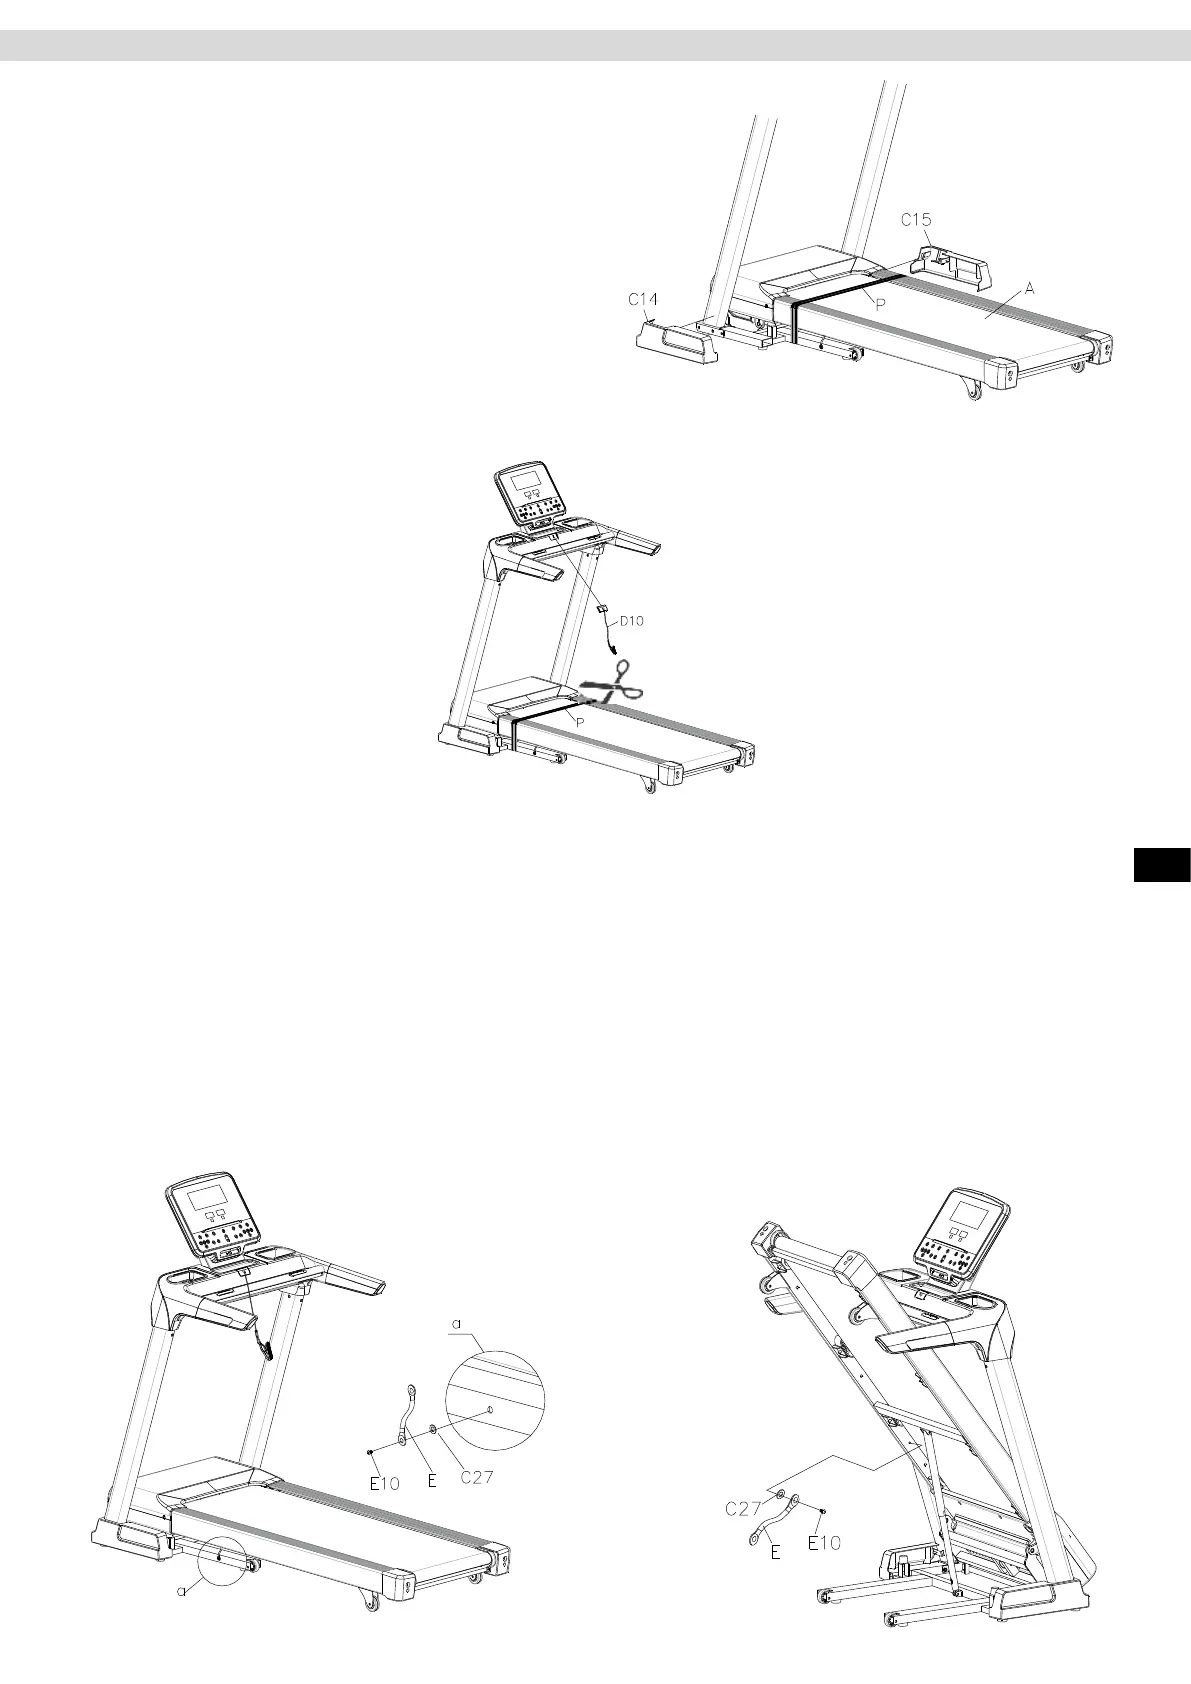
Step 4 - Assembly of the Side Covers
Insert the left side cover (C14) into the main frame (A) and push it on rmly.
Repeat with the right side-cover (C15).
Step 5 - Insert the Safety Key
Insert the safety key (D10) into the cockpit. Cut and remove the transport belt (P).
Step 6 - Remove the Transport Tether
Step 6.1 – Fig 1
Loosen the Allen screwM8x15 (E10) which fastens the steel cable (E) to the main frame (position a).
Remove the Allen screw (E10) and the plastic washers (C27) – see Fig. 1.
Lift up the treadmill deck.
Step 6.2 – Fig 2
Loosen and remove the Allen screwM8x15 (E10) with the steel cable (E) secured to the inside of the main
frame. Remove the Allen screw (E10), the steel cable (E) and the plastic washer (C27) – see Fig 2.
Note: Keep the steel cable (E) and the two screws (E10) and plastic washers (C27) to secure the treadmill if you
need to dismantle and transport it to a dierent location in future.
Fig 1. Fig 2.
Assembly