EasyManua.ls Logo

Maytag Amana AE123G35AX User Manual

Maytag Amana AE123G35AX
24 pages
To Next Page IconTo Next Page
Page #1 background imageLoading...
Page #1 background image
is a registered trademark of Maytag Corporation or its related companies
and is used under license to Goodman Company, L.P., Houston, TX. All rights reserved.
Room Air Conditioner & Heat Pump
Use and Care Manual
Introduction
Room air conditioners cool, dehumidify, and filter air inside
your home. Heat pump and electric heat models offer both
heating and cooling. Opening sections of manual provide
general information for all room air conditioner models.
Operating Controls section describes operation of controls
for each model. After reading the opening sections, turn to
Operating Controls section and find the panel layout that
matches the model of your unit.
Read entire manual thoroughly before beginning installation
and operation of your new room air conditioner. Be sure you
have all necessary tools and materials on hand for the job.
Study illustrations to familiarize yourself with important
details of the installation process. Review manual for oper-
ating instructions.
NOTE
1. Mechanical experience is required to install air condi-
tioner.
2. Installation can take from 1 to 3 hours, depending on
installer’s knowledge and skill.
3. If you encounter problems during installation, call our
consumer information line toll-free at 1-877-376-0214. If
your problem cannot be resolved by phone, contact an
authorized Amana
®
brand servicer. Contact and service
will be at your expense.
Safety Information
Be sure electrical service is adequate for chosen model of air
conditioner. Complete electrical rating for unit is found on
serial plate located behind front grille. Electrical outlet must
be close enough to unit for power cord to reach without strain.
Air conditioner should be the only appliance on individual
circuit.
For personal safety and to avoid possible damage to appli-
ance or home, observe all safety instructions highlighted by
symbol shown below.
RECOGNIZE THIS SYMBOL AS A
SAFETY PRECAUTION.
After installing unit, reread instructions to ensure each step
is complete and that all parts are fastened in place. For best
results and to minimize installation time, perform all proce-
dures in the order shown.
WARNING
HIGH VOLTAGE
Disconnect ALL power before
servicing or installing this unit.
Multiple power sources may be
present. Failure to do so may cause
property damage, personal injury,
or death.
IO-371B
©2010 , 2013 Goodman Company, L.P.
Effective: September 2013
Contents
Introduction .................................................................. 1
Safety Information ....................................................... 1
Unpacking .................................................................... 2
Electrical Requirements.............................................. 2
Installation ................................................................... 3
Room Heat Pumps ....................................................... 3
Normal Care & Maintenance ...................................... 3
Installation Requirements ........................................... 5
Installation Instructions ............................................... 8
General Instructions .................................................. 13
Through-The-Wall Installation Instructions ............. 14
Operating Controls .................................................... 17
Before Calling Service .............................................. 19
When Service Is Required ........................................ 19
Any Questions? .......................................................... 19
Warranty..................................................................... 20
Question and Answer IconNeed help?

Do you have a question about the Maytag Amana AE123G35AX and is the answer not in the manual?

Maytag Amana AE123G35AX Specifications

General IconGeneral
BrandMaytag
ModelAmana AE123G35AX
CategoryAir Conditioner
LanguageEnglish

Summary

Introduction to Amana Air Conditioners

Manual Overview and Product Features

Provides an overview of the manual's sections and the basic functions of Amana air conditioners.

Critical Safety Precautions

Electrical Shock and High Voltage Warnings

Emphasizes warnings regarding electrical hazards, high voltage, and proper grounding.

Owner's Product Identification and Unpacking

Recording Unit Information

Section to record unit's model, serial number, and purchase details.

Unpacking and Initial Inspection

Steps for unpacking the unit and checking for any shipping damage.

Electrical Requirements and Grounding

Grounding Instructions

Detailed guidance on proper grounding procedures for safety.

Installation Options and Heat Pumps

Window Mounting Kit Usage

Details about using optional window mounting kits.

Room Heat Pump Operation

Explains how heat pump models function for heating and cooling.

Normal Care and Maintenance

Annual Inspection Recommendation

Recommendation for annual inspection and cleaning by a dealer or servicer.

Unit Maintenance: Grille, Filter, and Chassis

Front Grille, Filter Removal & Cleaning

Steps for removing and cleaning the front grille and air filter.

Chassis Removal & Cabinet Cleaning

Detailed steps for removing the unit chassis and cleaning the cabinet.

Installation Requirements

Tools and Parts Checklist

Lists necessary tools and parts for installation.

Location Requirements

Criteria for selecting a suitable installation location.

Included Installation Parts

Identification of parts included in the package for installation.

Installation Methods and Electrical Specs

Window Installation Measurements

Measurements and guidelines for window installation.

Through-the-Wall Installation Measurements

Measurements and guidelines for through-the-wall installation.

Electrical Specifications and Wiring

Detailed electrical specifications and wiring requirements.

Grounding and Power Cord Procedures

Recommended Grounding Method

Detailed procedure for properly grounding the air conditioner.

Power Supply Cord Testing

Instructions for testing the power supply cord's functionality.

Installation Instructions: Unpacking and Window Setup

Unpacking the Air Conditioner

Steps for unpacking the unit and removing packaging.

Window Installation: Attaching Top Channel

Steps to attach the top channel to the unit's cabinet.

Window Installation: Side Curtains and Cabinet

Attaching Side Curtains

Instructions for attaching the side curtains to the unit.

Attaching Foam Adhesive Seal

Steps to attach the foam adhesive seal to the curtain bottom channel.

Installing Cabinet into Window

Procedures for installing the air conditioner cabinet into a window.

Window and Through-Wall Installation Steps

Attaching Side Curtains to Window Frame

Detailed steps for attaching side curtains to the window frame.

Completing Window Installation

Final steps for completing the window installation.

Through-the-Wall Cabinet Installation Notes

Instructions for through-the-wall installation of the cabinet.

Wall Frame and Cabinet Installation

Wood, Metal, or Plastic Molding Installation

Installation method for wood, metal, or plastic molding.

Plastered Wall Installation (No Molding)

Installation method for plastered walls without molding.

Installing the Wood Frame

Steps to construct and install a wood frame for installation.

Installing Cabinet into Wood Frame

Procedure to install the unit cabinet into a wood frame.

Complete Installation Procedures

Inserting and Securing the Unit

Steps for inserting the unit into the cabinet and securing it.

Finalizing Connections and Power Up

Connecting ground wire, plugging in, and resetting the cord.

General Operating Instructions

Airflow Management

Adjusting airflow direction and checking for obstructions.

Drain Cup Installation and Use

How to install and use the condensate drain cup.

Thru-wall Installation Guidelines

Unit and Outer Case Dimensions

Shows outside dimensions of the unit and outer case.

General Chassis Removal Instructions

General notes on chassis removal for installation.

Wall Construction and Case Placement

Brick Veneer or Frame Wall Installation

Installation details for brick veneer or frame wall construction.

Finished Opening Dimensions

Recommended dimensions for the finished wall opening.

Masonry Wall Construction

Installation guidelines for masonry wall construction.

Outer Case Placement and Sloping

How to properly position the outer case in the wall opening with correct slope.

Installation in Thick Walls

Ventilation for Walls Over 5.5 Inches

Special considerations for installing in walls thicker than 5.5 inches.

Chamfering Walls for Ventilation

How to chamfer wall openings for ventilation.

Operating Controls Explained

Power, Display, Temperature & Fan Settings

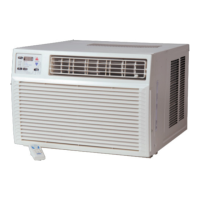
Describes power, display, temperature adjustment, and fan speed controls.

Delay Timer, Mode Selection & Delay Function

How to set the delay timer, select modes, and use the DELAY ON/OFF functions.

Advanced Operation Modes

Timer, Energy Saver, and Fan Only Modes

Using the delay timer, Energy Saver, and Fan Only modes.

Heating & Cooling Operation Tips

Effective use of heating, cooling, and auto fan modes.

Power Outage Recovery Feature

How the unit behaves after a power interruption.

Troubleshooting and Service Information

Common Problems and Solutions

A guide to identifying problems and their solutions.

Seeking Professional Service and Support

Information on seeking professional service and contacting customer support.

Consumer Limited Warranty

Warranty Coverage and Limitations

Covers warranty terms for residential use, including coverage periods and limitations.

Commercial Customer Warranty

Commercial Warranty Terms

Details the warranty terms specifically for commercial installations.

Related product manuals