c0st0m0, or,ce ]g'g.AG
240EdwardsS[reet£E
C;eveiandTannessaej311
Tel;423472-3333
Fax:423-478-6710
STEP 6
PREPARATION OF TOP CABINET AND WALL
Your Over-the-Range microwave oven should be mounted against and supported by a flat, vertical wall. Wall
construction should be a minimum ofT' x 4" wall studding and 3/8" or more, thick drywall or plaster/lath.
The oven must be attached to a minimum of one 2*"x 4" wall stud. See Figure 15.
1. To find studs, use one of the following methods:
A. Stud finder - a magnetic device which locates nails.
B. Use a hammer to tap lightly across the mounting surface to find a solid sound. This will indicate
a stud installation.
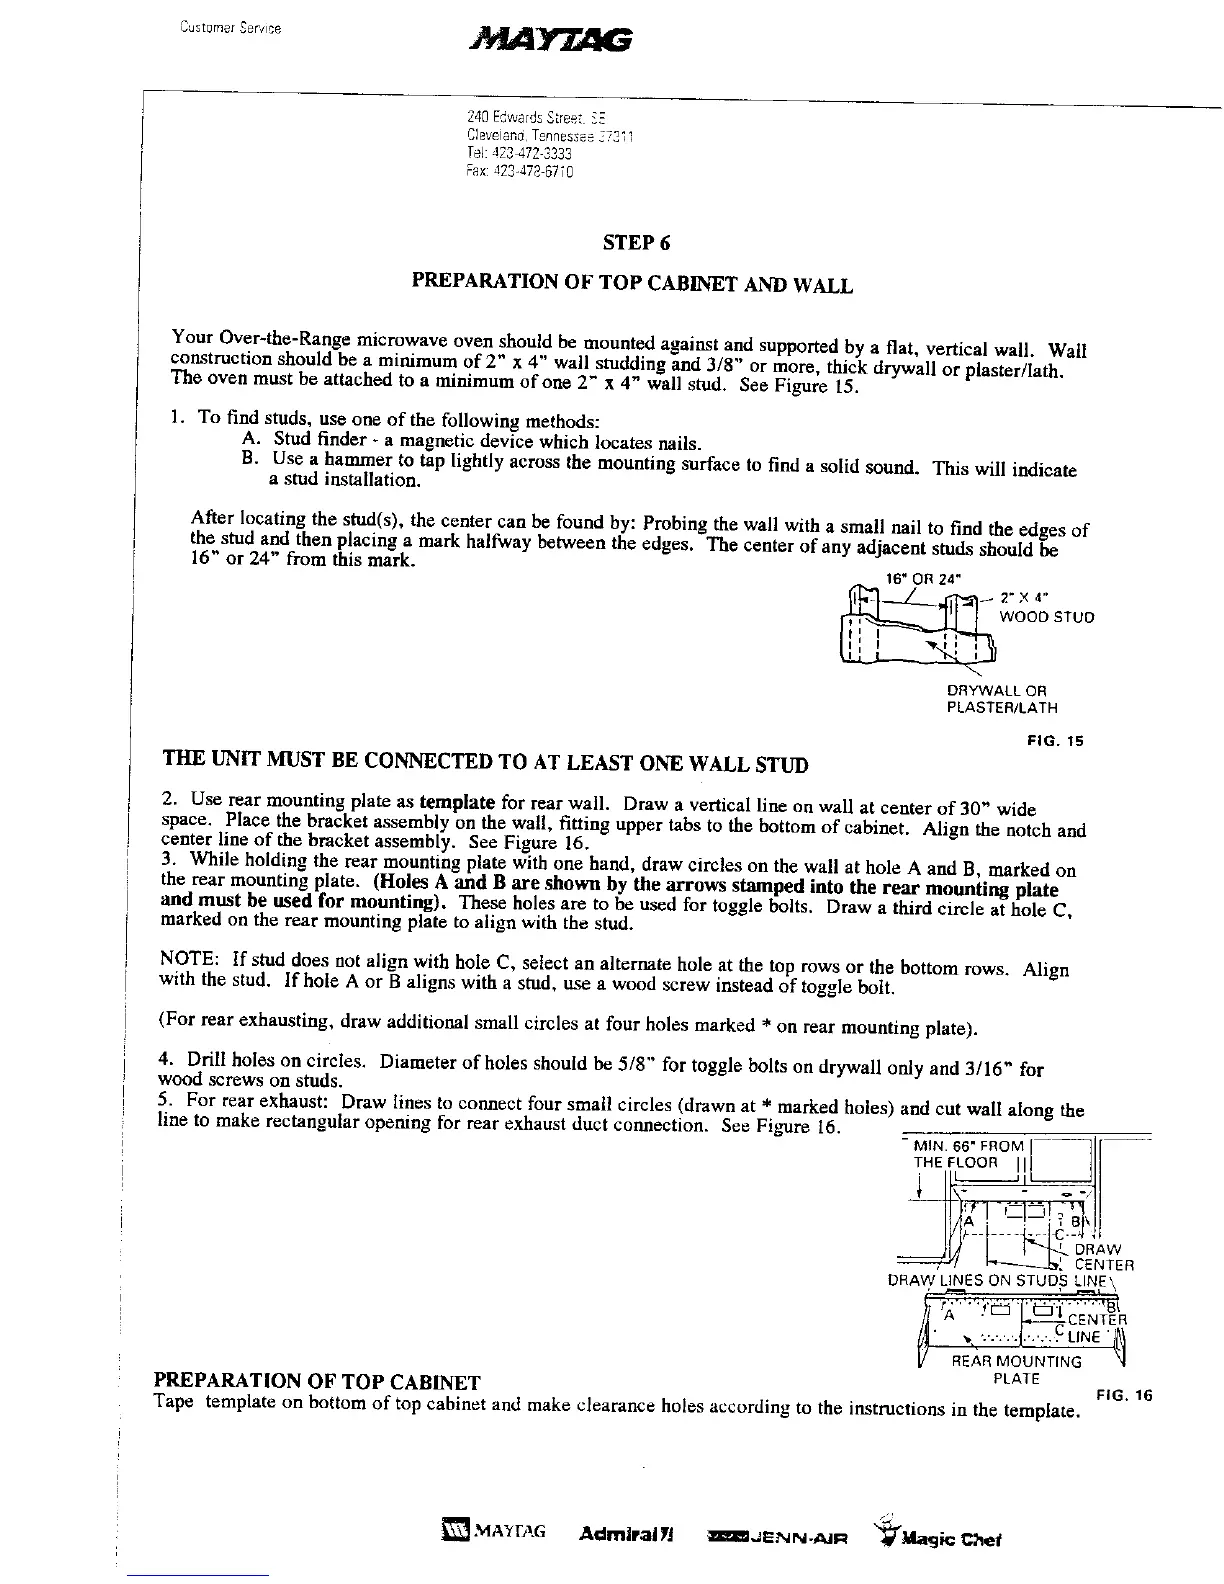
After locating the stud(s), the center can be found by: Probing the wall with a small nail to find the edges of
the stud and then placing a mark halfway between the edges. The center of any adjacent studs should be
16" or 24" from this mark.
16"OR24"
J 2"X 4"
WOODSTUD
DRYWALLOR
PLASTER/LATH
FIG. 15
THE UNIT MUST BE CONNECTED TO AT LEAST ONE WALL STUD
2. Use rear mounting plate as template for rear wall. Draw a vertical line on wall at center of 30" wide
space. Place the bracket assembly on the wall, fitting upper tabs to the bottom of cabinet. Align the notch and
center line of the bracket assembly. See Figure 16.
3. While holding the rear mounting plate with one hand, draw circles on the wall at hole A and B, marked on
the rear mounting plate. (Holes A and B are shown by the arrows stamped into the rear mounting plate
and must he used for mounting). These holes are to be used for toggle bolts. Draw a third circle at hole C,
marked on the rear mounting plate to align with the stud.
NOTE: If stud does not align with hole C, select an alternate hole at the top rows or the bottom rows. Align
with the stud. If hole A or B aligns with a stud, use a wood screw instead of toggle bolt.
(For rear exhausting, draw additional small circles at four holes marked * on rear mounting plate).
4. Drill holes on circles. Diameter of holes should be 5/8" for toggle bolts on drywall only and 3/16" for
wood screws on studs.
5. For rear exhaust: Draw lines to connect four small circles (drawn at * marked holes) and cut wall along the
line to make rectangular opening for rear exhaust duct connection. See Figure 16.
- MIN. 66" FROM --
T.ELOOR,,I--711
II I_r -l_q ._"'l /
II/_A! --!--; ; 8r,|l
DRAWLINESONSTUDSLINE\
A " CCENTER
V RE_,RMOUNTING ,I
PREPARATION OF TOP CABINET PLATE FIG. 16
Tape template on bottom of top cabinet and make clearance holes according to the instructions in the template.
_MA'_rA6 AdmlralT! _mlJeNN-,a,.ll_ "_Magic Chef
 Loading...