INSTALLATION
Remove and discard cantilever shelf packing
clips located .just above each shelf where it hooks
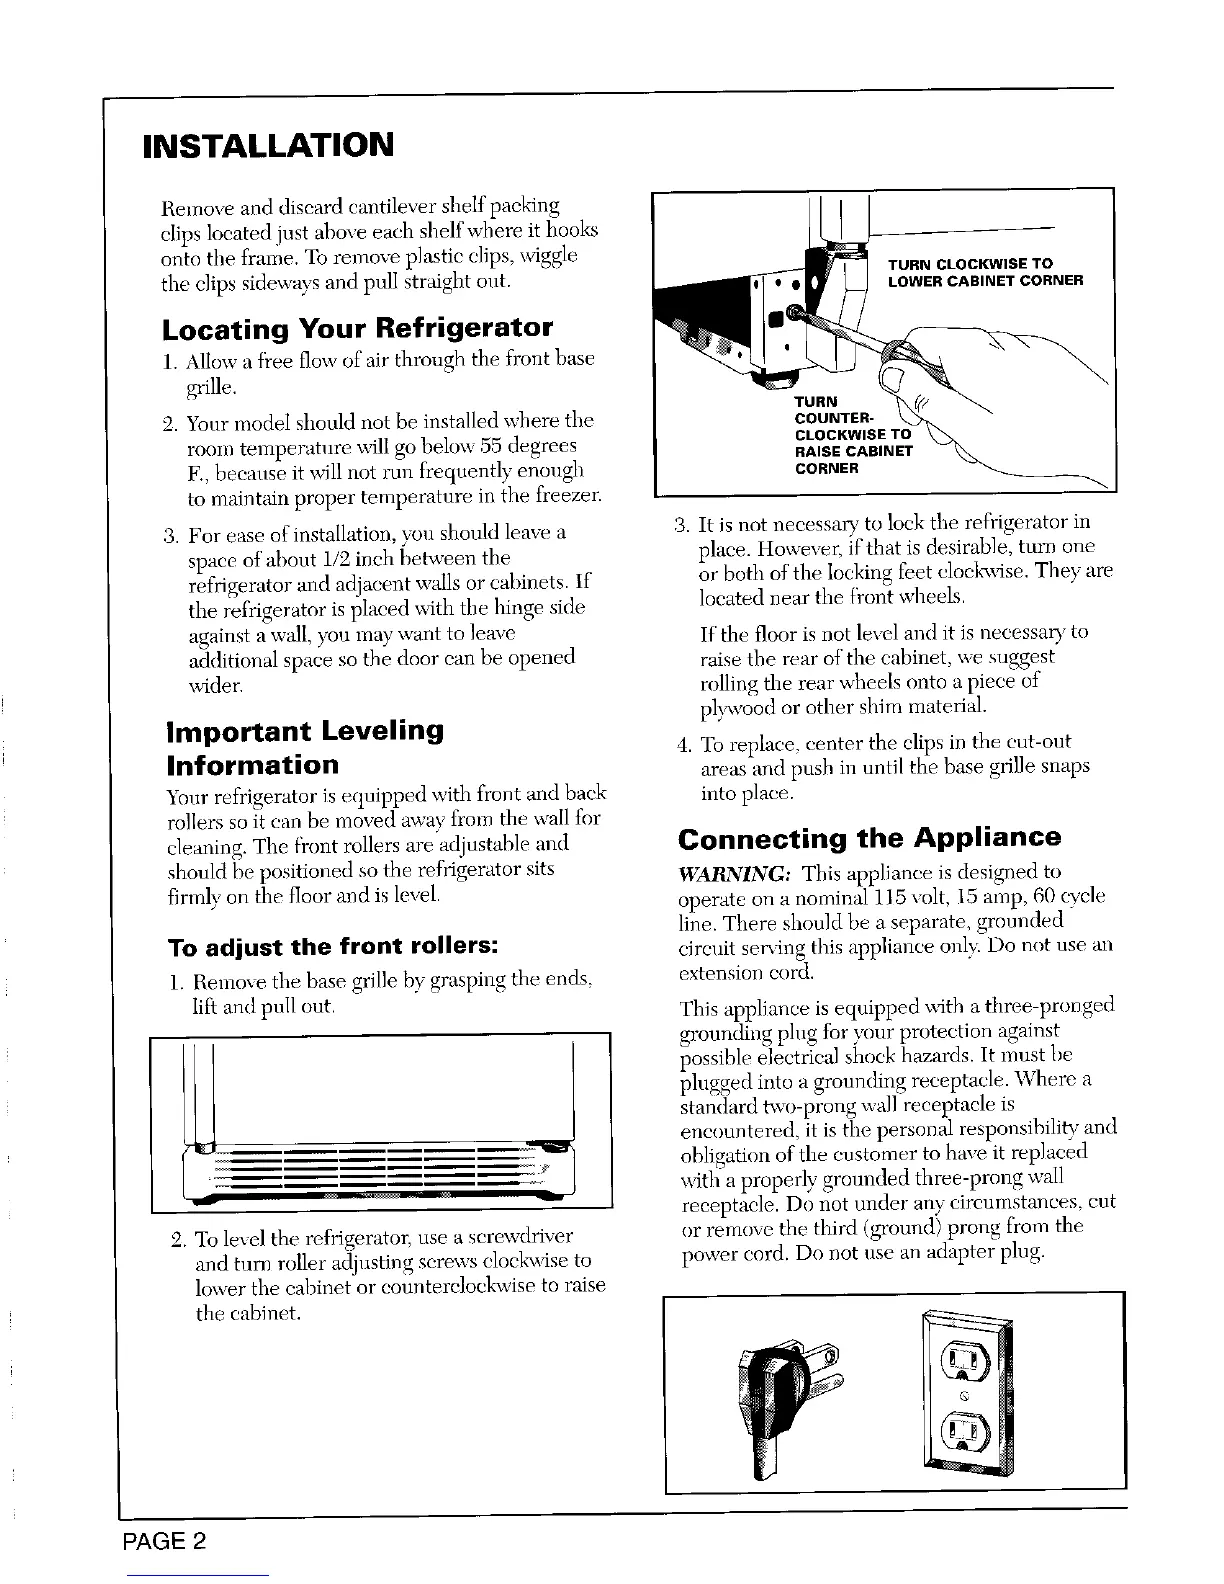
onto tile frame. To remove plastic dips, _dggle TURNCLOCKWISETO
the clips sideways and pull straight out. LOWERCABINETCORNER
Locating Your Refrigerator
1. Allow a fi'ee flow of air through the front base
grille.
TURN
2. Your lnodel should not be installed where the COUNTER-
room temperature will go below 55 degrees CLOCKWISETO
RAISE CABINET
F., because it will not mn freqnently enough CORNER
to maintain proper temperature in the freezer. _"
3. For ease of installation, you should leave a 3. It is not necessary to lock the refi'igerator in
space of about i/2 inch between the place. However, if that is desirable, turn one
refrigerator and adjacent walls or cahinets. If or both of the locking feet clockwise. They are
the refrigerator is placed with the hinge side located near the _}'ontwheels.
against a wall, yon ,nay, want to leave If the floor is not level and it is necessary to
additional space so the door can be opened raise the rear of the cabinet, we suggest
wider, rolling the rear wheels onto a piece of
plDvood or other shim material.
Important Leveling
4. To replace, center the clips in the eut-ont
Information areas and push in until the base grille snaps
Your refrigerator is equipped with front and back into pla_e.
rollers so it can be moved away from the wall for
cleaning. The fi'ont rollers are adjustable and Connecting the Appliance
should be positioned so tile refrigerator sits WAllNING: This appliance is designed to
firmly on the floor and is level, operate on a nominal 115 volt, 15 amp, 60 cycle
line. There should be a separate, grounded
To adjust the front rollers: circuit serving this appliance only Do not use an
1. Bemme the base grille by grasping the ends, extension cord.
lift and pull out. This appliance is equipped with a three-prorlged
grounding plug for your protection against
possible electrical shock hazards. It must be
plngged into a grounding receptacle. Where a
standard two-prong wall receptacle is
encountered, it is tim personal responsibilih_ and
2 _ obligation of tile customer to have it replaced
,_2Y
-_ \_4th a properly grounded three-prong wail
_ receptacle. Do not under any circumstances, cut
2. To lexel the refrigerator, use a screwdriver or remove the third (ground) prong from the
and turn roller adjusting screws eloela_dse to power cord. Do not nse an adapter plug.
lower the cahinet or counterclocl_vise to raise
the cabinet.
PAGE2