A OVERVIEW
These instructions apply to Generation 2, 3 and 4 TRAFx Mountain Bike Counters (2005 – 2017+).
CAREFULLY READ THESE INSTRUCTIONS BEFORE USING THE COUNTER.
Featuring an aerospace-quality magnetometer, this counter detects moving objects with ferrous
metal content (e.g., bike chains, cassettes, etc.). In essence, it’s a sophisticated metal detector.
PREPARATION
Finish TRAFx Manual – Part I first. Refer to its Quick Guide (p. 5) to understand the overall process. Download the
latest version at www.trafx.net/support
Here is the sequence:
1 2 3
TRAFx Manual TRAFx Manual DataNet Quick Guide
Part I Part II (with Part I)
You are here
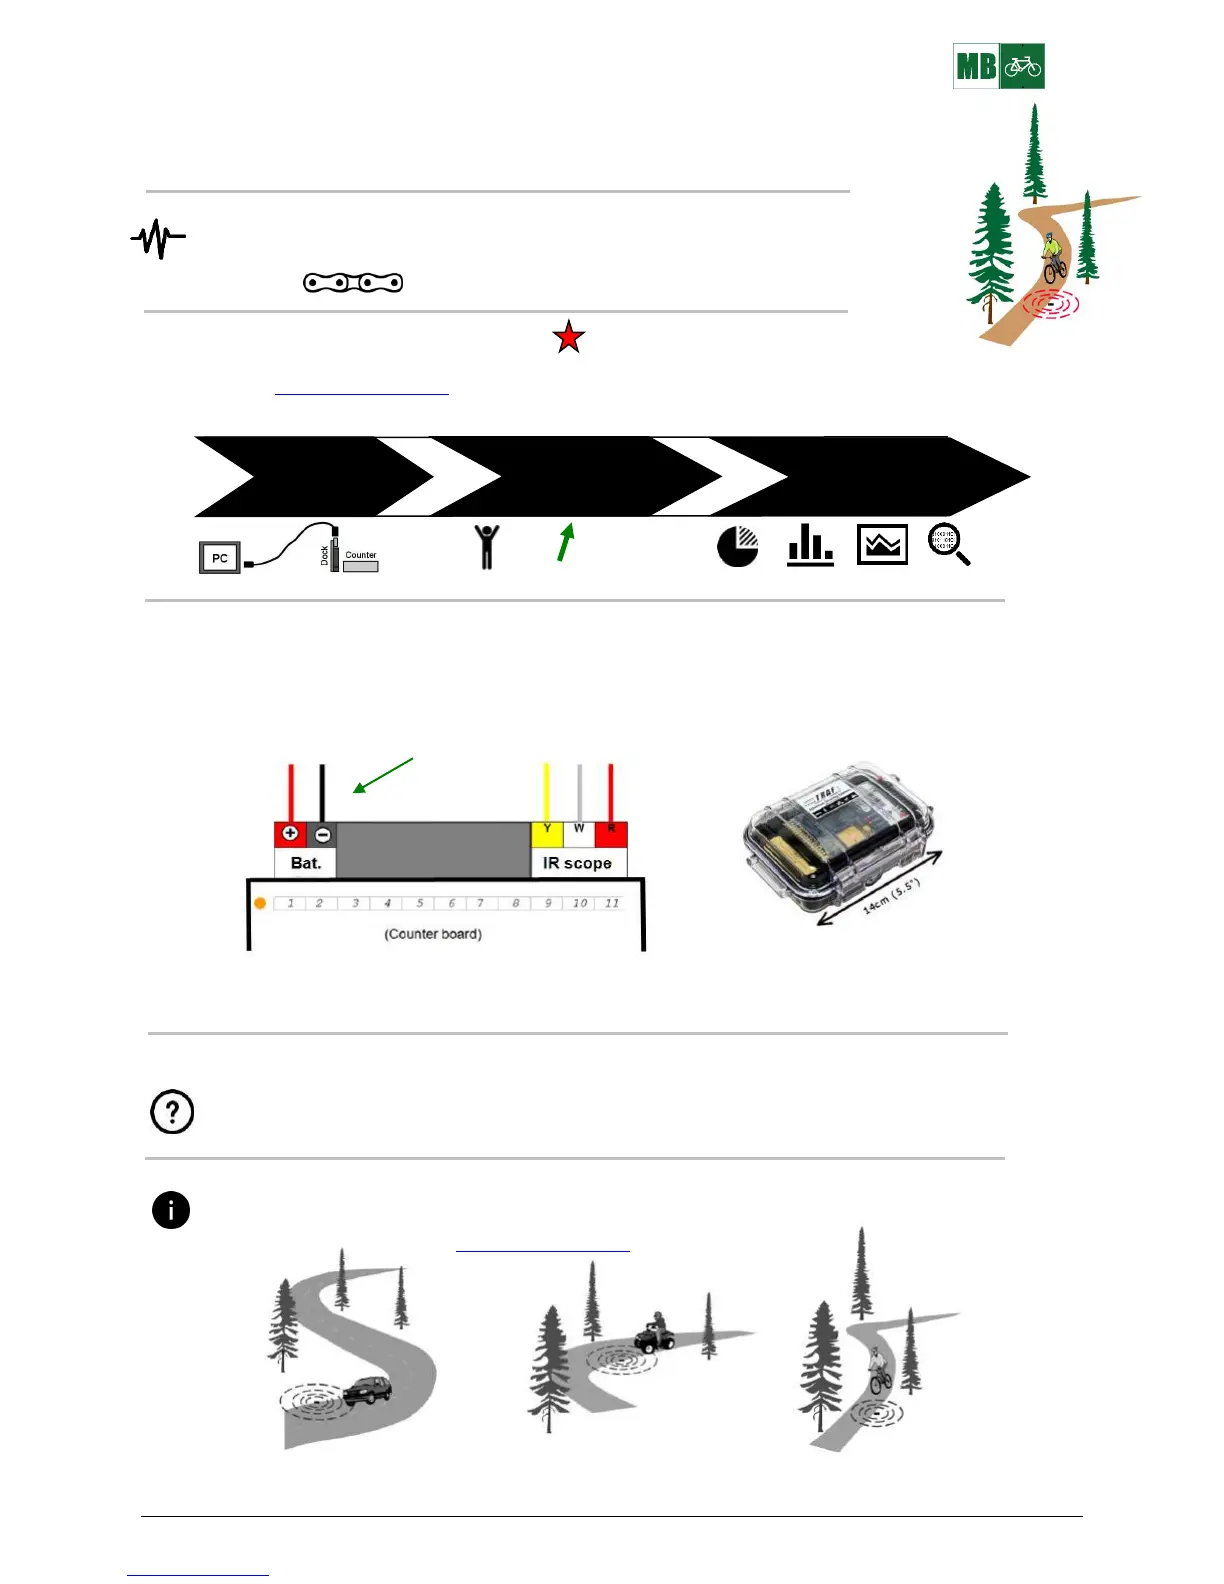
WIRE GUIDE
(Note: The counter ships assembled.)
Two battery wires connect to the counter’s screw block, as shown below. Ensure wires are fully inserted and the
screws are tight. Gently tug test each wire. Incorrectly connected wires could cause damage and void the warranty.
R B 2 Battery wires
Note: the IR scope wires are only used for the TRAFx Infrared Trail Counter Conversion Kit
STUDY DESIGN
Study design is beyond the scope of this document, but key questions include: Which trails? How many
counters? How long? Is the sample size and study period sufficient statistically?
The TRAFx Vehicle Counter has three main modes: vehicle, OHV, and mountain bike. For mountain bikes,
ensure your counter is in mountain bike mode. See TRAFx Manual – Part I, p. 9 regarding how to select a
mode. View and download it at www.trafx.net/support
In mountain bike mode, the counter will also detect and count vehicles and OHVs but from much farther away
(approx. 6m / 20ft.) because they are much larger and have more metal.
 Loading...