page 34
6.3 Indoor Unit Installation
To Choose the Position of Installation
Improper installation position will influence the cooling and heating performance, or even cause malfunction
or accident. To follow up the below instructions:
• Ensure air flow everywhere of room.
• No barrier for air flow.
• Enough maintaining space for installation. If not, it will cause difficulties to maintain the unit in future. If
not, it may cause the unit falling off.
• Wall or ceiling shall be strong enough to support indoor units.
• Do not expose to sunshine place.
• Do not install units at oil and steam gas place.
• Do not install leakage and easy burning gas place.
• Do not install around the Hi frequency equipment place.
• Do not install in the place usually using sulfide or other sprayer.
Installation of Indoor Unit
Installation of MCC-T Series Indoor Units
This type indoor units shall couple with duct working of air supply and air return; also can add the heating
coil and heater.
Indoor Unit
• To check the accessories are ready.
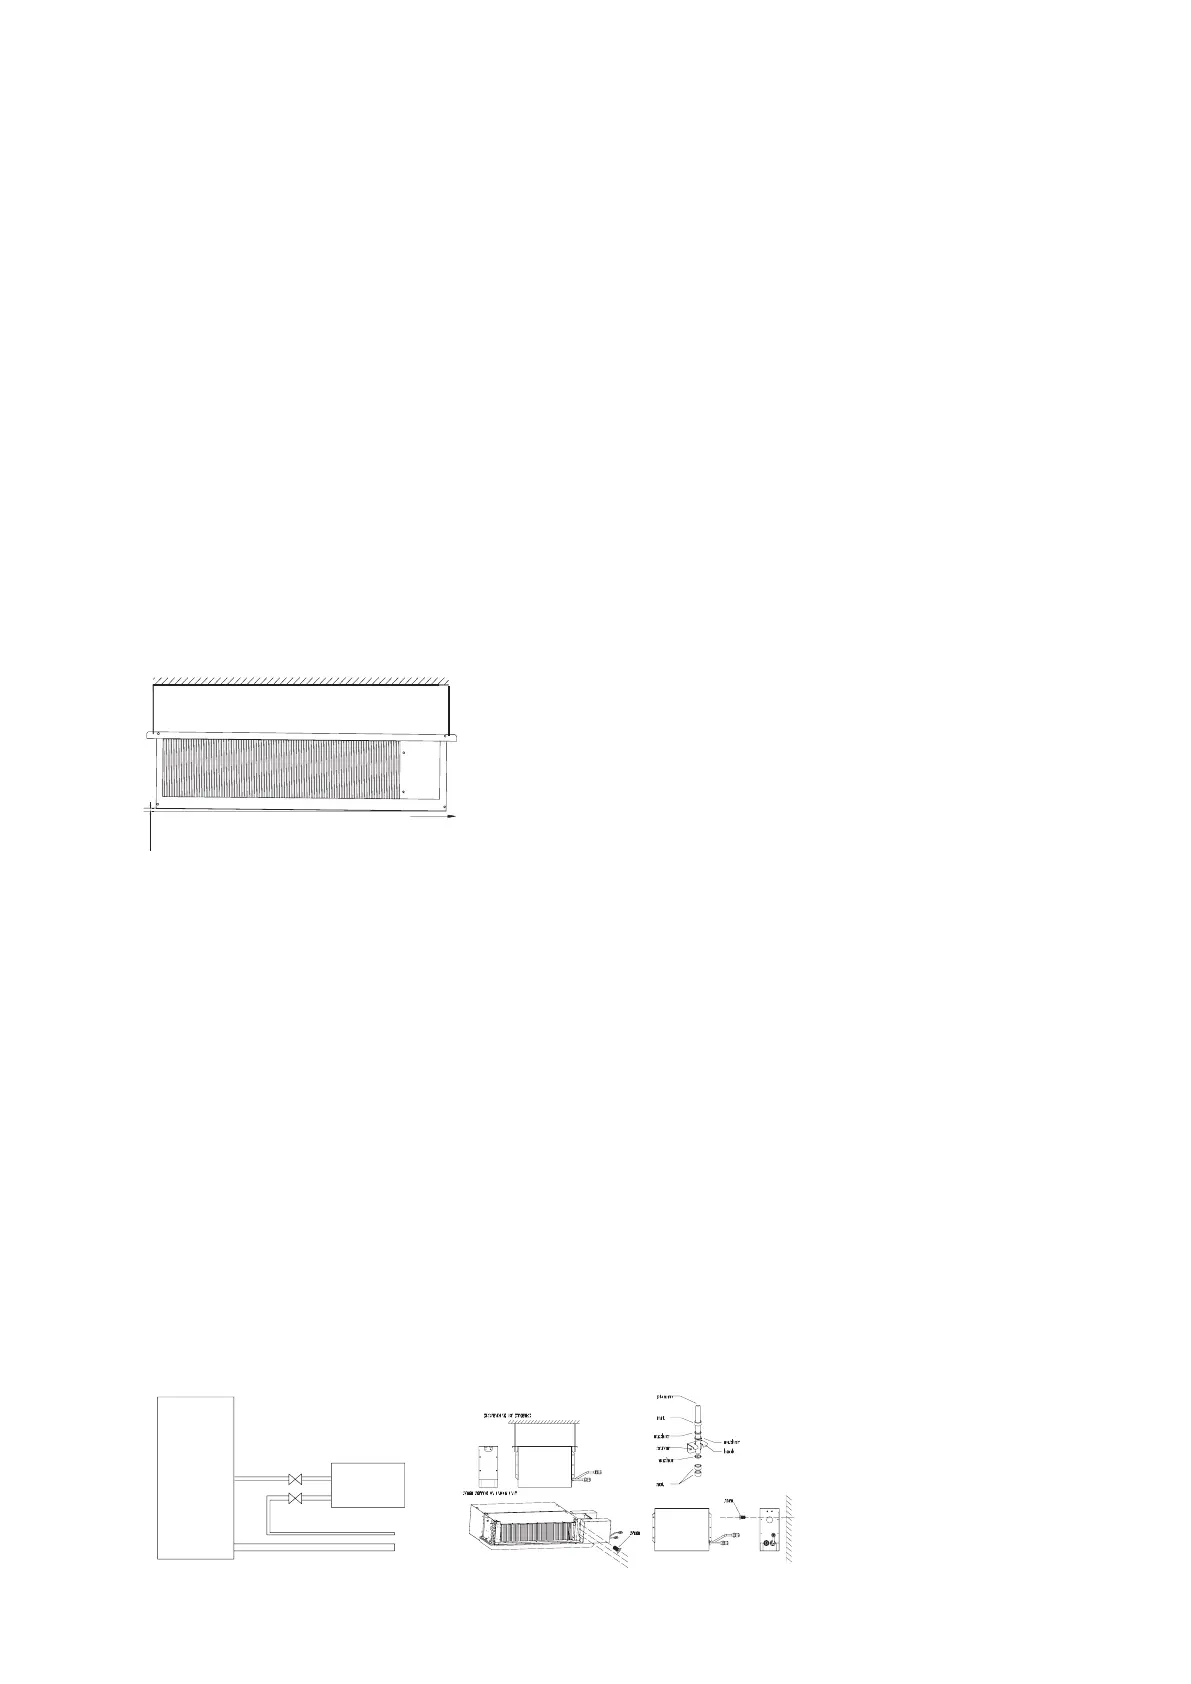
• To install the hooker and ensure it strong enough to support unit.
• Install the unit and check it installed horizontally; ensure the slope of the drainage piping , as shown in
below figure.
Notes:
©2005 McQuay International
indoor
unit
E-EXV box
liquid pip
e
gas pipe
screw join
t
10mm
drain direct
ion
©2005 McQuay International
indoor
unit
E-EXV box
liquid pip
e
gas pipe
screw join
t
10mm
drain direct
ion
a. Ensure piping and air duct working are most efficient length and units shall be installed in the middle
position of the room.
b. When installation of the indoor units, to ensure the distance shall be larger than 3m between return air
inlet and heat exchanger.
• To install the refrigerant pipe drainage pipe. Specification for the refrigerant pipe and drainage pipe, see
the section “technical parameters” of Usage Instruction. Use the torque spanner to install the pipe to avoid
damaging the copper tube and its joint.
• Do not use the damaged copper tube or dirty copper tube. To avoid long time expose to the air. Only get
the concerned preparation ready, to start the open valves, connector, copper cup and cover etc..
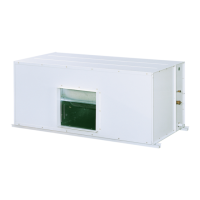
• Some model of this series product need connect a E-EXV box out of the machine, as shown in below
figure.
Note: The E-EXV box contain a electric-expanding valve in it. If the indoor unit is installed in the bedroom,
setting the E-EXV box out of the bedroom can efficient lower the noise of refrigerant flowing and
expanding.
When install the E-EXV box, make sure the box vertical and set it fast. The distance between the E-EXV
box and indoor unit could not exceed the length-limit of the expanding valve cable. The cable has a plug to
connect the control box of the indoor unit.
There are some manners to install the E-EXV (The installation must be safe and solid, and the installation
direction must be vertical):
©2005 McQuay International
indoor
unit
E-EXV bo
x
liquid pip
e
gas pipe
screw join
t
10mm
drain direct
ion