Quick Start Guide - MediaStar Evolution 785 HD Video Encoder
The structure of the menus presented on the LCD are
as follows:
• Encoder Part number and current operating status
• Stream Information
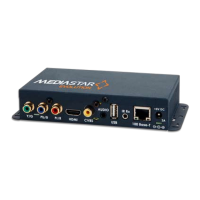
• Video Input selection (Composite, S-Video, YPbPr, Component
(SCART), Component (SOG), HDMI1, HDMI2, Colour Bars,
Search mode)
• Picture adjustments (Brightness, Contrast, Hue, Saturation)
• IP address settings (DNS/Static, IP Address, Netmask etc.,
Network Link)
• Unit details (MAC address, Serial Number, software version)
• Help
Note: The on-board display will go blank 30 minutes after
it was last used, but the encoder will continue to operate
normally. Press any button to bring the display on again.
IP Address setting using on-board display
Scroll to the IP address settings menu using the Up and
Down buttons. Press OK to enter the IP address setting
menu. Press DOWN to move to the static IP address setting
range and then OK to edit the current setting. Select the IP
address parameter to change then press OK. Use the Up and
Down buttons to change each digit of an IP address number
and press OK to move on to the next digit. Press the Up and
Down buttons together to abort a change and move back
up a menu level. When completed, the IP address entered
will be set on the network interface. You can then access
the full Encoder configuration web-pages via a standard
web-browser over the network.
IP Address setting using an RS232 or USB
Serial Link
Connect the Encoder to your computer using either an RS232
cable or USB cable. If using a USB cable, you might have to
load appropriate comms drivers which can be downloaded
from here: www.cabletime.com/dl/USB_drivers/usb_
driver_sw.zip. Start up a terminal emulator program (such
as Hyperterminal or Putty) and connect to the appropriate
comms port with the following settings:
115200 Baud
8 bits data
No parity
1 stop bit
Type: help <CR> and you should see a list of the serial
commands supported scroll past.
Type: setipconf, dhcp=”false”, dnsaddr=””, gatewayaddr=””,
localaddr=”xxx.xxx.xxx.xxx”, localnetmask=”255.255.0.0” <CR>
where: xxx.xxx.xxx.xxx is the desired IP address of the
encoder.
This will then set the new IP address into the encoder,
which will then reboot and start using that IP address. Once
rebooted, you can then access the full Encoder configuration
web-pages via a standard web-browser over the network.
IP Address setting using an IP Serial Link
To get a serial IP link to the encoder, you must configure
you PC/Laptop so that it can reach the Encoder at its
default IP address of 191.53.51.208. To do this set a static
IP address on your device of 191.53.51.207 with a netmask
of 255.255.0.0. Leave the dns server and gateway blank.
Connect your PC/Laptop to the Encoder with a standard
CAT5 cable (no crossover required). Start-up a telnet
program (such as Putty) and create a Telnet session onto
port 2026 of the encoder.
Type: help <CR> and you should see a list of the serial
commands supported scroll past.
Set the IP address of the encoder using the setipconf
command as described above.
IP Address setting using a Web Browser
To get web-access to the encoder, you must first configure
your PC/Laptop so that it can reach the Encoder at its
default IP address of 191.53.51.208. To do this set a static
IP address on your device of 191.53.51.207 with a netmask
of 255.255.0.0. Leave the dns server and gateway blank.
Connect your PC/Laptop to the Encoder with a standard
CAT5 cable (no crossover required). Start-up you web
browser (typically Internet Explorer, Firefox, Chrome or
Safari) and enter the IP address of the encoder into the
address box. The browser will then show the configuration
web pages of the encoder. Select the Network settings
page from the left hand side. You can then fill in all the
encoder network settings on that page and then press the
APPLY button. The Encoder will then change its IP address
so no further IP communications will be possible before
you configure your PC/Laptop back to its ‘normal’ settings.
Re-start your browser and enter the new IP address of the
encoder to see the configuration web pages.
7.
Use a web-browser on a PC/Laptop to fully configure the
Encoder’s settings. Start up a standard web-browser and
enter the IP address (or hostname, if configured) of the
Encoder. The Encoder’s specification page will then be
shown, with a list of all the configuration menus shown
down the left hand side. It is suggested that at least the
Encoding standard and the video inputs are properly
configured as required. Other options such as the emailing
of event logs are disabled by default, but can be enabled
if required. Full help for each of the menus is shown
on-screen if required.
 Loading...