88
12.3. Cleaning the brushes
We recommend that the brushes are cleaned regularly. Please carry out the following steps:
Switch off the appliance and place it upside down onto a flat surface with the bottom of the ap-
pliance facing upwards.
Hold both cleaning brushes
9
and
15
firmly and pull them straight up to remove them from
the appliance.
Use the supplied cleaning tool to clean the side brushes and the main brush. It is intend-
ed for removing dirt, dust and hairs.
After cleaning, reattach the brushes.
After a while, the brushes will need to be replaced to ensure the appliance works efficiently.
Please contact our Service Centre for more information on replaceable accessories.
If the brushes bend, it may help to place the brushes in hot water to encourage them to
return to their original shape.
12.4. Cleaning the sensors
The robot vacuum cleaner has one sensor on the front
5
and four sensors underneath
10
.
Clean the front sensor cover and the covers of the lower sensors regularly using a soft cloth to
ensure the best orientation of the robot vacuum cleaner possible.
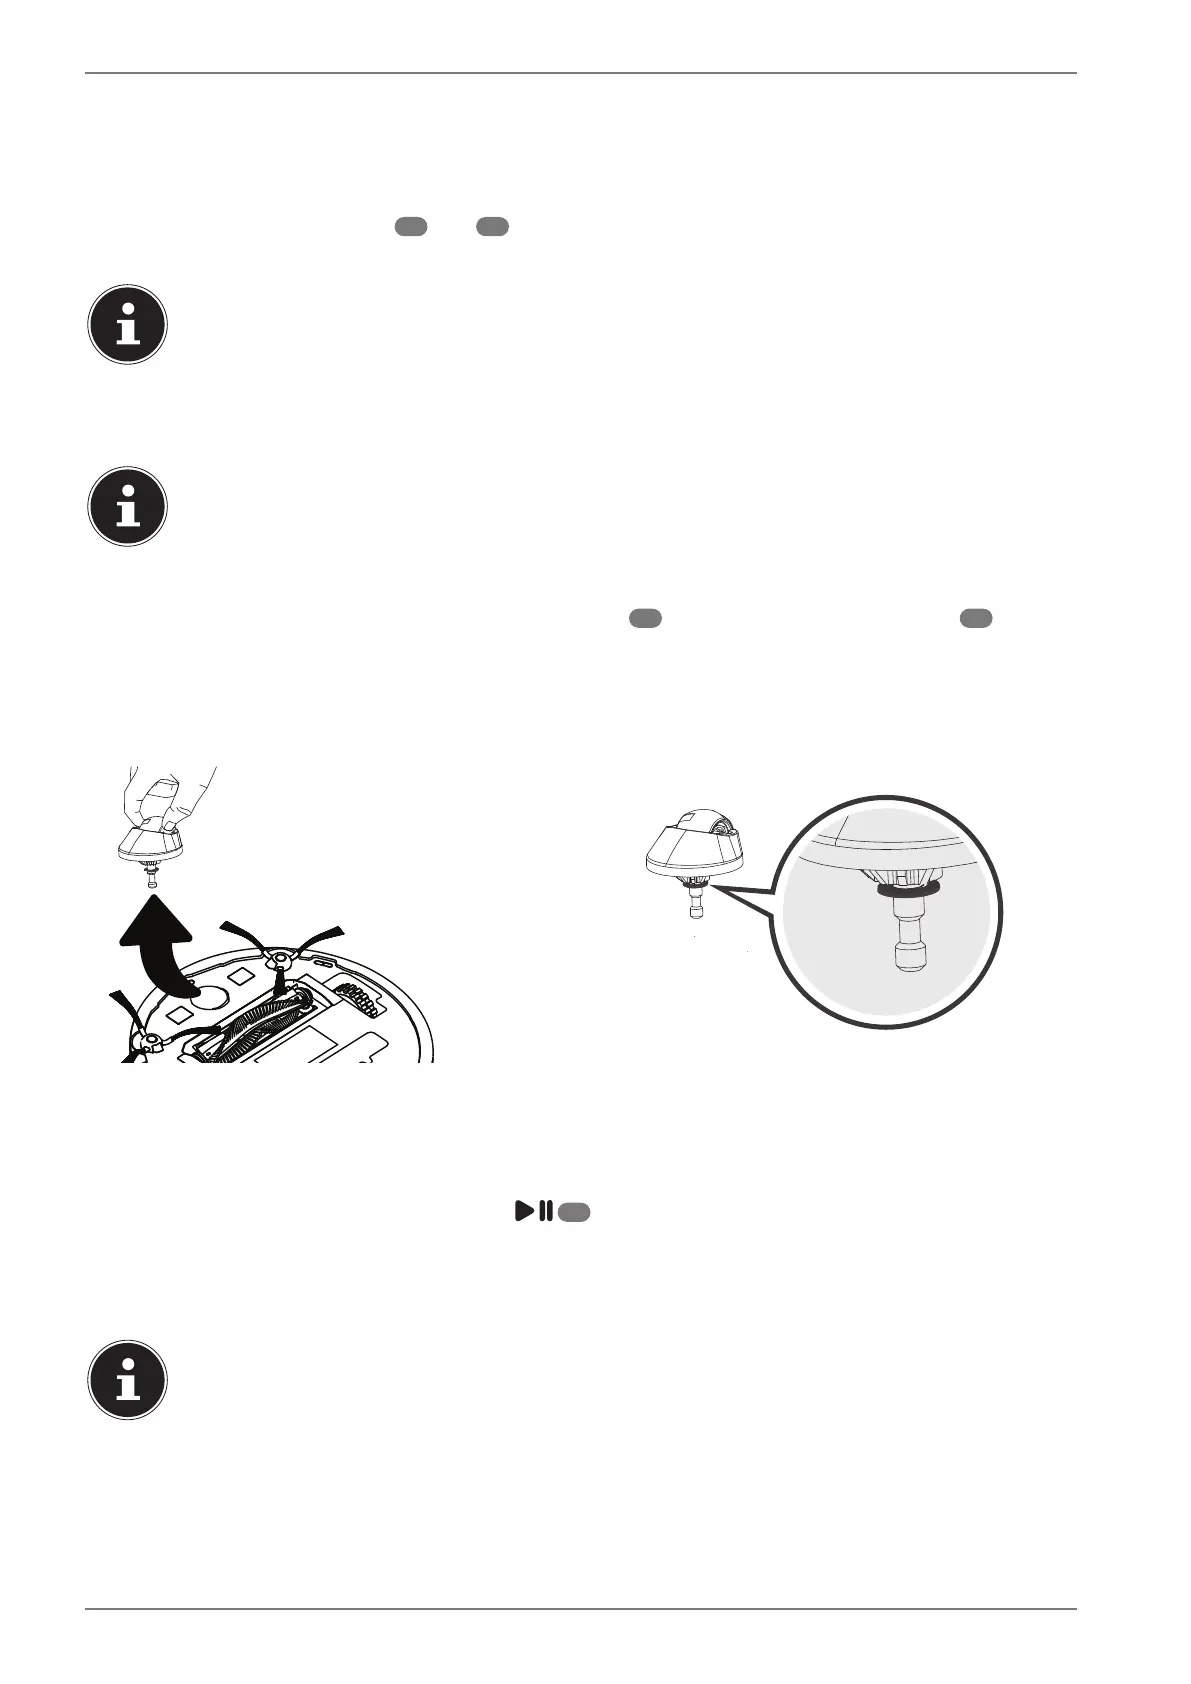
12.5. Cleaning the front wheel
If the front wheel is blocked, remove the wheel and clean the dirt from it using a damp cloth.
Reinsert the front wheel until it clicks into place.
13. Reset to factory settings
Press and hold the START/PAUSE button
3
for approx. 10 seconds to reset the robot vacu-
um cleaner.
All operating lights turn off for approx. 1–2 seconds.
The robot vacuum cleaner is restarted and all operating lights turn on again.
When the appliance is reset to factory settings, all stored map information is deleted. The
connection to the app must be re-established and an exploratory trip must be performed
to create a new map.
 Loading...